Insert background image behind cells in Excel – A full guide
In Excel, placing a background image behind the cells can enhance the visual appeal and professionalism of your reports and presentations. Whether it’s embedding a company logo discreetly behind data, setting a watermark for document security, or adding a decorative graphic to reinforce brand identity, this guide will show you how to effectively insert background images that sit behind the spreadsheet data. By following the methods outlined here, using both Excel’s native capabilities and the advanced features of Kutools for Excel, you will learn how to seamlessly integrate images into your worksheets without disrupting the visibility of your data.

Inserting a background image in an entire worksheet
Adding a background image to your entire worksheet can provide a subtle design element that doesn't interfere with data readability. This section describes two ways to implement this.
Insert background behind cells with Background function
There is a Background function that can insert image behind cells in active worksheet.
1. Click Page Layout > Background. See screenshot:
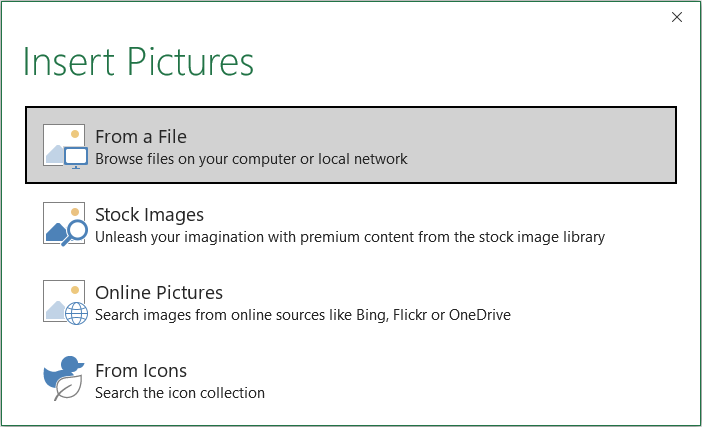
2. Then a Insert Pictures dialog pops out, and click the Browse button next to From a file, then select a picture you want to set as background from a folder in the Sheet Background dialog. See screenshot:

3. Click Insert. And the background image has been inserted behind cells.
Tip: To delete background, click Page Layout > Delete Background.
Using Kutools to easily add an background image as a watermark
For users who want more control over the position and appearance of their images, Kutools for Excel offers an enhanced solution. It allows you to easily add images as watermarks.
After installing Kutools for Excel, please do as below:(Free Download Kutools for Excel Now!)
1. Click Kutools > Insert > Insert Watermark.
2. In the Insert Watermark dialog, you can choose insert picture watermark from folder or text watermark with formatting, see screenshot:

3. Click Apply or Ok, then the background picture has been inserted.
- In default, when you insert picture watermark in Insert Watermark dialog, the Erosion option is checked by default, if you do not check the Erosion option, the watermark will be shown as below:

- To remove the watermark, click Kutools > Delete > Delete Watermark.


Inserting a background image in a specific range of cells
Sometimes, you may need to highlight a particular section of your worksheet or just enhance a specific range of cells with a background image. This technique can draw attention to key areas, making your data presentation more effective. This section will show you how to achieve this task.
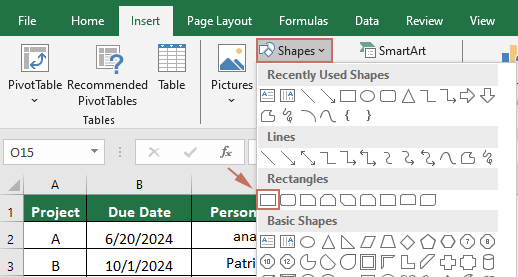
- Go to the Insert tab, click Shapes > Rectangle.
 Rectangle under Insert tab"/>
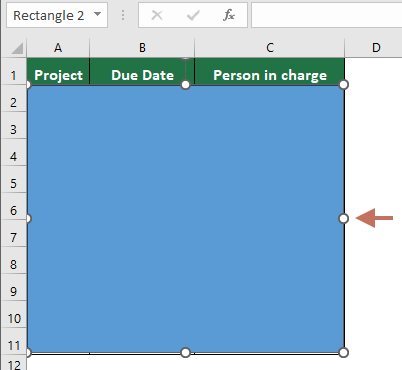
 - Draw a rectangle over the specific range of cells where you want the background image displayed.
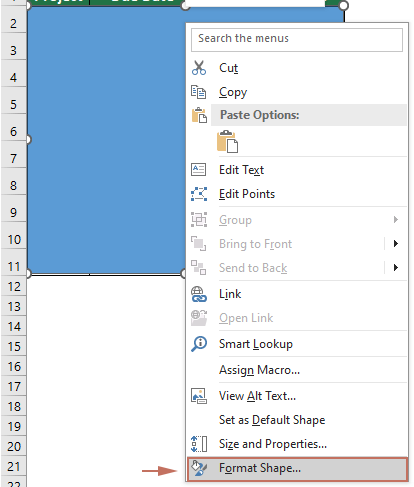
- Right click the shape and select Format Shape from the context menu.
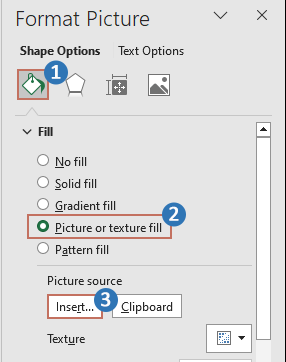
- The Format Picture pane is now displayed on the right of the worksheet. You need to:
- Stay in the Fill & Line tab.
- Select Picture or texture fill option in the Fill section.
- Click the Insert button.
- In the Insert Pictures dialog box, navigate to the desired path and select the image you want to use as a background.
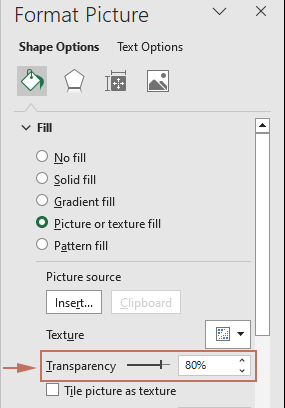
- After inserting the image, it will cover the specified range. To make it appear as a background, adjust the image's transparency by using the Transparency slider in the Format Picture pane.
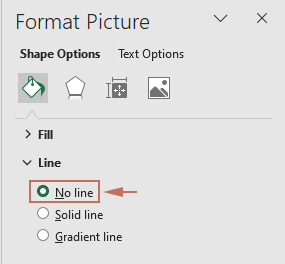
- In the Line section, choose the No line option.
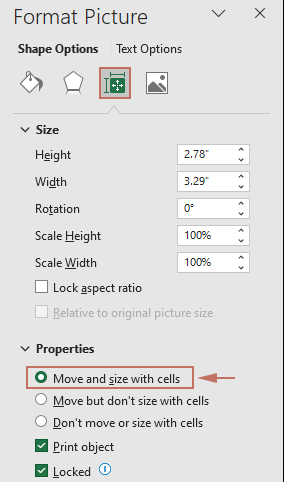
- Go to the Size & Properties tab, make sure the Move and size with cells option is selected in the Properties section.
 Rectangle under Insert tab"/>


Result
Now you have inserted a background image in a specific range of cells.
Insert Background behind Cell Contents
Relative Articles
How to quickly remove watermark in Excel?
How to remove/hide page number watermark in Excel?
Best Office Productivity Tools
Supercharge Your Excel Skills with Kutools for Excel, and Experience Efficiency Like Never Before. Kutools for Excel Offers Over 300 Advanced Features to Boost Productivity and Save Time. Click Here to Get The Feature You Need The Most...
Office Tab Brings Tabbed interface to Office, and Make Your Work Much Easier
- Enable tabbed editing and reading in Word, Excel, PowerPoint, Publisher, Access, Visio and Project.
- Open and create multiple documents in new tabs of the same window, rather than in new windows.
- Increases your productivity by 50%, and reduces hundreds of mouse clicks for you every day!
All Kutools add-ins. One installer
Kutools for Office suite bundles add-ins for Excel, Word, Outlook & PowerPoint plus Office Tab Pro, which is ideal for teams working across Office apps.
- All-in-one suite — Excel, Word, Outlook & PowerPoint add-ins + Office Tab Pro
- One installer, one license — set up in minutes (MSI-ready)
- Works better together — streamlined productivity across Office apps
- 30-day full-featured trial — no registration, no credit card
- Best value — save vs buying individual add-in