How to send email from a specified range of cells in Excel?
Often, you might need to share important data or reports with others directly from your Excel workbook, and including a specific range of cell content in your email body can save you time and ensure accuracy. For example, sending selected financial summaries, student grades, or inventory data via email straight from Excel allows recipients to view essential information without the need to open an attachment. This article explains practical methods to send an email with a selected range embedded in the email body, helping you streamline communication and data sharing right from Excel.
Send email from a specified range of cells in Excel
Send email from a specified range of cells with an amazing tool
More tutorials for mailing in Excel...
Send email from a specified range of cells in Excel
If you prefer a built-in and customizable approach, using VBA code within Excel is an efficient way to copy a selected cell range and automatically paste it into an Outlook email body. This method is suitable for those who regularly use Microsoft Outlook as their email client and need to automate emailing directly from Excel. Here’s how you can accomplish this:
1. Open the worksheet that contains the cell range you would like to embed in your email. Press Alt + F11 simultaneously to launch the Microsoft Visual Basic for Applications window. This shortcut helps quickly access the VBA editor where the code will be inserted.
2. In the VBA editor window, click Tools > References. Make sure you select the correct workbook, especially if you have multiple files open.
3. In the References – VBAProject dialog box, scroll and check the Microsoft Outlook Object Library option. Enabling this reference allows VBA to interact with Outlook, letting you create and send emails directly. After checking the box, click OK.

4. On the menu bar, click Insert > Module to add a new code module. Then, copy and paste the following VBA code into the module window.
VBA code: Send email with a specified range in Excel
Sub Send_Email()
'Updated by Extendoffice 20200119
    Dim xRg As Range
    Dim I, J As Long
    Dim xAddress As String
    Dim xEmailBody As String
    Dim xMailOut As Outlook.MailItem
    Dim xOutApp As Outlook.Application
    On Error Resume Next
    xAddress = ActiveWindow.RangeSelection.Address
    Set xRg = Application.InputBox("Please select range you need to paste into email body", "KuTools For Excel", xAddress, , , , , 8)
If xRg Is Nothing Then Exit Sub
Application.ScreenUpdating = False
    Set xOutApp = CreateObject("Outlook.Application")
    Set xMailOut = xOutApp.CreateItem(olMailItem)
    For I = 1 To xRg.Rows.Count
        For J = 1 To xRg.Columns.Count
            xEmailBody = xEmailBody & "  " & xRg.Cells(I, J).value
        Next
        xEmailBody = xEmailBody & vbNewLine
    Next
    xEmailBody = "Hi" & vbLf & vbLf & " body of message you want to add" & vbLf & vbLf & xEmailBody & vbNewLine
    With xMailOut
        .Subject = "Test"
        .To = "happy.xuebi@163.com"
        .Body = xEmailBody
        .Display
        '.Send
    End With
    Set xMailOut = Nothing
    Set xOutApp = Nothing
    Application.ScreenUpdating = True
End Sub
Notes:
- 1).You can customize the content and greeting in the line xEmailBody = "Hi" & vbLf & vbLf & " body of message you want to add" & vbLf & vbLf & xEmailBody & vbNewLine as needed. For example, you may wish to add a specific message or instructions before the Excel data.
- 2). Adjust the recipient and subject by modifying this line: .To = happy.xuebi@163.com and .Subject = "Test". Make sure the recipient's email is correct to avoid delivery issues.
5. To run the code, press F5 in the VBA editor. When the Kutools for Excel dialog appears, choose the cell range you want to include in the email body and click OK. If you select the wrong range, you can restart the process or modify the selection.

6. An Outlook email will be generated automatically, with your specified recipient, subject, inserted message, and the Excel data included in the email body. Preview the message before sending to ensure all data is displaying correctly. Click the Send button to deliver your email.

Note: This VBA method only works when Microsoft Outlook is installed and set as your default email client. If you use other email programs, consider a different solution as described below. Additionally, if Outlook is not running, the macro will launch it for you.
Limitations: It requires Outlook and appropriate permissions to access email functionality. If your organization restricts macro usage or Outlook access, this method may not apply.
Send email from a specified range of cells with an amazing tool
For users who do not use Outlook or prefer a simpler, code-free method, Kutools for Excel offers a straightforward solution for sending email messages that include selected cell ranges. The "Send Email" feature in Kutools lets you configure an outgoing server (SMTP) and send emails through any supported email account, such as Gmail, Yahoo, or company mail, directly from Excel. This makes it a versatile choice when you need to work from diverse environments or share information with multiple recipients.
To use this method, please follow these steps:
1. Firstly, you need to prepare a mailing list with needed fields.
- Tips: Your mailing list needs at least two rows: one for headers and one or more for the actual data. For instance, when emailing two people, add both emails under the "Email" header as shown in the screenshot below.

- If you want to create a mailing list quickly, try the Create Mailing List feature for automated setup.

2. Next, select the actual Excel range you wish to paste into the email message body, then press Ctrl + C to copy it. Ensure you only copy the necessary cells for clarity in your email.
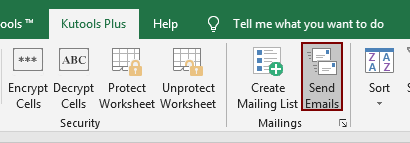
3. Select the entire mailing list (including headers) and go to Kutools Plus > Send Emails.
4. The "Send Emails" dialog will appear, displaying fields populated from your selected mailing list.
- 4.1) Review and adjust items in the dialog as needed. You can add more fields to the mailing list if you need personalized messages or additional information.
- 4.2) Click inside the "Email body" box and press Ctrl + V to paste your copied range. Add any extra text or instructions if necessary, ensuring the email message is clear and informative.
- 4.3) Make sure "Send emails via Outlook" is unchecked if you want to send via SMTP (other email services).
- 4.4) Click Outgoing Server Settings to configure your email account’s SMTP settings, which is required for direct sending from non-Outlook accounts.


5. In the "Outgoing Server (SMTP) Settings – New Scheme" dialog, fill in all the necessary details, such as your email address, SMTP server, port number, and authentication credentials. You can also choose to save sent emails in a specified folder by checking the "Save sent emails to" box, which helps track your communications. After completing the settings, click OK to confirm.

6. You’ll return to the "Send Emails" window. Double-check all fields and pasted content for accuracy, then click Send to deliver your email. The email will be sent via the configured server directly from Excel, and you’ll see a confirmation or status depending on the outcome.
Advantages: Kutools supports sending emails from almost any SMTP-enabled account, not just Outlook, making it ideal for users who utilize webmail, work with multiple domains, or want a user-friendly interface without macro coding.
When using Kutools, carefully check your server settings to avoid failed delivery errors. If emails aren’t sent, verify network connectivity, server address, port, and login credentials.
For bulk emailing, always preview at least one message before mass sending to correct any display or personalization issues.
Related articles:
Send email to email addresses specified in cells in Excel
Supposing you have a list of email addresses, and you want to send email message to these email addresses in bulk directly in Excel. How to achieve it? This article will show you methods of sending email to multiple email addresses which specified in cells in Excel.
Insert Outlook signature when sending email in Excel
Supposing you want to send an email directly in Excel, how can you add the default Outlook signature in thie email? This article provides two methods to help you adding Outlook signature when sending email in Excel.
Send email with multiple attachments attached in Excel
This article is talking about sending an email through Outlook with multiple attachments attached in Excel.
Send email if due date has been met in Excel
For example, if the due date in column C is less than or equal to7 days (current date is2017/9/13), then send an email reminder to the specified recipient in column A with specified content in column B. How to achieve it? This article will provide a VBA method to deal with it in details.
Automatically send email based on cell value in Excel
Supposing you want to send an email through Outlook to a certain recipient based on a specified cell value in Excel. For example, when the value of cell D7 in a worksheet is greater than200, then an email is created automatically. This article introduces a VBA method for you to quickly solve this issue.
Best Office Productivity Tools
Supercharge Your Excel Skills with Kutools for Excel, and Experience Efficiency Like Never Before. Kutools for Excel Offers Over 300 Advanced Features to Boost Productivity and Save Time. Click Here to Get The Feature You Need The Most...
Office Tab Brings Tabbed interface to Office, and Make Your Work Much Easier
- Enable tabbed editing and reading in Word, Excel, PowerPoint, Publisher, Access, Visio and Project.
- Open and create multiple documents in new tabs of the same window, rather than in new windows.
- Increases your productivity by 50%, and reduces hundreds of mouse clicks for you every day!
All Kutools add-ins. One installer
Kutools for Office suite bundles add-ins for Excel, Word, Outlook & PowerPoint plus Office Tab Pro, which is ideal for teams working across Office apps.
- All-in-one suite — Excel, Word, Outlook & PowerPoint add-ins + Office Tab Pro
- One installer, one license — set up in minutes (MSI-ready)
- Works better together — streamlined productivity across Office apps
- 30-day full-featured trial — no registration, no credit card
- Best value — save vs buying individual add-in