How to display images from a range of file paths in Excel?
Often in Excel, you may find yourself with a list of image file paths—perhaps you are managing a product inventory, compiling employee photos, or organizing project documentation where each record has an associated image. In these cases, being able to directly display the images next to their file paths can greatly improve clarity, make data more visually accessible, and enhance reporting or presentation. However, there isn’t a standard Excel function to automatically pull in images based on cell file paths, so users face the challenge of inserting the images efficiently, especially when handling a large volume of data. Below, we will cover how you can realize this functionality using VBA code, a dedicated Excel add-in, and also discuss common applicable scenarios, advantages, limitations, and provide useful operational tips for each method.
Display images from a range of file paths with VBA code in Excel
Display images from a range of file path with an amazing feature
Display images from a range of file paths with VBA code in Excel
For users comfortable with automation and needing more customization, you can insert images into Excel based on file paths using VBA. This approach gives you the flexibility to adapt the code for various scenarios, such as controlling image size or placement, and is especially useful if you often work with dynamic lists.
1. Hold down the ALT + F11 keys to open the Microsoft Visual Basic for Applications window.
2. Click Insert > Module, then copy and paste the following code into the Module window. Make sure your file paths are valid and accessible from your computer, or the image insertion may fail.
VBA code: Display images from a range of file paths:
Sub InsertPicFromFile()
    Dim xRg As Range
    Dim xCell As Range
    Dim xVal As String
    On Error Resume Next
    Set xRg = Application.InputBox("Please select file path cells:", "KuTools for Excel", Selection.Address, , , , , 8)
    If xRg Is Nothing Then Exit Sub
    Application.ScreenUpdating = False
    For Each xCell In xRg
        xVal = xCell.Value
        If xVal <> "" Then
            ActiveSheet.Shapes.AddPicture xCell.Value, msoFalse, msoTrue, _
            xCell.Offset(0, 1).Left, xCell.Top, xCell.Height, _
            xCell.Height
        End If
    Next
    Application.ScreenUpdating = True
End Sub3. To run this code, press the F5 key within the VBA window. A prompt box will appear asking you to select the range of cells containing your image file paths. You can use your mouse to select the cells with the file paths.
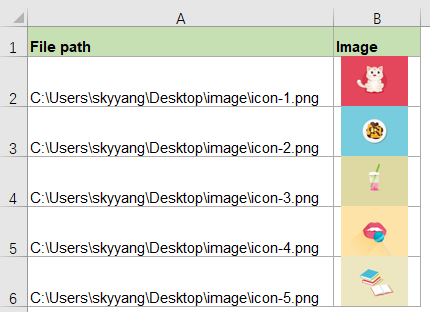
4. Once you have selected the cells, click OK. The macro will process the file paths and automatically insert the corresponding images into the adjacent column, matching each file path to its image. You will see a result similar to the following screenshot.

This VBA method is especially useful if your image paths are local and you need a quick, repeatable solution. It works well when you need to automate the same task across multiple sheets or workbooks. However, be aware of potential limitations:
- The VBA code may not work if the image files are moved, deleted, or the file paths are incorrect.
- For network or cloud-based file paths, you might experience delays or errors if the connection is slow or the files are inaccessible.
- Inserted images may need resizing or repositioning if your sheet layout changes after running the macro.
Display images from a range of file path with an amazing feature
For those who prefer a hassle-free solution, or if VBA seems too complex, Kutools for Excel offers an integrated feature called Insert Pictures from Path(URL). With this versatile utility, you can instantly insert images in bulk by referencing file paths or URLs—ideal for both local images and web-hosted pictures.
After installing Kutools for Excel, follow these steps to quickly insert images:
1. Go to the Kutools tab, click Insert > Insert Pictures from Path(URL).

2. In the Insert Pictures from Path(URL) dialog box:
- Select the list of cells which contain the file path and a cell where you want to put the image.
- Then, specify the size of the picture that you want to use under the Picture Size section.

3. Click Ok, and Kutools will automatically insert the images next to your selected file paths. The process is fast and minimizes errors commonly seen in manual image insertion, helping you keep your worksheet organized and consistent.

With Kutools, you can efficiently handle large volumes of image data, use web-based image links, and customize the layout all within a straightforward interface. If a path cannot be loaded or an image fails to appear, check if the file or URL is accessible and correctly typed. You can also use the "Undo" feature in Excel to revert any accidental images or incorrect insertions.
Click Download Kutools for Excel and free trial Now!
More relative articles:
- Convert Image URLs To Actual Images In Excel
- If you have a list of image URL addresses in column A, and now, you want to download the corresponding pictures from the URLs and display them into the adjacent column B as left screenshot shown. In Excel, how could you extract the actual pictures from the image URLs quickly and easily?
- Extract Hyperlinks From Multiple Images In Excel
- Let’s say, you have a list of images in a worksheet, and each image contains a hyperlink, now, you would like to extract the real hyperlink addresses from these pictures to their next cells as following screenshot shown. Of course, you can copy the hyperlink address from the Edit Hyperlink box one by one, but, this will be time-consuming if there are multiple hyperlinks needed to be extracted.
- Create Drop Down List With Images In Excel
- In Excel, we can quickly and easily create a drop down list with cell values, but, have you ever tried to create a drop down list with images, that is to say, when you click one value from the drop down list, its relative image will be displayed at the same time.
- Insert The Same Image Into Multiple Worksheets
- Normally, we can insert a picture into a worksheet quickly by using the Insert function in Excel, but, have ever tried to insert the same picture into all worksheets of your workbook?
Best Office Productivity Tools
Supercharge Your Excel Skills with Kutools for Excel, and Experience Efficiency Like Never Before. Kutools for Excel Offers Over 300 Advanced Features to Boost Productivity and Save Time. Click Here to Get The Feature You Need The Most...
Office Tab Brings Tabbed interface to Office, and Make Your Work Much Easier
- Enable tabbed editing and reading in Word, Excel, PowerPoint, Publisher, Access, Visio and Project.
- Open and create multiple documents in new tabs of the same window, rather than in new windows.
- Increases your productivity by 50%, and reduces hundreds of mouse clicks for you every day!
All Kutools add-ins. One installer
Kutools for Office suite bundles add-ins for Excel, Word, Outlook & PowerPoint plus Office Tab Pro, which is ideal for teams working across Office apps.
- All-in-one suite — Excel, Word, Outlook & PowerPoint add-ins + Office Tab Pro
- One installer, one license — set up in minutes (MSI-ready)
- Works better together — streamlined productivity across Office apps
- 30-day full-featured trial — no registration, no credit card
- Best value — save vs buying individual add-in