How to print labels for mailing list from Excel?
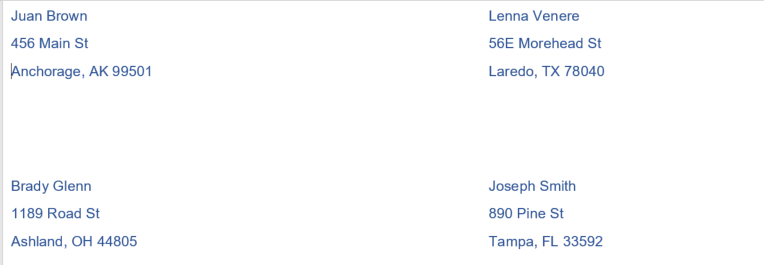
Normally, we can organize a mailing list in Excel quickly and easily, but it’s not so convenient when it comes to printing the labels. Each row in the worksheet needs to be transferred onto one label as below screenshots shown. In this case, the Mail Merge feature in Word document can help you to create the labels from Excel and then print or save them as you need.
 |
 |
 |
Create and print labels in Word from an Excel worksheet with Mail Merge feature
1. Prepare the data information of your printing mailing labels, such as First name, Last name, Address, City, State, Zip Code as below screenshot shown:

2. Save and close the workbook, then launch a Word document, and click Mailings > Start Mail Merge > Labels, see screenshot:

3. In the opened Label Options dialog box, set the Label information and Product number as you need:
- Label information: Choose supplier of label sheets;
- Product number: Select product number listed on the package of label sheets.
- (In this example, I will choose Microsoft and 1/4 Letter separately.)

4. Then, click OK button to close the dialog box. Next, please click Mailings > Select Recipients > Use an Existing List, see screenshot:

5. In the opened Select Data Source window, choose the Excel file you saved earlier, and click Open button, see screenshot:

6. And in the following Select Table dialog box, select the sheet containing the mailing list, see screenshot:

7. Then, click OK to close the dialog box, and the Word document will look like the screenshot below:

8. Make sure the cursor is on the upper-right corner of the document. And then, go on clicking Address Block under the Mailings tab, see screenshot:

9. In the popped out Insert Address Block dialog box, select the desired options, check the result under the Preview section, see screenshot:

10. Go ahead and click the OK button, and the《AddressBlock》will appear in your first label. Then, click Update Labels from the Mailings tab, see screenshot:

11. In this step, perform the mail merge by clicking Finish & Merge > Edit Individual Documents under the Mailings tab, see screenshot:

12. And the Merge to New Document dialog box will appear. Select All from the Merge records, and then click the OK button. See screenshot:

13. Now, the mailing list from Excel will be merged into the labels in a new Word file as below screenshot shown:

14. At last, you can change the formatting of the label, such as the border, font color, font size, etc. to your need for printing.

Best Office Productivity Tools
Supercharge Your Excel Skills with Kutools for Excel, and Experience Efficiency Like Never Before. Kutools for Excel Offers Over 300 Advanced Features to Boost Productivity and Save Time. Click Here to Get The Feature You Need The Most...

Office Tab Brings Tabbed interface to Office, and Make Your Work Much Easier
- Enable tabbed editing and reading in Word, Excel, PowerPoint, Publisher, Access, Visio and Project.
- Open and create multiple documents in new tabs of the same window, rather than in new windows.
- Increases your productivity by 50%, and reduces hundreds of mouse clicks for you every day!
