Remove Excel Password from Excel file / Worksheets / Workbook Structure
In the realm of data security, password protection in Excel serves as a vital tool to control file access and edit permissions. However, there are times when removing these passwords becomes necessary - whether to facilitate easier editing, to share with colleagues, or simply because the extra layer of security is no longer required. This article will guide you through the process of removing passwords from an Excel file, be it an encrypted file or a protected worksheet, ensuring smooth and unrestricted access to your data in Excel.
Removing Password from Encrypted Excel File:
- Utilize the 'Info' option for straightforward removal
- Employ the 'Save As' feature to create an unprotected copy
Removing Password from Protected Worksheets:
- Use the 'Unprotect' feature to remove passwords individually
- Apply 'Kutools for Excel' for batch removal from multiple sheets
Accessing Unknown Passwords Protected Worksheets
Unlocking Password-Protected Workbook Structure
Removing Password from Encrypted Excel File
Encrypting an Excel file is a common practice to safeguard sensitive data. This involves setting a password to access the workbook, preventing unauthorized viewing. This is especially important for files containing confidential data like financial records, personal information, or proprietary business data. However, there may come a time when you need to remove this password from your encrypted Excel file. Whether it's because the security is no longer necessary or you want to enhance accessibility for editing and sharing, this guide presents two simple methods for removing encryption.
Utilize the 'Info' option for straightforward removal
This method involves using the built-in features of Excel to remove the password directly from the file.
Step 1: Open Your Encrypted Excel File
Start by opening the Excel file that is password protected. (Need to enter the password to open the protected file.)

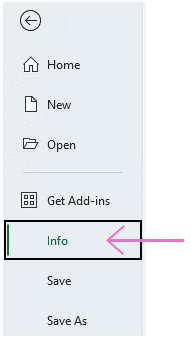
Step 2: Access File Info
Click on the File tab in the Excel ribbon to access the backstage view.
Select Info on the left sidebar.

Step 3: Remove Encryption
In the Info section, look for the Protect Workbook box. Click on the Encrypt with Password option.
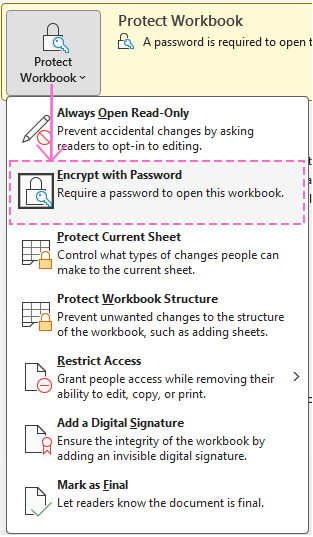
A dialog box will appear where the current password is displayed. Delete the password from the password field. (This action will remove the password protection from the file.) Click OK to confirm the removal of the password.


Step 4: Save Changes
Save your file to apply the changes.
Your Excel file is no longer password-protected.

Unlock Excel Magic with Kutools AI
- Smart Execution: Perform cell operations, analyze data, and create charts—all driven by simple commands.
- Custom Formulas: Generate tailored formulas to streamline your workflows.
- VBA Coding: Write and implement VBA code effortlessly.
- Formula Interpretation: Understand complex formulas with ease.
- Text Translation: Break language barriers within your spreadsheets.
Employ the 'Save As' feature to create an unprotected copy
If you prefer keeping the original file encrypted but need an unprotected version for ease of access or editing, creating a copy of the file without a password is the way to go.
Step 1: Open the Encrypted File
Open the password-protected Excel file as you normally would. (Need to enter the password to open the protected file.)
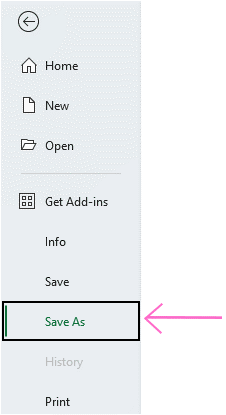
Step 2: Use Save As
Go to File > Save As.
Choose your desired location to save the new file.
In the Save As dialog, click on the Tools button near the Save button and select General Options.

In the General Options window, you will see the Password to open field. Clear this field to remove the password. Click OK to close the dialog.


Step 3: Save the New File
Give your file a new name if you wish to distinguish it from the original encrypted file.
Click Save. This new file will be an exact copy of the original but without password protection.
Now the saved copy of the file is unprotected.
Streamline your Excel experience with Kutools' Password Manager, a game-changer for data security.
Effortlessly manage multiple passwords across workbooks with enhanced safety and simplicity. Say goodbye to the hassles of remembering and resetting passwords. Embrace this robust tool for secure, efficient Excel operations. Try Kutools now – elevate your productivity! Beyond this feature, Kutools offers dozens of functions that simplify complex calculations with ease.

Besides, Kutools supports to automatically fill password when opening an encrypted workbook.

Removing Password from Protected Worksheets
In Excel, protecting worksheets with a password is a common practice to allow users access the worksheet but restrict unauthorized editing. When you protect a worksheet, you can set various restrictions to control what users can and cannot do on that sheet. However, there may come a time when you need to remove these passwords - perhaps for editing purposes or because the protection is no longer necessary. This article will guide you through two effective methods for removing passwords from protected worksheets.
Use the 'Unprotect' feature to remove passwords individually
Step 1: Open the protected worksheet
Begin by opening the Excel workbook that contains the password-protected sheet(s).
Step 2: Navigate to the Protected Sheet
Click on the tab of the worksheet you wish to unprotect.
Step 3: Access the Unprotect Feature
Go to the Review tab on the Excel ribbon. Click on Unprotect Sheet. This button is available in the Protect group.

Step 4: Enter the Password to unprotect the worksheet
In the prompted dialog, enter the password for the worksheet and click OK. Now the worksheet is no longer protected, and you can freely edit it.

Apply 'Kutools for Excel' for batch removal from multiple sheets
If you have multiple worksheets that need to be unprotected, and they all share the same password, unprotecting them one by one can be a time-consuming process. Kutools for Excel's Unprotect Worksheets feature allows you to unprotect all or specific worksheets within a workbook in one go, significantly improving your work efficiency.
Click Kutools Plus > Protect Worksheets > Unprotect Worksheets, then tick the worksheets you want to unprotect (at default, all sheets are checked), then type the password and click OK.
If you want to protect multiple worksheets with one password, apply Protect Worksheets feature, it allows you protect worksheets at once time. Besides, there are more than 300 handy tools for improving your work efficiency.
Accessing Unknown Passwords Protected Worksheets
Encountering a password-protected Excel worksheet without knowing the password can pose a significant hurdle. However, an unconventional but effective method to bypass this protection involves using the zip file technique. This approach requires converting the Excel file into a zip format, manipulating the file structure, and then reverting it back to its original state.
Step 1: Create a Backup of the Excel File
Before proceeding, ensure you have a backup copy of the Excel file to prevent data loss.
Step 2: Change the Excel File Extension to Zip
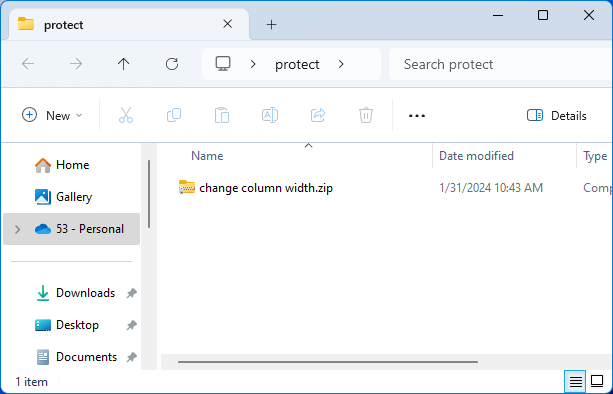
Locate the Excel file in File Explorer. (Go to the folder that contains the Excel file you want to unprotect the worksheets.)
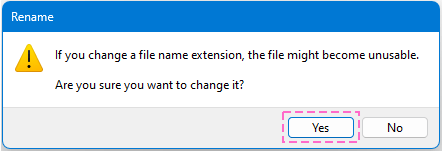
Right-click on the Excel file and choose Rename to enter the edit mode. Change the file extension from .xlsx or .xls to .zip.

Click Yes button in the prompted dialog.


Step 3: Open the Zip File
Double-click on the zip file to open it.
Step 4: Locate the Protected Worksheet
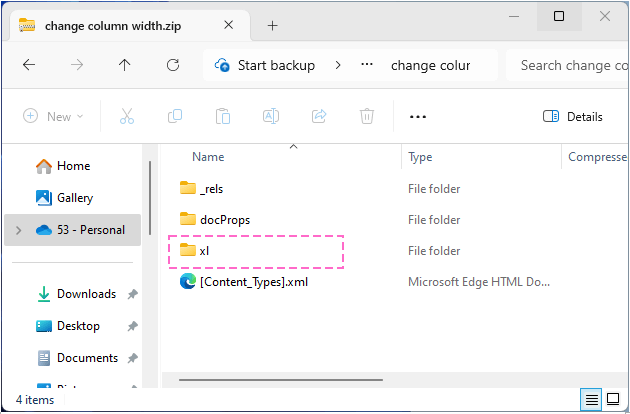
Navigate to the extracted folder, and then go to the xl folder.
Find the Worksheets directory, and double-click on it to open this folder.
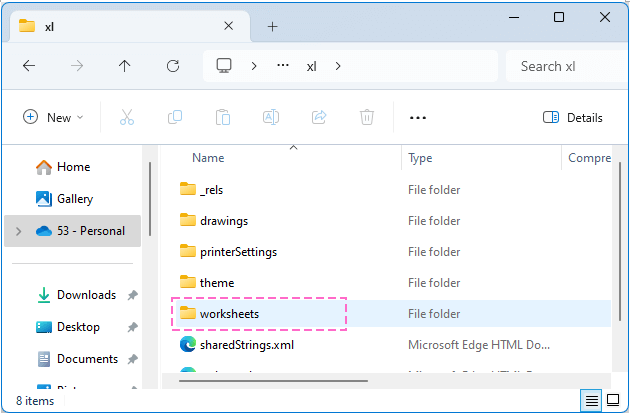
You can see individual sheets are stored as separate XML files (e.g., sheet1.xml).


Step 5: Copy the Protected Sheet to another Location
Select the protected sheet (e.g. sheet2.xml) and press Ctrl + C to copy it, then go to another folder and press Ctrl + V to paste it.

Step 6: Open the Protected Sheet with Notepad
Right-click on the copied protected sheet, select Open with > Notepad.

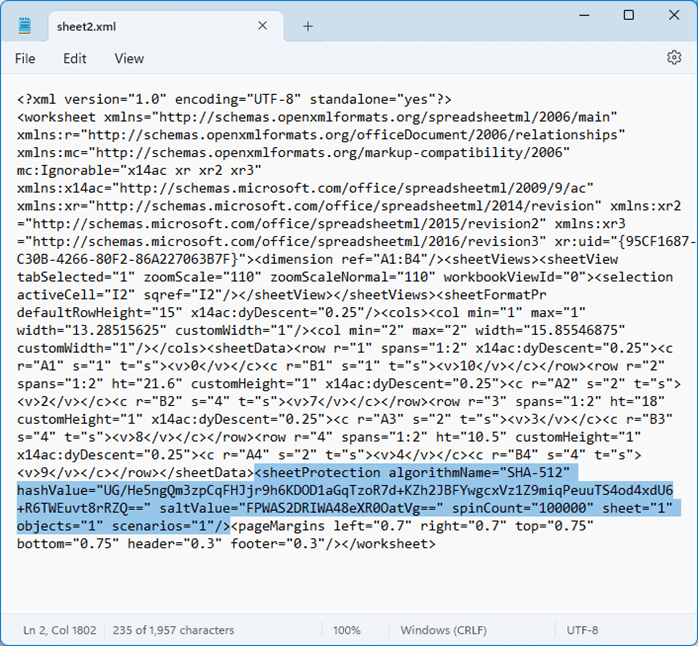
Step 7: Identify and Remove the Password Protection Tag
In the Notepad window, press Ctrl + F to enable the search bar, then enter “protect”, then press Enter key to find this string in the notepad.

Select the entire line the string "protect"in – everything between and including the "<" and ">" characters and press Delete key to delete it.
Delete this line:


Step 8: Save and Close the Modified file
After removing the tag, save the changes to the file.
Step 9: Copy the Modified XML file back to the Original Worksheets Folder
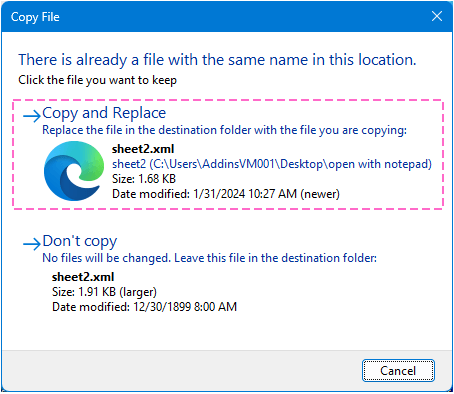
Select the modified XML file, press Ctrl + C to copy it, and go back to the Worksheets folder, press Ctrl + V to paste it.
When you paste the file, a dialog pops out, select Copy and Replace option.


Step 10: Change the Extension Back to Excel Format
Repack all the contents of the extracted folder back into a zip file.
Rename the file extension from .zip back to .xlsx or .xls.

In the Rename dialog, click Yes to continue.


Step 11: Open the Modified Excel File to Check If the Password is removed
Open the modified Excel file. The previously protected worksheet should now be accessible without requiring a password.
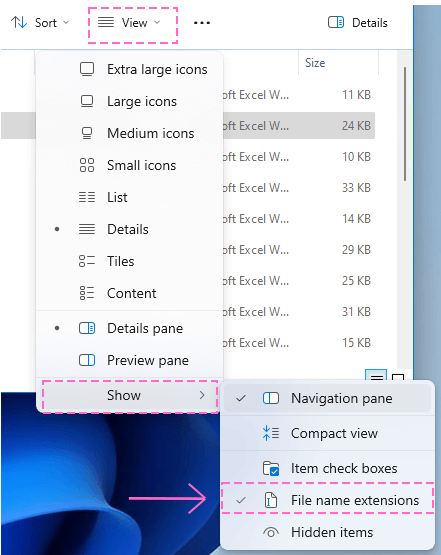
In Windows 8 and 10, directly check the File name extensions checkbox under View tab. For showing the file extensions in Windows 11, please click View in the ribbon of the folder, then click Show and tick File name extensions.
For removing multiple protected worksheets passwords, repeat step 5 – step 9.
This method only work for removing passwords from protected worksheets, if the Excel file is encrypted, this method cannot work.

Unlocking Password-Protected Workbook Structure
Workbook structure protection in Excel safeguards the layout of the sheets within the workbook. It restricts users from adding, moving, renaming, hiding/unhiding, or deleting sheets. However, for some reasons, you may want to remove the password and unlock the workbook structure.
Step 1: Open the Protected Workbook
Start by opening the Excel workbook with the protected structure.
Step 2: Locate the Structure Protection Feature
Go to the Review tab on the Excel ribbon, find and click on the Protect Workbook button in the Protect group.

Step 3: Enter the Password for Unlocking Workbook Protection
A dialog box will appear prompting you to enter the password. Enter the password and click OK.

The workbook structure is now unprotected, and you can modify the workbook as needed.
General Notes on Excel Passwords
Types of Passwords in Excel:
- Workbook Protection: Prevents opening the workbook without the password.
- Worksheet Protection: Restricts editing and formatting on a particular sheet.
- Workbook Structure Protection: Protects the layout of the sheets within the workbook.
Password Strength:
Use strong, complex passwords combining letters (both uppercase and lowercase), numbers, and symbols. Avoid common words or easily guessable passwords like "12345" or "password."
Whether you're dealing with an encrypted file, a protected worksheet, or a locked workbook structure, the steps outlined above will help you remove passwords and regain control of your Excel documents. Always remember to keep password management ethical and within the legal framework, especially when handling sensitive data. For more game-changing Excel strategies that can elevate your data management, explore further here..
The Best Office Productivity Tools
Kutools for Excel - Helps You To Stand Out From Crowd
Kutools for Excel Boasts Over 300 Features, Ensuring That What You Need is Just A Click Away...
Office Tab - Enable Tabbed Reading and Editing in Microsoft Office (include Excel)
- One second to switch between dozens of open documents!
- Reduce hundreds of mouse clicks for you every day, say goodbye to mouse hand.
- Increases your productivity by 50% when viewing and editing multiple documents.
- Brings Efficient Tabs to Office (include Excel), Just Like Chrome, Edge and Firefox.
Table of contents
- Removing Password from Encrypted Excel File
- Utilize the 'Info' option
- Employ the 'Save As' feature
- Removing Password from Protected Worksheets
- Use the 'Unprotect' feature
- Apply 'Kutools for Excel'
- Accessing Unknown Passwords Protected Worksheets
- Unlocking Password-Protected Workbook Structure
- Related Articles
- Best Office Productivity Tools
- Comments