How to keep draft email after sending in Outlook?
By default, when you send a draft email in Outlook, it’s immediately moved from the Drafts folder to the Sent Items folder. This behavior makes it difficult to reuse the content later. Many users prefer to retain draft emails as reusable templates—ideal for recurring messages like weekly updates or client replies. While Outlook has a few manual workarounds, Kutools for Outlook offers a more efficient, long-term solution that lets you save your draft content as reusable AutoText and insert it with one click. This guide walks you through both the Outlook methods and the Kutools approach, helping you choose the best fit.
Method 1: Use Ctrl + F to Keep the Draft (Manual & Basic)
Method 2: Save Drafts as AutoText for One-Click Reuse with Kutools for Outlook 👍 (Fast & Efficient)
Method 3: Use the Forward Button to Keep the Draft (More Steps & Setup Needed)
Method 1: Use Ctrl + F to Keep the Draft
Outlook allows you to manually duplicate a draft email using a simple keyboard shortcut (Ctrl + F).
1. Double-click the draft email to open it.
2. Place your cursor in any header field (e.g., Subject line) and press Ctrl + F.

3. A new email message will be created with the same content. Compose and send this duplicated version.
4. Close the original draft window. The draft will remain untouched in the Drafts folder.
Pros and Cons of Method 1:
- ✅ Simple keyboard shortcut, no complex setup required.
- ✅ Quick method for occasional use.
- ❌ Entirely manual each time.
- ❌ Limited practicality for frequent reuse.
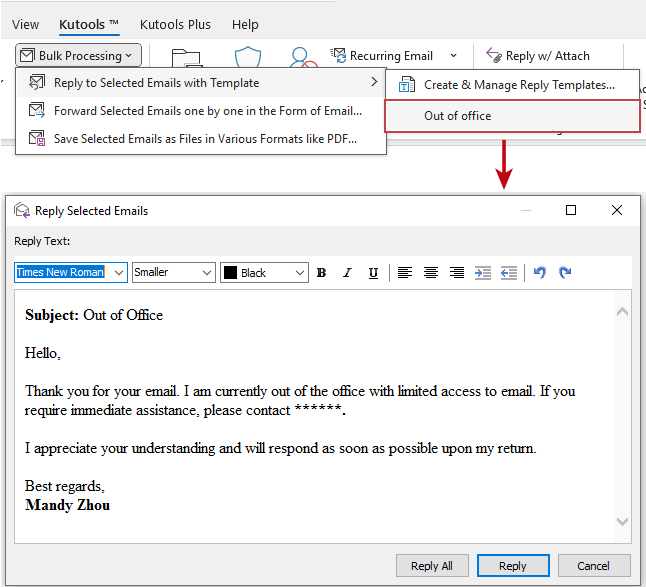
📩 Instantly Reply to Multiple Emails with a Template!
Tired of typing the same email responses over and over? With Kutools for Outlook's Reply to Selected Emails with Template feature, you can send preformatted replies to multiple emails in just a few clicks—saving you time and effort. Simply select the emails, go to "Kutools" > "Bulk Processing" > "Reply to Selected Emails with Template", and pick your pre-created response. It’s that easy to streamline your workflow and reply instantly!
Method 2: Save Drafts as AutoText for One-Click Reuse with Kutools for Outlook 👍
If you want a smarter, more reliable way to reuse draft emails, Kutools for Outlook offers a powerful AutoText feature that lets you save drafts and insert them anytime with just a click—no need to forward or duplicate messages manually.
Say goodbye to Outlook inefficiency! Kutools for Outlook makes batch email processing easier - now with a 30-day free trial! Download Kutools for Outlook Now!!
1. Double-click to open the draft email and select the content you want to reuse.
2. Go to Kutools > Resource.

3. Under the AutoText tab, click the Add button.

4. In the New AutoText dialog:
- 1) Enter a name for the entry.
- 2) Select a category (or create one).
- 3) Click Add.

📌 Result: Your draft content is now saved in the Kutools Resource Library as a reusable item. To reuse it later, simply place your cursor in the message body and click the AutoText item—it's inserted instantly.

Advantages of Using Kutools:
- ✅ Instant Reuse: Save once, use anytime with just a click.
- ✅ Easy Management: Organize and manage multiple email templates neatly.
- ✅ Increased Productivity: Perfect for frequently sent emails, no repetitive typing required.
- ✅ Flexible and Reliable: No risk of accidentally losing original content.
Method 3: Use the Forward Button to Keep the Draft
Another Outlook native method involves using the Forward button after modifying Outlook settings.
1. In Outlook, click File > Options.
2. In the Outlook Options dialog, go to the Mail tab. Under the Replies and Forwards section, check the Open replies and forwards in a new window option, then click OK.

3. Go to your Drafts folder and select the draft you want to keep. Click Forward under the Home tab.

4. A new window appears. Compose and send this new message.
5. Close the original draft email without sending it to keep it in the Drafts folder.
Pros and Cons of Method 3:
- ✅ Easy setup within Outlook’s built-in options.
- ✅ Suitable for users who regularly forward messages.
- ❌ Requires initial setup.
- ❌ It can become tedious when frequently sending drafts.
- ❌ No easy content management or reuse.
Which Method Should You Use?
Use this clear comparison to choose the best method for your workflow:
| Method | Best For | Ease of Use | Efficiency | Content Reuse |
|---|---|---|---|---|
| Ctrl + F Shortcut | Quick, occasional reuse | ⭐⭐⭐⭐ | ⭐⭐⭐ | ⭐⭐ |
| Kutools AutoText | Frequent reuse & easy management | ⭐⭐⭐⭐⭐ | ⭐⭐⭐⭐⭐ | ⭐⭐⭐⭐⭐ |
| Forward Button | Regular forwarding with some initial setup | ⭐⭐⭐ | ⭐⭐⭐ | ⭐⭐ |
✅ Recommendation: For frequent email reuse and better template management, Kutools for Outlook provides the fastest and most efficient solution.
Best Office Productivity Tools
Experience the all-new Kutools for Outlook with 100+ incredible features! Click to download now!
📧 Email Automation: Auto Reply (Available for POP and IMAP) / Schedule Send Emails / Auto CC/BCC by Rules When Sending Email / Auto Forward (Advanced Rules) / Auto Add Greeting / Automatically Split Multi-Recipient Emails into Individual Messages ...
📨 Email Management: Recall Emails / Block Scam Emails by Subjects and Others / Delete Duplicate Emails / Advanced Search / Consolidate Folders ...
📁 Attachments Pro: Batch Save / Batch Detach / Batch Compress / Auto Save / Auto Detach / Auto Compress ...
🌟 Interface Magic: 😊More Pretty and Cool Emojis / Remind you when important emails come / Minimize Outlook Instead of Closing ...
👍 One-click Wonders: Reply All with Attachments / Anti-Phishing Emails / 🕘Show Sender's Time Zone ...
👩🏼🤝👩🏻 Contacts & Calendar: Batch Add Contacts From Selected Emails / Split a Contact Group to Individual Groups / Remove Birthday Reminders ...
Use Kutools in your preferred language – supports English, Spanish, German, French, Chinese, and 40+ others!


🚀 One-Click Download — Get All Office Add-ins
Strongly Recommended: Kutools for Office (5-in-1)
One click to download five installers at once — Kutools for Excel, Outlook, Word, PowerPoint and Office Tab Pro. Click to download now!
- ✅ One-click convenience: Download all five setup packages in a single action.
- 🚀 Ready for any Office task: Install the add-ins you need, when you need them.
- 🧰 Included: Kutools for Excel / Kutools for Outlook / Kutools for Word / Office Tab Pro / Kutools for PowerPoint