How to automatically print attachments when emails arrive in Outlook?
This tutorial demonstrates a method to combine a VBA script and an Outlook rule to help you automatically print attachments of certain emails when they arrive in Outlook.
Automatically print attachments when certain emails arrive
Supposing, you want to print attachments of incoming emails from a certain sender automatically. You can do as follows to get it done.
Step1: Create a script in Outlook
Firstly, you need to create a VBA script in Outlook.
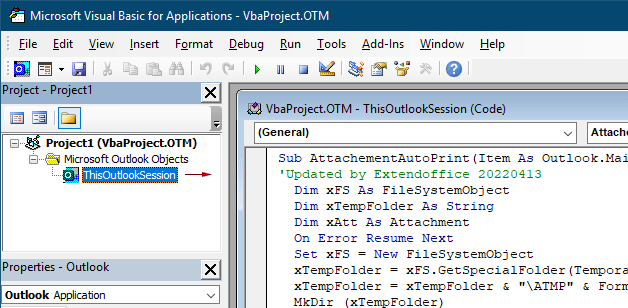
1. Launch your Outlook, press the Alt + F11 keys simultaneously to open the Microsoft Visual Basic for Applications window.
2. In the Microsoft Visual Basic for Applications window, double click on Project1 > Microsoft Outlook Objects > ThisOutlookSession to open the ThisOutlookSession (Code) window, and then copy the following code into this code window.
VBA code 1: Automatically print attachments (all types of attachments) when emails arrive
Sub AttachementAutoPrint(Item As Outlook.MailItem)
'Updated by Extendoffice 20230223
  Dim xFS As FileSystemObject
  Dim xTempFolder As String
  Dim xAtt As Attachment
  Dim xShell As Object
  Dim xFolder As Object, xFolderItem As Object
  Dim xFileName As String
  On Error GoTo xError
  If Item.Attachments.Count = 0 Then Exit Sub
  Set xFS = New FileSystemObject
  xTempFolder = xFS.GetSpecialFolder(TemporaryFolder)
  xTempFolder = xTempFolder & "\ATMP" & Format(Item.ReceivedTime, "yyyymmddhhmmss")
  If Not xFS.FolderExists(xTempFolder) Then
    MkDir (xTempFolder)
  End If
  Set xShell = CreateObject("Shell.Application")
  Set xFolder = xShell.NameSpace(0)
  For Each xAtt In Item.Attachments
    If IsEmbeddedAttachment(xAtt) = False Then
      xFileName = xTempFolder & "\" & xAtt.FileName
      xAtt.SaveAsFile (xFileName)
      Set xFolderItem = xFolder.ParseName(xFileName)
      xFolderItem.InvokeVerbEx ("print")
    End If
  Next xAtt
  Set xFS = Nothing
  Set xFolder = Nothing
  Set xFolderItem = Nothing
  Set xShell = Nothing
xError:
  If Err <> 0 Then
    MsgBox Err.Number & " - " & Err.Description, , "Kutools for Outlook"
    Err.Clear
  End If
Exit Sub
End Sub

Function IsEmbeddedAttachment(Attach As Attachment)
Dim xItem As MailItem
Dim xCid As String
Dim xID As String
Dim xHtml As String
On Error Resume Next
IsEmbeddedAttachment = False
Set xItem = Attach.Parent
If xItem.BodyFormat <> olFormatHTML Then Exit Function
xCid = ""
xCid = Attach.PropertyAccessor.GetProperty("http://schemas.microsoft.com/mapi/proptag/0x3712001F")
If xCid <> "" Then
    xHtml = xItem.HTMLBody
    xID = "cid:" & xCid
    If InStr(xHtml, xID) > 0 Then
        IsEmbeddedAttachment = True
    End If
End If
End Function
Note: This code supports printing of all types of attachments received in emails. If you want to print only the specified type of attachment, such as pdf files, please apply the following VBA code.
VBA code 2: Automatically print the specified type of attachments when emails arrive
Sub AttachementAutoPrint(Item As Outlook.MailItem)
'Updated by Extendoffice 20230223
  Dim xFS As FileSystemObject
  Dim xTempFolder As String
  Dim xAtt As Attachment
  Dim xShell As Object
  Dim xFolder As Object, xFolderItem As Object
  Dim xFileType As String, xFileName As String
  On Error GoTo xError
  If Item.Attachments.Count = 0 Then Exit Sub
  Set xFS = New FileSystemObject
  xTempFolder = xFS.GetSpecialFolder(TemporaryFolder)
  xTempFolder = xTempFolder & "\ATMP" & Format(Item.ReceivedTime, "yyyymmddhhmmss")
  If Not xFS.FolderExists(xTempFolder) Then
    MkDir (xTempFolder)
  End If
  Set xShell = CreateObject("Shell.Application")
  Set xFolder = xShell.NameSpace(0)
  For Each xAtt In Item.Attachments
    If IsEmbeddedAttachment(xAtt) = False Then
      xFileName = xAtt.FileName
      xFileType = LCase$(Right$(xFileName, VBA.Len(xFileName) - VBA.InStrRev(xFileName, ".")))
      xFileName = xTempFolder & "\" & xFileName
      Select Case xFileType
        Case "pdf"   'change "pdf" to the file extension you want to print
          xAtt.SaveAsFile (xFileName)
          Set xFolderItem = xFolder.ParseName(xFileName)
          xFolderItem.InvokeVerbEx ("print")
      End Select
    End If
  Next xAtt
  Set xFS = Nothing
  Set xFolder = Nothing
  Set xFolderItem = Nothing
  Set xShell = Nothing
xError:
  If Err <> 0 Then
    MsgBox Err.Number & " - " & Err.Description, , "Kutools for Outlook"
    Err.Clear
  End If
  Exit Sub
End Sub

Function IsEmbeddedAttachment(Attach As Attachment)
Dim xItem As MailItem
Dim xCid As String
Dim xID As String
Dim xHtml As String
On Error Resume Next
IsEmbeddedAttachment = False
Set xItem = Attach.Parent
If xItem.BodyFormat <> olFormatHTML Then Exit Function
xCid = ""
xCid = Attach.PropertyAccessor.GetProperty("http://schemas.microsoft.com/mapi/proptag/0x3712001F")
If xCid <> "" Then
    xHtml = xItem.HTMLBody
    xID = "cid:" & xCid
    If InStr(xHtml, xID) > 0 Then
        IsEmbeddedAttachment = True
    End If
End If
End Function
Notes:
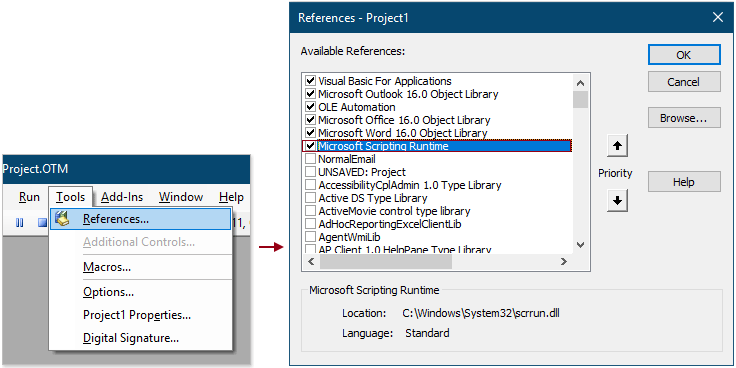
3. Go ahead and click Tools > References. In the popping up References – Project1 dialog box, check the Microsoft Scripting Runtime box, and then click the OK button.
4. Save the code and press the Alt + Q keys to close the Microsoft Visual Basic for Applications window.
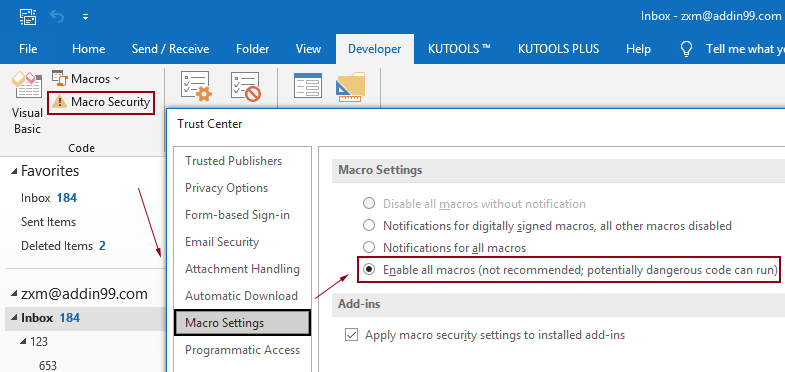
Note: Please make sure that the Enable all macros option is enabled in your Outlook. You can check this option by following the steps shown below.
Step2: Build a rule to use the script
After adding the VBA script in Outlook, you need to create a rule to use the script based on certain conditions.
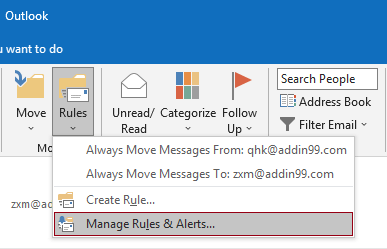
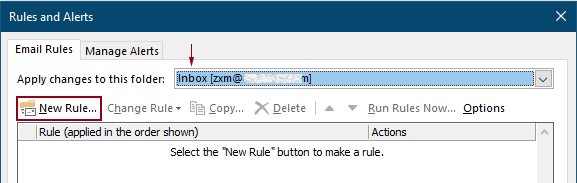
1. Go to the Home tab, click Rules > Manage Rules & Alerts.
2. In the Rules and Alerts dialog box, click the New Rule button to create a rule.
Tips: If you have added multiple email accounts to your Outlook, please specify an account in the Apply changes to this folder drop-down list where you want to apply the rule. Otherwise, it will be applied to the inbox of the currently selected email account.
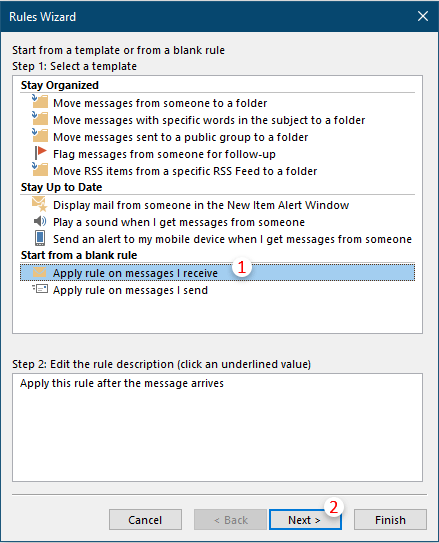
3. In the first Rules Wizard dialog box, select Apply rule on messages I receive in the Step 1 box, and then click Next.
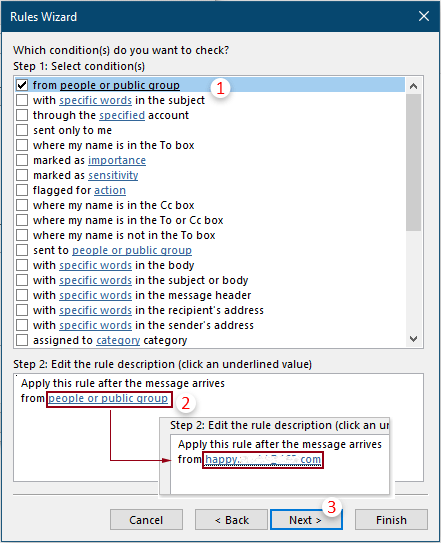
4. In the second Rules Wizard dialog box, you need to:
5. In the third Rules Wizard dialog box, you need to configure as follows.
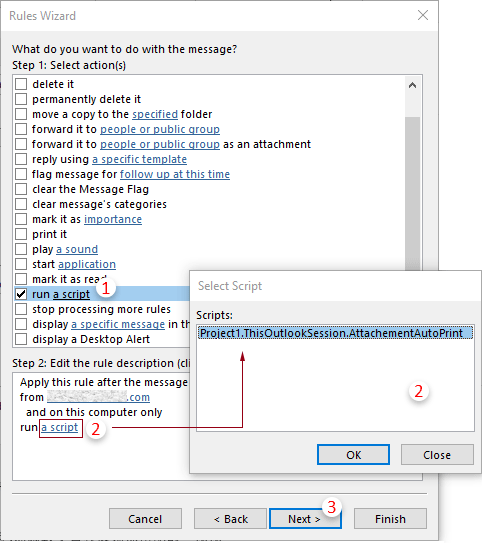
Tips: If the “run a script” option is missing in your Rules Wizard, you can display it by following the method mentioned in this article: restore missing Run A Script pption in Outlook rule.
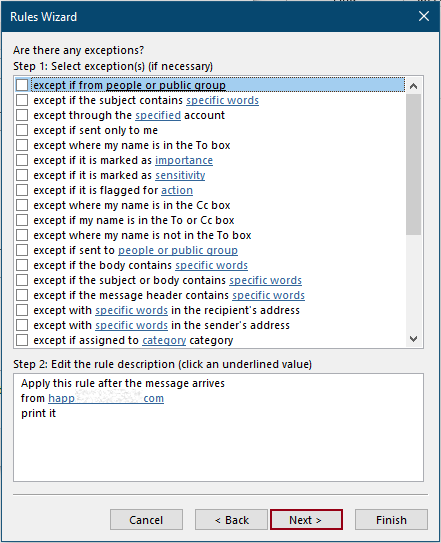
6. Then another Rules Wizard pops up asking for exceptions. You can select the exceptions if necessary, otherwise, click the Next button without any selections。
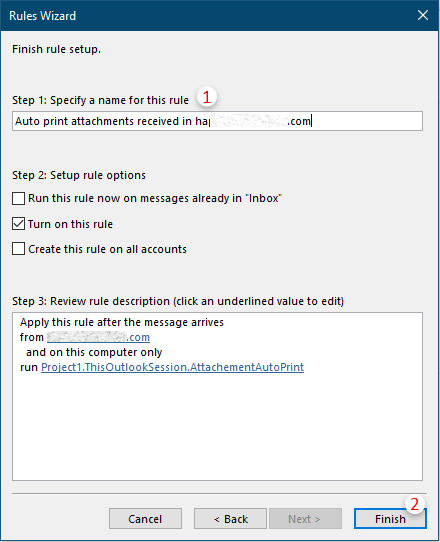
7. In the last Rules Wizard, you need to specify a name for the rule, and then click the Finish button.
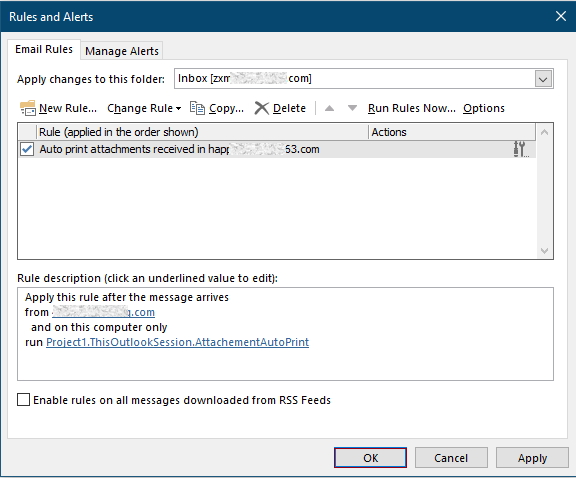
8. Then it returns to the Rules and Alerts dialog box, you can see the rule you created listed inside, click the OK button to finish the whole settings.
From now on, when an email from the specified person is received, the attached files will be printed automatically.
Related articles
Only Print Attachment(S) From One Email Or Selected Emails In Outlook
In Outlook, you can print the emails, but have you printed the attachments only from one email or selected emails in Outlook? This article introduces the tricks on solving this job.
Only Print Message Header Of An Email In Outlook
When printing an email in Outlook, it will print both of message header and message body in the email. However, in some special cases, you may just need to print out the message header with the subject, sender, recipients, etc. This article will introduce two solutions to do it.
Print A Calendar In A Specified/Custom Date Range In Outlook
Normally, when printing a calendar in Month view in Outlook, it will automatically select the month containing the currently selected date. But, you may need to print the calendar within a custom date range, such as 3 months, half of year, etc. This article will introduce the solution for you.
Print A Contact With Picture In Outlook
Normally, a contact’s picture won’t be printed out when printing the contact in Outlook. But sometimes, it will be more impressive to print a contact with its picture. This article will introduce some workarounds to get it done.
Print A Selection Of An Email In Outlook
If you received an email message and found that there is a selection of the email content need to be printed out instead of printing the whole message, what would you do? Actually, Outlook can help you achieve this operation with the help of internet browsers, such as the Firefox and the Internet Explorer. Here I will take the Internet browsers for example. Please look at the following tutorials.
Best Office Productivity Tools
Experience the all-new Kutools for Outlook with 100+ incredible features! Click to download now!
📧 Email Automation: Auto Reply (Available for POP and IMAP) / Schedule Send Emails / Auto CC/BCC by Rules When Sending Email / Auto Forward (Advanced Rules) / Auto Add Greeting / Automatically Split Multi-Recipient Emails into Individual Messages ...
📨 Email Management: Recall Emails / Block Scam Emails by Subjects and Others / Delete Duplicate Emails / Advanced Search / Consolidate Folders ...
📁 Attachments Pro: Batch Save / Batch Detach / Batch Compress / Auto Save / Auto Detach / Auto Compress ...
🌟 Interface Magic: 😊More Pretty and Cool Emojis / Remind you when important emails come / Minimize Outlook Instead of Closing ...
👍 One-click Wonders: Reply All with Attachments / Anti-Phishing Emails / 🕘Show Sender's Time Zone ...
👩🏼🤝👩🏻 Contacts & Calendar: Batch Add Contacts From Selected Emails / Split a Contact Group to Individual Groups / Remove Birthday Reminders ...
Use Kutools in your preferred language – supports English, Spanish, German, French, Chinese, and 40+ others!


🚀 One-Click Download — Get All Office Add-ins
Strongly Recommended: Kutools for Office (5-in-1)
One click to download five installers at once — Kutools for Excel, Outlook, Word, PowerPoint and Office Tab Pro. Click to download now!
- ✅ One-click convenience: Download all five setup packages in a single action.
- 🚀 Ready for any Office task: Install the add-ins you need, when you need them.
- 🧰 Included: Kutools for Excel / Kutools for Outlook / Kutools for Word / Office Tab Pro / Kutools for PowerPoint