How to change the all-day event default to busy in Outlook?
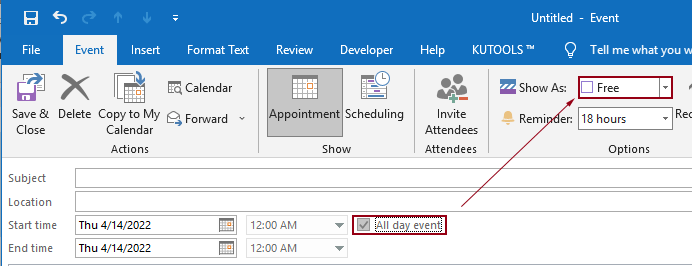
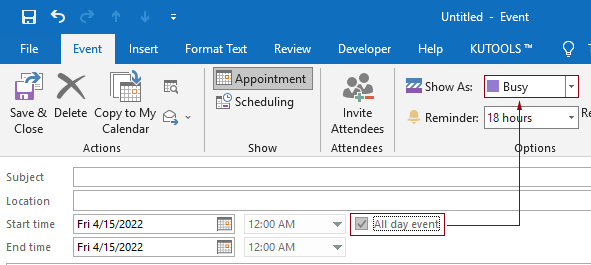
By default, Outlook sets the status of appointments and meetings to "Busy", but all-day events to "Free" (see screenshot below). You need to manually change the Show As status to Busy each time you create an all-day event. To change the default show as status of all-day events to Busy, the article provides you with two methods.
Change the all-day event default to busy by creating a custom form
A custom form can help you create an all-day event with the default "Show As" status of "Busy." Please do as follows.
1. Shift to the Calendar view. Click "Home" > "New Appointment".
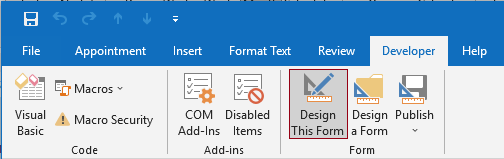
2. In the new Appointment window, click "Developer" > "Design This Form".
Tips: If the "Developer" tab does not show on the ribbon, please follow the methods in this article to display it.
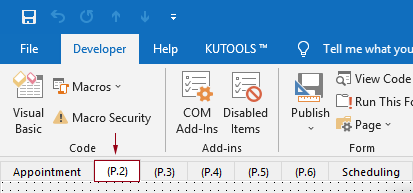
3. Then the appointment window turns to design mode. You need to click the "(P.2)" tab.
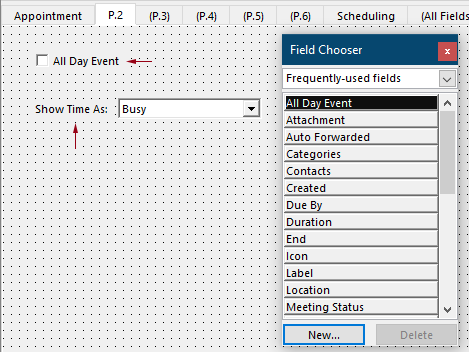
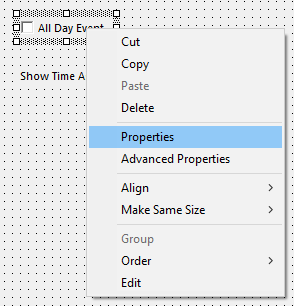
4. Drag the "All Day Event" field and the "Show Time As" field from the "Field Chooser" pane separately to the board under the "(P.2)" tab
5. Right click the dragged-out "All Day Event" field and select "Properties" from the context menu.
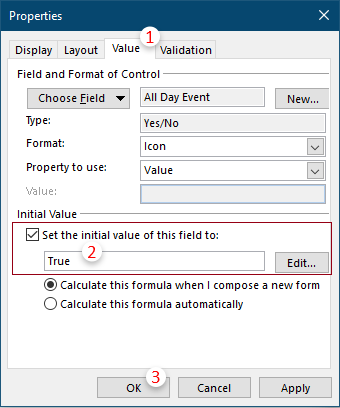
6. In the "Properties" dialog box, you need to configure as follows.
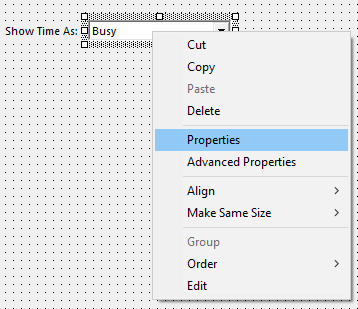
7. Right click the combo box of the "Show Time As" field and click "Properties" from the context menu.
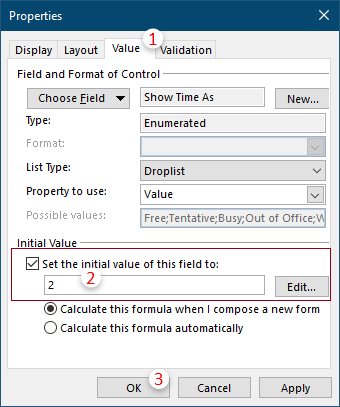
8. In the "Properties" dialog box, you need to configure as follows.
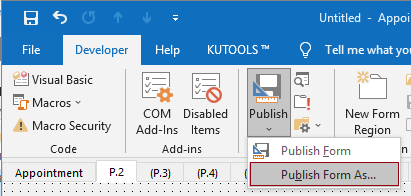
9. Click "Publish" > "Publish Form As" on the ribbon.
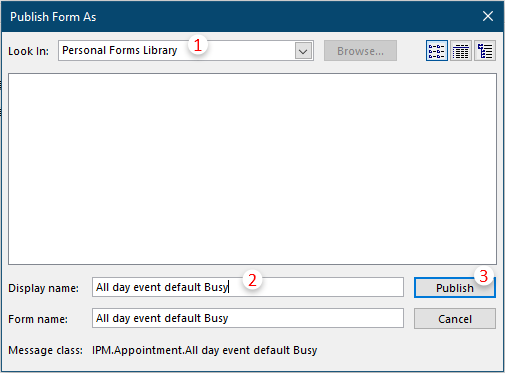
10. In the "Publish Form As" dialog box, you need to:
11. Close the Appointment window without saving.
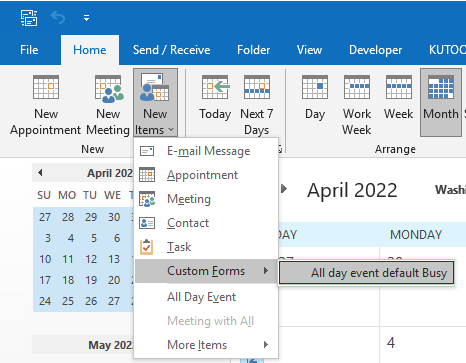
12. From now on, when you need to create an all-day event with the Show as status default to Busy, please shift to the "Calendar" view and click "Home" > "New Items" > "Custom Forms" > "The name of the custom form".
Note: To create an all-day event with the Show as status default to “Free”, just do as usual: click "Home" > "New Appointment", and then check the "All day event" box in the "Appointment" window.
Change the all-day event default to busy by using VBA
The above method has too many steps. If you always need to create an all-day event with the Show As status default to "Busy", the following VBA code can help you easily get it done.
1. Launch your Outlook, press the "Alt" + "F11" keys simultaneously to open the "Microsoft Visual Basic for Applications" window.
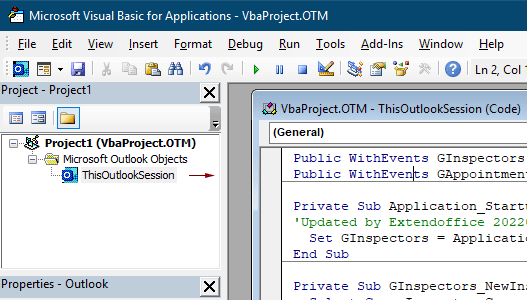
2. In the "Microsoft Visual Basic for Applications" window, double click on "Project1" > "Microsoft Outlook Objects" > "ThisOutlookSession" to open the "ThisOutlookSession (Code)" window, and then copy the following code into this code window.
VBA code: Set All day event status default to "Busy"
Public WithEvents GInspectors As Inspectors
Public WithEvents GAppointmentItem As AppointmentItem

Private Sub Application_Startup()
'Updated by Extendoffice 20220413
  Set GInspectors = Application.Inspectors
End Sub

Private Sub GInspectors_NewInspector(ByVal Inspector As Inspector)
  Select Case Inspector.CurrentItem.Class
    Case olAppointment
      Set GAppointmentItem = Inspector.CurrentItem
  End Select
End Sub

Private Sub GAppointmentItem_Open(Cancel As Boolean)
  Select Case GAppointmentItem.AllDayEvent
    Case True
      GAppointmentItem.BusyStatus = olBusy
  End Select
End Sub

Private Sub GAppointmentItem_PropertyChange(ByVal Name As String)
  If Name = "AllDayEvent" Then
    Select Case GAppointmentItem.AllDayEvent
      Case True
        GAppointmentItem.BusyStatus = olBusy
    End Select
  End If
End Sub
3. Save the VBA code and restart Outlook.
From now on, after converting an appointment or a meeting to an all-day event, the "Show As" status will show as "Busy" by default.
Related articles
Change Default Reminder Time Of All-Day Events In Outlook
Normally, the default reminder time of all-day event is 18 hours in Outlook 2007/2010 and 0.5 day in Outlook 2013. Sometimes, the default reminder time of all-day event may not agree with your work schedule. Here we will introduce the way to change the default reminder time of all-day events in Microsoft Outlook.
Change The Default Follow Up Time In Outlook
As we know, when we add a follow up reminder for an email in Outlook, the default follow up time is 4:30 PM (or other time depending on your working hours). However, you may want to change the default follow up time, and let it remind you at the beginning of working hours, such as 9:00 AM. In this article, I will show you how to change the default follow up time in Outlook.
Change Default Archive Location In Outlook
By default, Outlook has default location for the archive files. Besides the default location, you can set you own archive location for your archive files. In this tutorial, we will show you how to change default archive location in Outlook in details.
Change Default Attachment Saving Location In Outlook
Have you fed up with finding the attachment location you have specified every time when launching Outlook? In this tutorial, we will show you how to change the default attachment location. After that, the specified attachment saving folder will be opened automatically every time you save the attachments even though you restarting the Outlook.
Change The Default Time For Delay Delivery In Outlook
This tutorial provides a VBA code to help you change the default time for the delay delivery option in Outlook.
Best Office Productivity Tools
Experience the all-new Kutools for Outlook with 100+ incredible features! Click to download now!
📧 Email Automation: Auto Reply (Available for POP and IMAP) / Schedule Send Emails / Auto CC/BCC by Rules When Sending Email / Auto Forward (Advanced Rules) / Auto Add Greeting / Automatically Split Multi-Recipient Emails into Individual Messages ...
📨 Email Management: Recall Emails / Block Scam Emails by Subjects and Others / Delete Duplicate Emails / Advanced Search / Consolidate Folders ...
📁 Attachments Pro: Batch Save / Batch Detach / Batch Compress / Auto Save / Auto Detach / Auto Compress ...
🌟 Interface Magic: 😊More Pretty and Cool Emojis / Remind you when important emails come / Minimize Outlook Instead of Closing ...
👍 One-click Wonders: Reply All with Attachments / Anti-Phishing Emails / 🕘Show Sender's Time Zone ...
👩🏼🤝👩🏻 Contacts & Calendar: Batch Add Contacts From Selected Emails / Split a Contact Group to Individual Groups / Remove Birthday Reminders ...
Use Kutools in your preferred language – supports English, Spanish, German, French, Chinese, and 40+ others!


🚀 One-Click Download — Get All Office Add-ins
Strongly Recommended: Kutools for Office (5-in-1)
One click to download five installers at once — Kutools for Excel, Outlook, Word, PowerPoint and Office Tab Pro. Click to download now!
- ✅ One-click convenience: Download all five setup packages in a single action.
- 🚀 Ready for any Office task: Install the add-ins you need, when you need them.
- 🧰 Included: Kutools for Excel / Kutools for Outlook / Kutools for Word / Office Tab Pro / Kutools for PowerPoint