How to Request Read Receipts of Emails with Specific Conditions?
If you send large amounts of emails to all sorts of clients every day, you probably need the confirmation whether the important emails are read or not. That means you only need to get the read receipts of the emails which meet certain conditions, not all the emails you send. In this case, I will introduce you a simple way to request read receipts of specific emails.
Request Read Receipts of Emails with Specific Conditions
Request Read Receipts of Emails with Specific Conditions
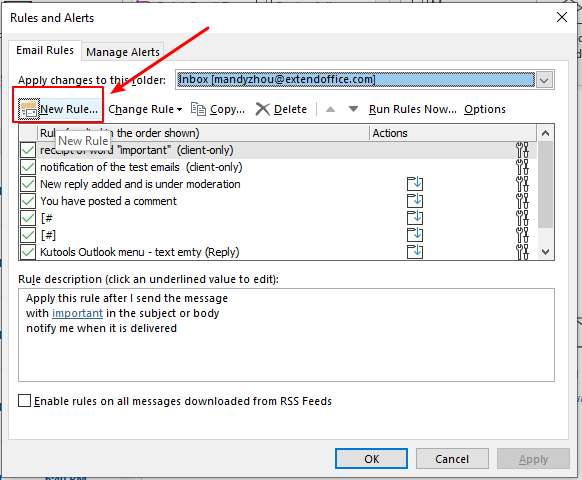
1. In Outlook, go to the "Home" tab, click "Rules" in the "Move" group, then click "Manage Rules & Alerts" in the drop-down menu.

2. In "Rules and Alerts" window, press the "New Rule" button under the "Email Rules" tab.
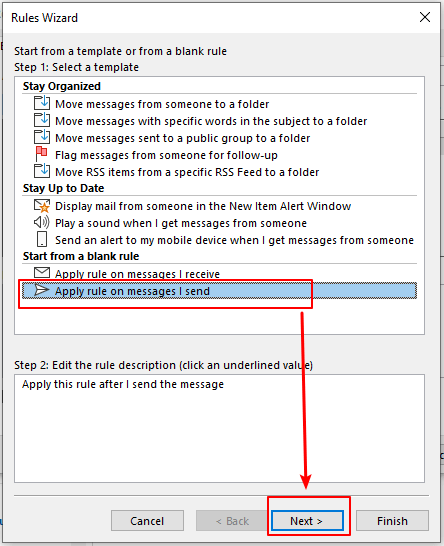
3. In the "Rules Wizard" window, click "Apply rule on messages I send" in the "Start from a template or from a blank rule" section. Then click the "Next" button.
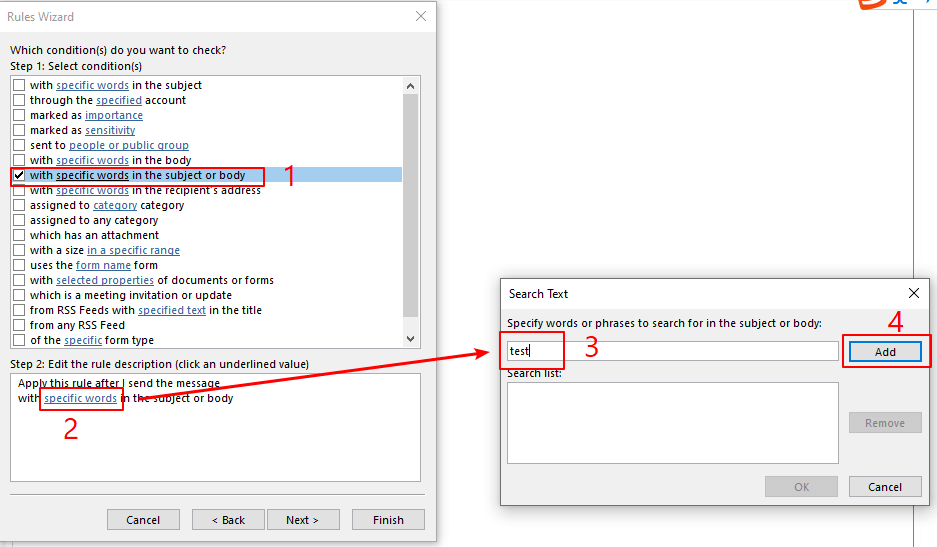
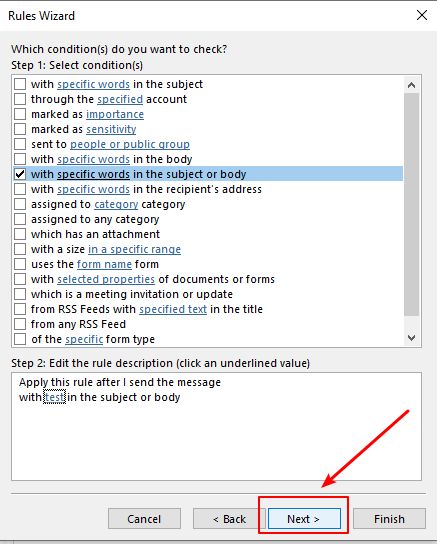
4. Specify the conditions as you wish from the suggested list. For example, I wish to receive a read receipt only from the emails with the word "test" in the subject or body.
- Tick the "with specific words in the subject or body" option in Step 1.
- Click the underlined words "specific words" in Step 2.
- The "Search Text" dialog box pops up. Input word "test" in the box.
- Click the "Add" button.
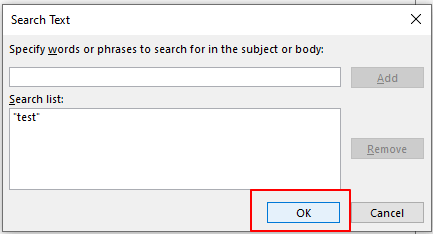
- Then click the "OK" button.
- Click the "Next" button in the "Rules Wizard" window to move to the next step.
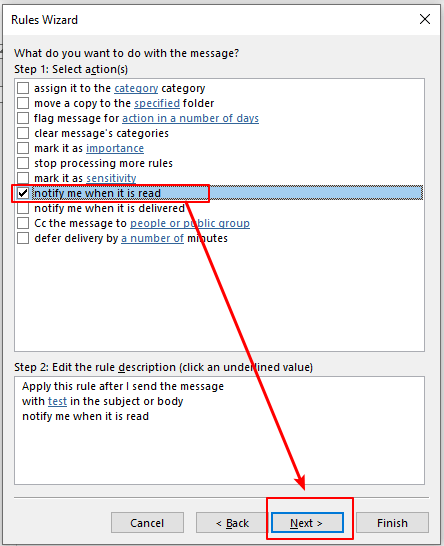
5. Specify the actions. Tick the "notify me when it is read" option in Step 1. Then click the "Next" button.
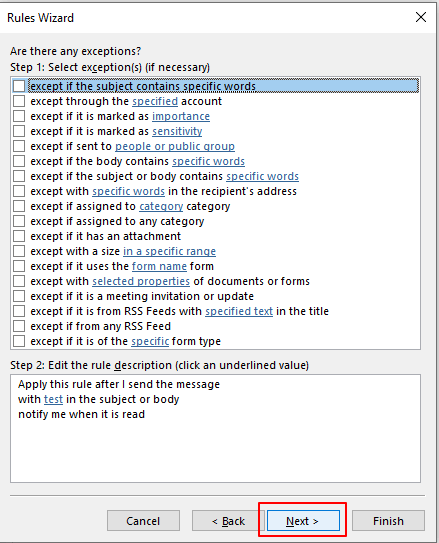
6. Specify the exceptions. If none, click the "Next" button.
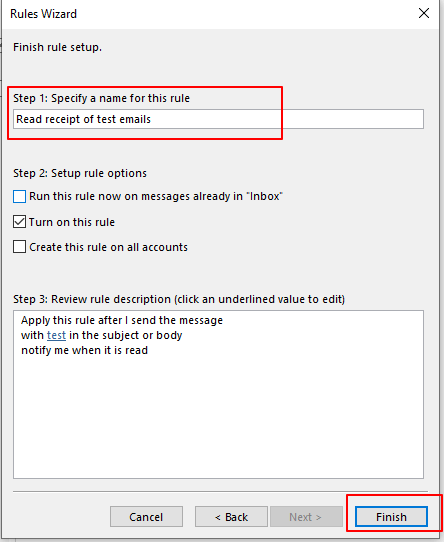
7. Specify a name for this rule and set up rule options. Make sure the "Turn on this rule" option is ticked. Then click the "Finish" button.
8. A Microsoft Outlook warning dialog box pops up. Click the "OK" button.

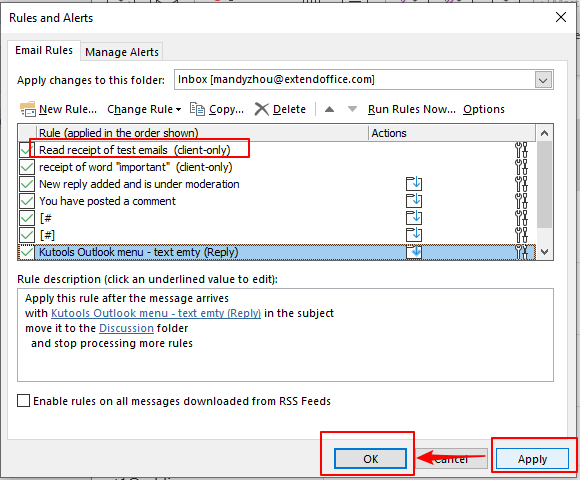
9. In the "Rules and Alerts" window, click the "Apply" button, and then click the "OK" button.
10. Now the rule for requesting a read receipt is set up. After the email with the word "test" in the subject or body is delivered and the recipient reads the email, a read receipt will be sent to your Inbox folder in Outlook. The email read receipt notification will be like the one below.
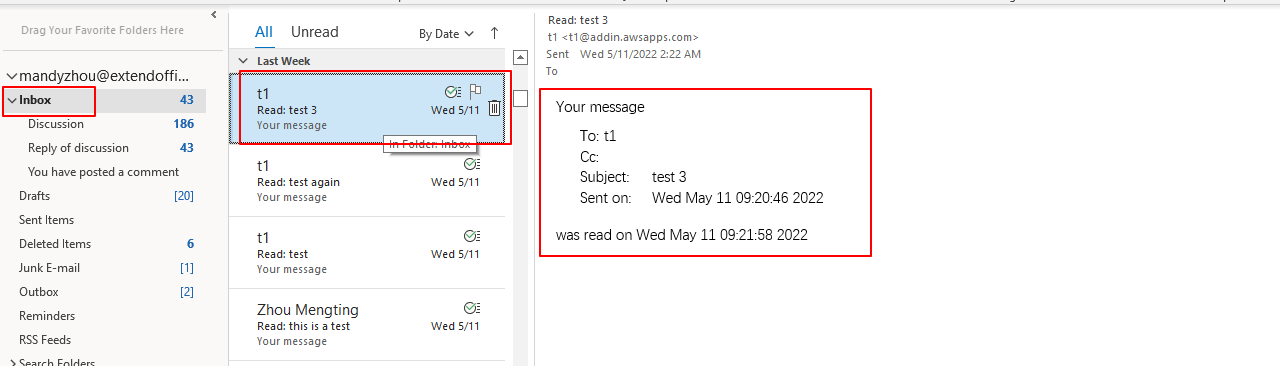
The read receipt notification contains the recipient's name and email address, subject, date and time when the email was sent and when the recipient read it.
Note: However, sometimes you may not receive the read receipt even if you have sent an email that meets the conditions. The reasons are as follows:
- For message recipients who use Outlook as their email program, after reading the message, a Microsoft Outlook dialog box will pop up. They can decline to send a read receipt.
- Some recipients' settings or mail servers block read receipts entirely.

Related articles
How To Request Delivery Receipt And Read Receipt In Outlook?
Here this article is provided to help you request delivery receipts and read receipts for currently composing email message, and for all sent email messages as well.
How To Block Tracking / Read Receipt In Outlook Emails?
Have you ever received read receipt request when opening an Outlook email as below screenshot shown? In some cases, you may need to block such tracking for the reason of privacy, security, etc. Here, this tutorial will introduce the way to block (read receipt) tracking in Outlook emails easily.
How To Track Meeting Responses In Outlook?
After creating a meeting and inviting attendees for the meeting, you can track the meeting responses which attendees have accepted or declined the meeting request. In this article, we will show you how to track meeting responses in Outlook.
How To Track Phone Calls With Journals In Outlook?
You might have experienced that you have to look for pen and paper to write down a brief note during a business call. Actually, when we make a call to a certain contact in Outlook, we can track the phone call with a journal entry. In this article, I will show you how to track phone calls with journals in Outlook easily.
- ✅ One-click convenience: Download all five setup packages in a single action.
- 🚀 Ready for any Office task: Install the add-ins you need, when you need them.
- 🧰 Included: Kutools for Excel / Kutools for Outlook / Kutools for Word / Office Tab Pro / Kutools for PowerPoint
Best Office Productivity Tools
Experience the all-new Kutools for Outlook with 100+ incredible features! Click to download now!
📧 Email Automation: Auto Reply (Available for POP and IMAP) / Schedule Send Emails / Auto CC/BCC by Rules When Sending Email / Auto Forward (Advanced Rules) / Auto Add Greeting / Automatically Split Multi-Recipient Emails into Individual Messages ...
📨 Email Management: Recall Emails / Block Scam Emails by Subjects and Others / Delete Duplicate Emails / Advanced Search / Consolidate Folders ...
📁 Attachments Pro: Batch Save / Batch Detach / Batch Compress / Auto Save / Auto Detach / Auto Compress ...
🌟 Interface Magic: 😊More Pretty and Cool Emojis / Remind you when important emails come / Minimize Outlook Instead of Closing ...
👍 One-click Wonders: Reply All with Attachments / Anti-Phishing Emails / 🕘Show Sender's Time Zone ...
👩🏼🤝👩🏻 Contacts & Calendar: Batch Add Contacts From Selected Emails / Split a Contact Group to Individual Groups / Remove Birthday Reminders ...
Use Kutools in your preferred language – supports English, Spanish, German, French, Chinese, and 40+ others!


🚀 One-Click Download — Get All Office Add-ins
Strongly Recommended: Kutools for Office (5-in-1)
One click to download five installers at once — Kutools for Excel, Outlook, Word, PowerPoint and Office Tab Pro. Click to download now!