How to highlight confidential emails with a receipt request in Outlook?
For some extremely private email messages, the sender may mark the emails as confidential and ask for receipt requests. In this case, we just want to notice these kinds of important emails at the first glance when we browse through loads of emails in the Inbox folder. To do that, we just need to automatically highlight confidential emails with a receipt request so they can stand out. This tutorial will show you how to use conditional formatting to highlight confidential emails with a receipt request.
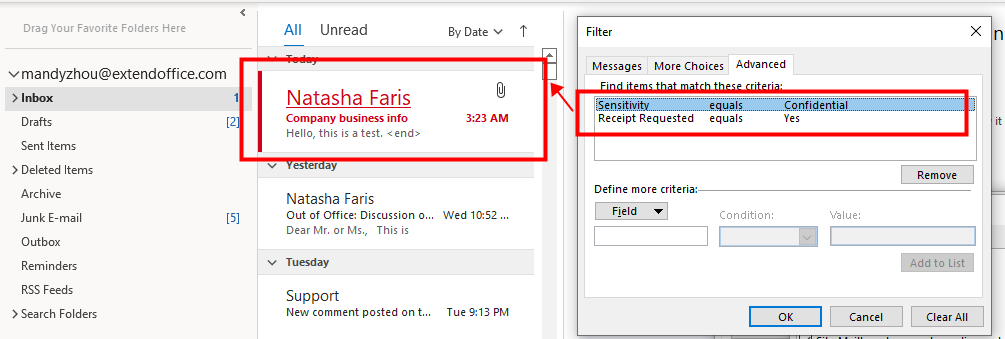
Note: Here takes Microsoft Outlook 365 as an instance, the steps and descriptions may have some differences in other Outlook versions.
Highlight confidential emails with a receipt request
Here we want to highlight email messages that have a receipt request and is considered confidential. To achieve this goal, please do as follows.
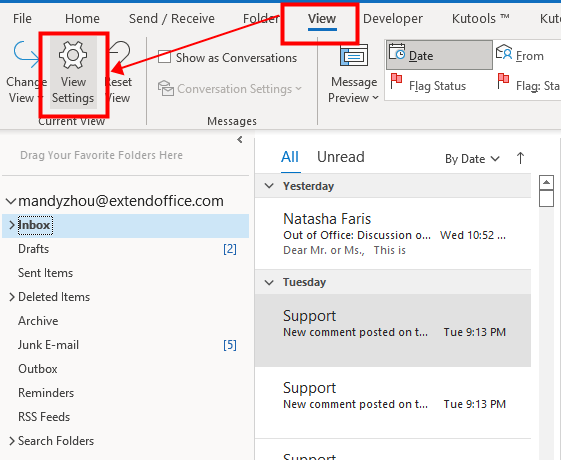
1. Enable Outlook, open the Inbox folder, go to the View tab, then click View Settings.
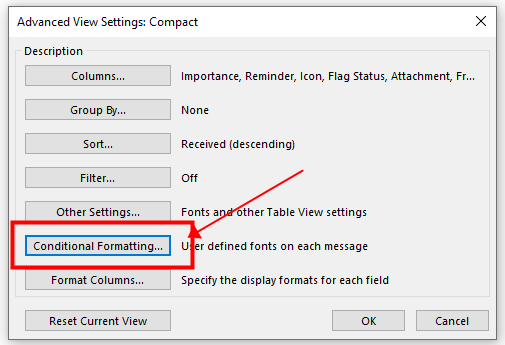
2. The Advanced View Settings: Compact dialog pops up. Click the Conditional Formatting option.
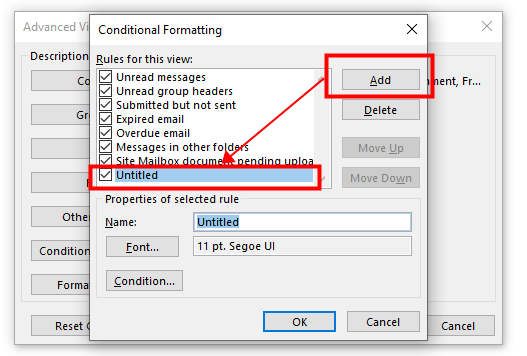
3. Then the Conditional Formatting dialog shows up. Click the Add button. An Untitled rule is created and displayed in the list of Rules for this view.
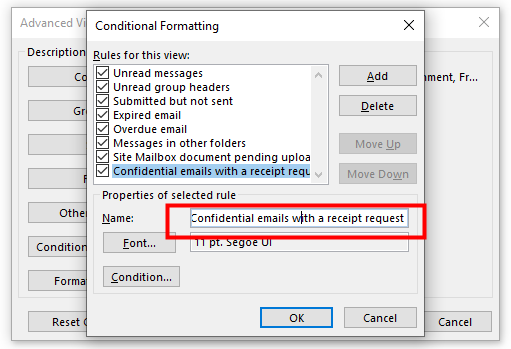
4. To change the rule name as you want, please input a name in the Name textbox. Here I input text “Confidential emails with a receipt request”.
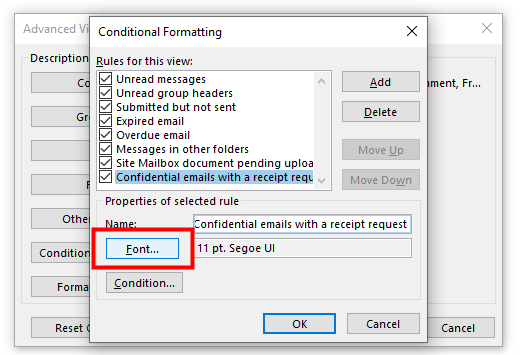
5.Click the Font button to set up the appearance for the highlighted confidential emails with a receipt request.
6. The Font dialog box pops up. Customize the format as you like. Here I set the Size to Bigger, check the Underline checkbox, and choose Red as the Color. Click OK.
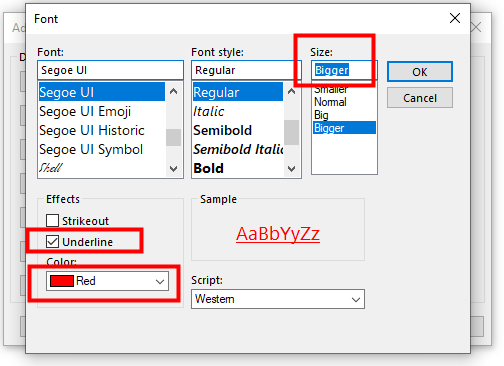
Note: You can see the final appearance in the Sample section.
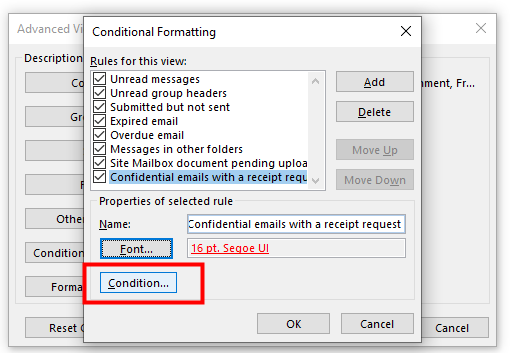
7. Back to the Conditional Formatting dialog. Click the Condition button to set up the condition to trigger the rule.
8. The Filter dialog shows up. Go to the Advanced tab. In the Define more criteria section, click the Field button.
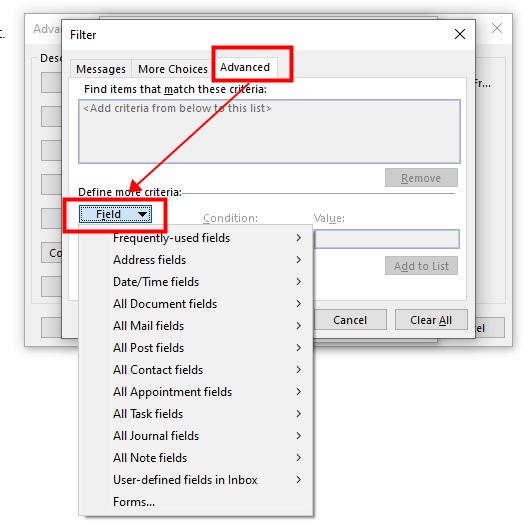
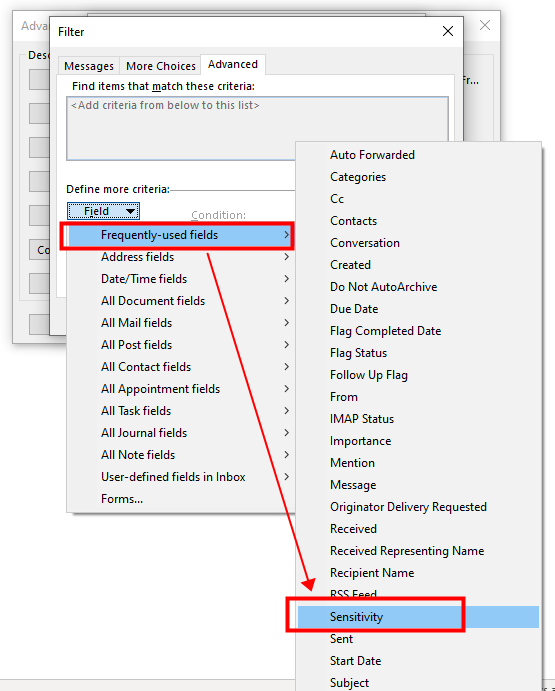
9. Navigate to the Frequently-used fields from the drop-down list and click on it. Then click Sensitivity.
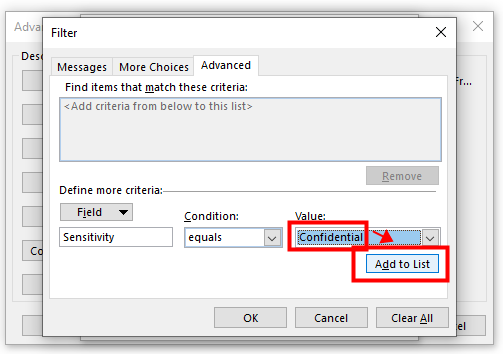
10. It goes back to the Filter dialog box. Set the Sensitivity Value equal to Confidential. And click the Add to List button.
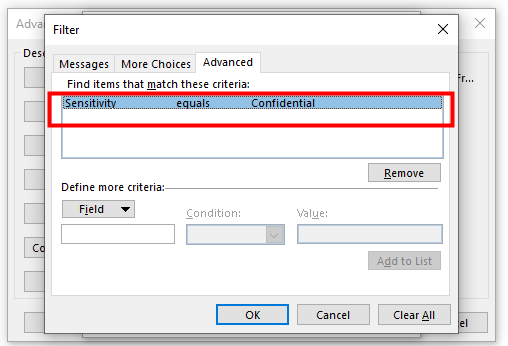
11. In the Find items that match these criteria section, this condition is added and displayed in the list.
12. Continue to click the Field button. Click All Mail fields > Receipt Requested.
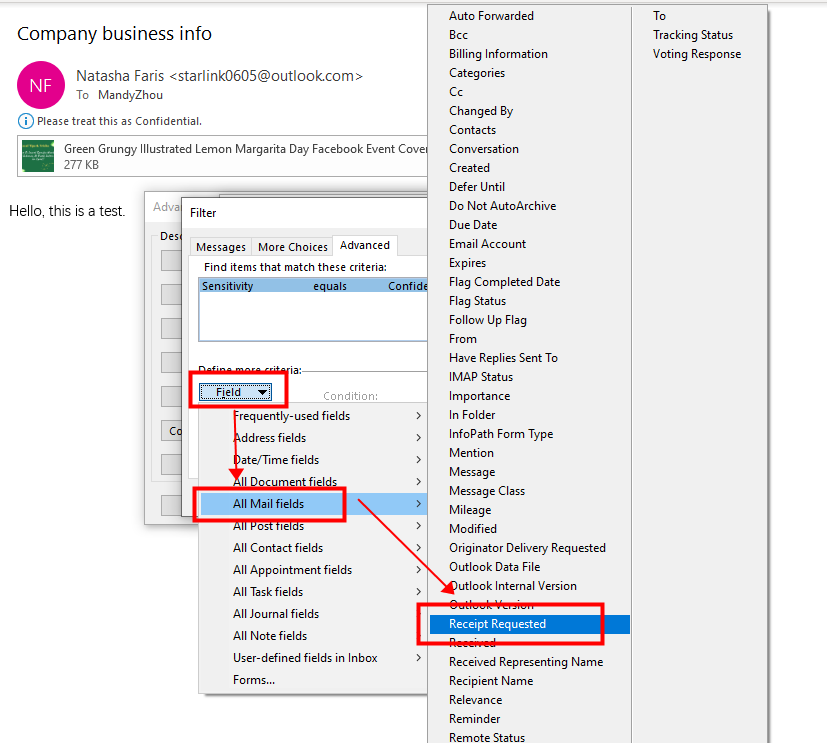
13. Once again, it goes back to the Filter dialog box. Set the Receipt Requested condition Value equal to Yes. And click the Add to List button.
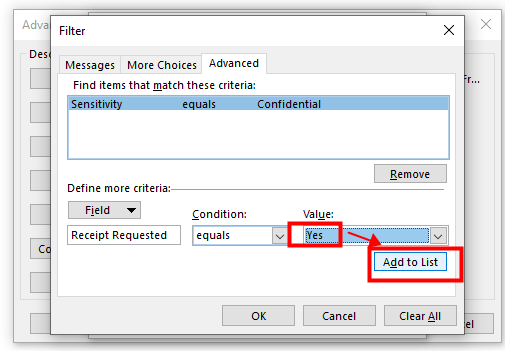
14. Now the two conditions are added and displayed in the list. Click OK.
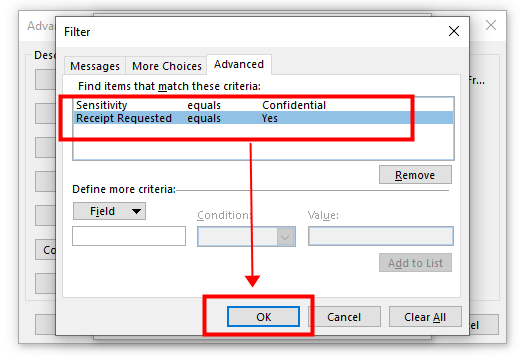
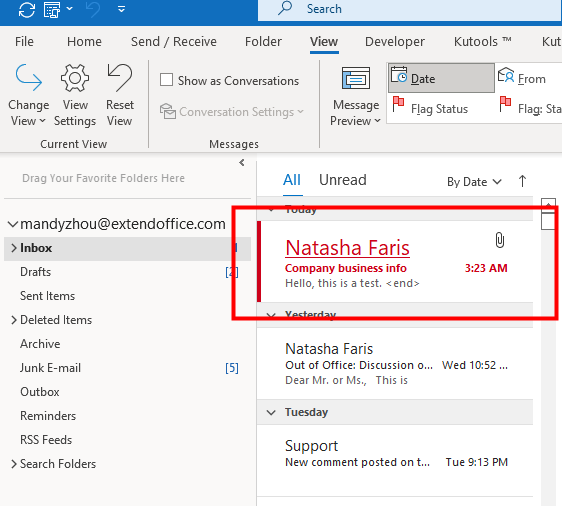
15. Continue to click OK > OK to finish the setting. Now you can see a confidential email with a receipt request is highlighted in the mailing list.
Related articles
How To Highlight Emails From Specific Sender In Outlook?
With this tutorial, you can learn how to highlight emails from specific sender in Outlook.
How To Highlight Emails Sent Only To Me In Outlook?
his tutorial aims to show you how to highlight emails directly sent to you only in Outlook.
How To Color Code Emails By Message Size In Outlook?
This tutorial will introduce how to set up a rule to color code emails based on the message size.
Best Office Productivity Tools
Experience the all-new Kutools for Outlook with 100+ incredible features! Click to download now!
📧 Email Automation: Auto Reply (Available for POP and IMAP) / Schedule Send Emails / Auto CC/BCC by Rules When Sending Email / Auto Forward (Advanced Rules) / Auto Add Greeting / Automatically Split Multi-Recipient Emails into Individual Messages ...
📨 Email Management: Recall Emails / Block Scam Emails by Subjects and Others / Delete Duplicate Emails / Advanced Search / Consolidate Folders ...
📁 Attachments Pro: Batch Save / Batch Detach / Batch Compress / Auto Save / Auto Detach / Auto Compress ...
🌟 Interface Magic: 😊More Pretty and Cool Emojis / Remind you when important emails come / Minimize Outlook Instead of Closing ...
👍 One-click Wonders: Reply All with Attachments / Anti-Phishing Emails / 🕘Show Sender's Time Zone ...
👩🏼🤝👩🏻 Contacts & Calendar: Batch Add Contacts From Selected Emails / Split a Contact Group to Individual Groups / Remove Birthday Reminders ...
Use Kutools in your preferred language – supports English, Spanish, German, French, Chinese, and 40+ others!


🚀 One-Click Download — Get All Office Add-ins
Strongly Recommended: Kutools for Office (5-in-1)
One click to download five installers at once — Kutools for Excel, Outlook, Word, PowerPoint and Office Tab Pro. Click to download now!
- ✅ One-click convenience: Download all five setup packages in a single action.
- 🚀 Ready for any Office task: Install the add-ins you need, when you need them.
- 🧰 Included: Kutools for Excel / Kutools for Outlook / Kutools for Word / Office Tab Pro / Kutools for PowerPoint