Set up out of office auto replies in Outlook (full guide)
In today's digital age, we can access our emails whenever and wherever we want. However, even though we’re always online, there are times when we might not be able to respond to incoming messages right away, such as on holidays or when we're away from the office. That's where the out-of-office auto reply feature becomes invaluable, letting the email senders know that our replies will be delayed. Whether you're using Outlook on "Windows", "Web", "Mac", or even "iOS and Android devices", this guide will help you go in-depth on how to set up out of office auto replies on all of these platforms. Let's get started.
- Set up out of office replies in Outlook on Windows
- Set up out of office replies in Outlook on Mac
- Set up out of office replies in Outlook on the Web
- Set up out of office replies in Outlook for iOS and Android
Set up out of office replies in Outlook on Windows
This section demonstrates three methods to help you set up out of office replies for exchange accounts and all email accounts on Windows.
- Automatic Replies – Outlook built-in function, but only for Exchange accounts.
- Kutools for Excel – Easy to set up and use, available for all email accounts.
- Outlook rules - Many steps and complicated operations, available for all email accounts.
Set up out of office replies with the Automatic Replies feature
If you are using an Exchange account in Outlook, the built-in "Automatic Replies" feature can help you set up out of office replies in Outlook. Please do as follows.
Step 1: Open the Automatic Replies window
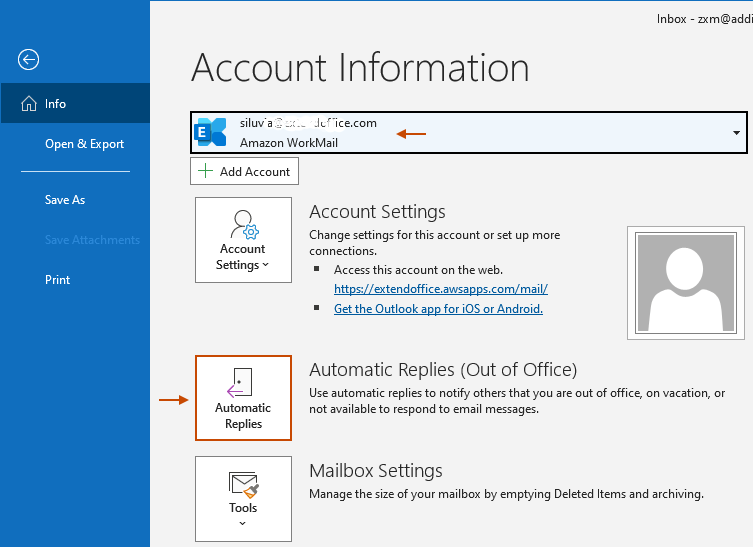
In your Outlook, go to the "File" tab, select the exchange account for which you need to enable auto-reply from the account drop-down list, and then click "Automatic Replies". See screenshot:
Step 2: Enable automatic replies and configure settings
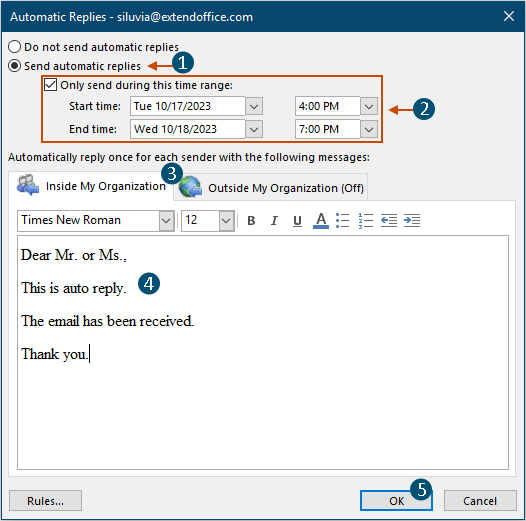
In the opening "Automatic Replies" window, you need to do as follows.
- Select the "Send automatic replies" option to enable this feature.
- To send the automatic replies only within a specified time range, check the "Only send during this time range" checkbox and specify the desired start and end times. Tip: If you don't set a time period, your automatic reply remains on until you turn it off by selecting "Don't send automatic replies".
- If you only want to send automatic replies to the senders inside your organization, stay in the "Inside My Organization" tab.
- Type in the auto-reply message in the textbox.
- Click the "OK" button to save the settings.
- If you want to send automatic replies to the senders outside your organization, click the "Outside My Organization" tab, check the "Auto-reply to people outside my organization" checkbox, choose an option you need, and then type in the auto-reply message.

- If you configure both the "Inside My Organization" and the "Outside My Organization" options, they can be activated simultaneously.
- When someone from inside your organization sends you an email, they'll receive the message you've set up for "Inside My Organization".
- When someone from outside your organization sends you an email, they'll receive the message you've set up for "Outside My Organization".
- Outlook allows you to specify rules for sending auto replies. Click the "Rules" button in the lower left corner of the window to open the "Automatic Reply Rules" dialog box. Click the "Add Rule" button and then specify the criteria for your rule in the "Edit Rule" dialog box.


Result
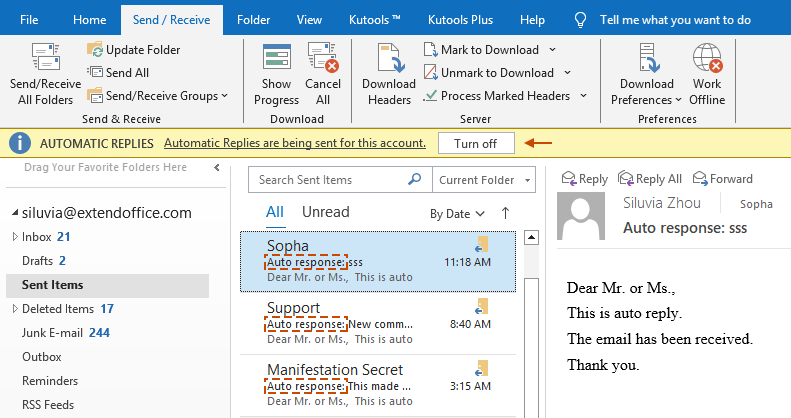
If you set a time period for automatic replies in Step 3, the auto reply will activate at the designated time, and you will then see a yellow information bar showing below the Outlook ribbon. If no time period is specified, the auto reply will activate immediately.
You can go to the "Sent Items" folder to view the auto-reply emails (emails prefixed with "Auto response:").
- If both the "Automatic Replies" feature of an Exchange account and the "auto-reply rule" you've created for other email accounts (like a POP account) are enabled, and an email is received, an incoming email may trigger responses from both the Exchange "Automatic Replies" and the client-side auto-reply rule. The order of response depends on server processing and the client-side rule execution sequence.
- "Automatic Replies" for Exchange: This is a server-side function of Exchange and doesn't require Outlook to be running.
- Auto-replies via created rules: This is usually a client-side function, requiring Outlook to be active and processing incoming emails.
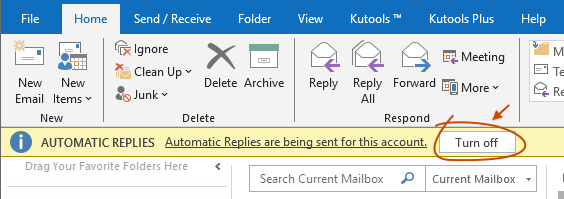
So, if both reply methods are set up, the person sending you an email might receive two auto-reply emails. - To turn off this feature, simply click the "Turn off" button in the information bar.
Set up out of office replies with Kutools for Outlook easily
Given the limitations of the above method, here I would like to recommend you the "Auto Reply" feature of "Kutools for Outlook", which helps you set up out of office replies easily in Outlook, regardless of the email account types. After downloading and installing Kutools for Outlook, you need to do as follows:
Step 1: Configure the Auto Reply settings
Select "Kutools" > "Reply" > "Auto Reply Manager" to open the "Auto Reply" dialog box, and then you need to:
- Check email accounts where you want to enable automatic reply:
The "Check accounts" section lists all email accounts in your Outlook. Select the accounts where you want to enable automatic reply.
- Modify the subject prefix for auto-reply emails:
The default text in the "Subject Prefix" textbox is “Auto response”. This will be the prefix for auto-reply email subjects. You can replace this default text as needed.
- Enter the auto-reply content:
A default template is provided in the dialog box, which you can modify as needed.
- Save the changes: Click the "OK" button.


Step 2: Enable the Auto Reply feature
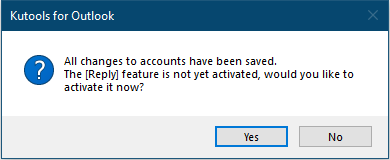
A "Kutools for Outlook" dialog box pops up asking if you want to activate the feature immediately. Click the "Yes" button to enable the feature.
Result
From now on, incoming emails to the checked accounts will trigger automatic replies.
- To use this feature, you should install "Kutools for Outlook" first. Click to download and have a 30-day free trial now.
- To know more about this feature, visit this page: Quickly set up auto reply when out of office in Outlook.
Set up out of office replies by creating Outlook rules
You also can create Outlook rules to set up out of office replies for all email accounts. However, this method requires multiple steps to complete. If you need, follow the steps below.
Step 1: Create an auto-reply template
- In Outlook, create a new email message by clicking "New Email" under the "Home" tab.

- In the "Message" window, enter a subject and message body for your template.

- Click "File" > "Save As".

- In the opening "Save As" dialog box, name the template (by default, the email subject will be used as the template name), select "Outlook Template" from the "Save as type" drop-down list, and then click the "Save" button.
This custom template will be saved in the default personal templates location.

- After saving the template, close the email without saving.


Step 2: Open the Rules and Alerts window
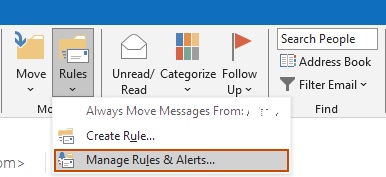
Under the "Home" tab, click "Rules" > "Manage Rules & Alerts" to open the "Rules and Alerts" window.
Step 3: Create an out of office auto-reply rule
In the "Rules and Alerts" window, please do as follows to create an out of office auto-reply rule.
- Under the "Email Rules" tab, specify an email account where you want to apply the auto-reply rule and then click the "New Rule" button.
Tip: If the "Apply changes to this folder" drop-down list does not display in the "Rules and Alerts" window of your Outlook, the rules you created will apply to all email accounts.

- In the first "Rules Wizard", select "Apply rule on messages I receive" in the "Start from a blank rule" section, and then click the "Next" button.

- In the second "Rules Wizard", if you want to automatically reply to every email message you receive, click the "Next" button without checking any conditions. In the pop-up "Microsoft Outlook" dialog box, click the "Yes" button.
Tip: If you only want to automatically reply to certain emails, specify the conditions you need.

- In the third "Rules Wizard", check the reply using a specific template checkbox in the "Step 1" box, and then click the underlined text in the "Step 2" box.

- In the Select a Reply Template dialog box, choose "User Templates in File System" from the "Look In" drop-down list, select the template you created in step 1, and then click the "Open" button.

- When it returns to the third "Rules Wizard", click the "Next" button to continue.

- In the fourth "Rules Wizard", specify exceptions for your rule if necessary. Here I click the "Next" button without checking any exceptions.

- In the last "Rules Wizard", specify a name for this rule in the Step 1 section, keep the "Turn on this rule" box checked in Step 2, and then click the "Finish" button.

- A "Microsoft Outlook" prompt box will then pop up reminding you that the rule will only run when Outlook is running. Click the "OK" button.

- Then it returns to the "Rules and Alerts" window, you can see the created rule listed in the window, click the "OK" button to save the rule.


Result
Now you have created an auto-reply rule. From now on, incoming emails to the specified account or all accounts will trigger this auto-reply rule, and the person who sent you an email will receive an auto-reply email.
- If both the auto-reply rule and the "Automatic Replies" feature of an Exchange account are enabled, an incoming email may trigger both to respond. The order of response depends on server processing and the rule execution order on the client-side.
- "Automatic Replies" for exchange: This is a server-side function of Exchange and doesn't require Outlook to be running.
- Auto-replies via created rules: This is usually a client-side function, requiring Outlook to be active and processing incoming emails.
Typically, the server-side "Automatic Replies" will be faster since it doesn't depend on the Outlook client's activity. But if both reply methods are set up, the person sending you an email might receive two auto-reply emails. - To turn off the auto reply rule, click "Rules" > "Manage Rules & Alerts" on the "Home" tab to open the "Rules and Alerts" window, then uncheck the checkbox in front of the rule and then click "OK" to save the changes.
Set up out of office replies in Outlook on Mac
If you want to set up automatic reply in Outlook for Mac, the method in this section can help. Please do as follows.
Step 1: Accessing the “Out of Office” feature
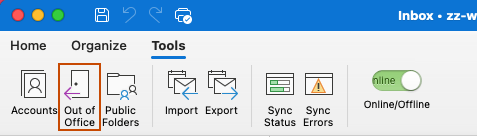
Launch Outlook on Mac, open the email account for which you want to enable the Out of Office feature, then go to the "Tools" tab and select "Out of Office".
Step 2: Configuring the Automatic Replies settings
In the "Autoreply Settings" dialog box, you need to make the following configurations.
- Check the "Send automatic replies for account" “(your account)” checkbox.
- In the "Reply once to each sender with" textbox, enter the body for the automatic reply message.
- It is optional to:
- Set the start and end dates for the automatic reply: Check the "Only send replies during this time period" checkbox and enter the start and end dates and times. After the end date and time, out of office replies will be automatically turned off.
- Reply to people outside your organization: If needed, check the "Also send replies to senders outside my organization" checkbox. Choose either "Only to senders in my Contact list" or "Send to all external senders" and then enter the body for the automatic reply message.
- Click "OK" to save the settings and apply this Automatic Replies feature.


Result
Auto replies have been enabled for certain email accounts in your Outlook for Mac. From now on, incoming emails to this account will trigger automatic replies.
- To view sent auto-reply emails, go to the "Sent" folder for emails with the prefix "Auto response:".
- Contacts within your organization will receive the reply content set in the "Reply once to each sender with" textbox.
- External contacts will receive the reply content set in the "Reply once to each external sender with" textbox.
- The Gmail, Yahoo or other POP or IMAP email account does not currently support this feature.
- To turn off the automatic replies, open the email account with the feature enabled. Click "Tools" > "Out of Office" to open the "Automatic Replies" dialog box. Then, clear the "Send automatic replies for account" “your account” checkbox.


Set up out of office replies in Outlook on the Web
If you are using Outlook on the web and would like to set up out of office replies, the method in this section can do you a favor. Please follow the steps below.
Step 1: Access the “Automatic replies” feature
- On the upper right corner of the page, click the "Settings" button

- In the opening "Settings" window, select "Automatic Replies" in the "Mail" section.


Step 2: Configure the “Automatic replies” settings
- Click the "Turn on automatic replies" toggle to turn on the "Automatic replies" feature.
- Check the "Send replies only during a time period" checkbox and specify the start and end dates and times for the automatic replies. You can ignore this setting if you don’t need.
- In the text edit box, enter the body for the automatic reply message.
- Click the "Save" button.


Result
Now you have enabled Auto replies in Outlook on the web. From now on, incoming emails to this account will trigger automatic replies.
- If you specify start and end dates and times for sending automatic replies, you can choose to minimize interruptions during that period, such as "blocking your calendar", "automatically declining new event invitations", and "canceling or declining your existing meetings".
- If you are using an "Exchange account", the page displayed will be different. You can send automatic reply emails not only to the "senders inside your orgnization", but also to the "senders outside your orgnization".

- If you want to automatically reply to your contacts only, check the "Send replies only to contacts" checkbox.
- To turn off this automatic replies feature in Outlook on the web, follow the above step 2 to get into the "Automatic Replies" window, and then click the "Automatic replies on" toggle.


Set up out of office replies in Outlook for iOS and Android
Many Outlook users are familiar with setting up automatic replies on their desktops, but know little about the mobile program. In the last section of this article, I will walk you through how to set up automatic replies from your iOS or Android devices, ensuring you maintain clear communication no matter where you are. Let’s follow the steps below.
Step 1: Launch Outlook in your iOS or Android device
Step 2: Access the "Automatic replies" feature
- On the upper left corner of the page, click the "Home" button

- Then click the "Settings" button.

- In the "Settings" dialog box and under the "Mail Accounts" section, choose an email account where you want to enable automatic replies. In this case, I choose an "Exchange" account.

- In the "Exchange" page (if you select another account in the previous step, the title of this dialog box will display the domain of the other account), you can see that the "Automatic Replies" feature is turned off. Please click on it.


Step 3: Configure Automatic Replies settings
In the "Automatic Replies" dialog box, you need to configure as follows.
- In the "Automatic Replies" field, toggle the switch on.
- Specify to whom you want to send automatic replies: either "to everyone" or "only to people within your organization". Here I choose "Reply to everyone".
- Enter the reply message in the "Reply to everyone with" textbox.
- Click the check mark
 on the upper right corner of the screen to save the settings.
 Notes:
- In the "Reply during a time period" field, toggle the switch on, then you can set the start and end dates and times for sending your automatic replies.
- In the "Use different replies" field, toggle the switch on, then you can specify different reply messages for the people inside or outside your organization.
- If you select a different type of account instead of an Exchange account, the "Use different replies" field does not appear in the "Automatic Replies" dialog box.
- When you return to the previous dialog box, you can see that the "Automatic Replies" feature has been turned on.

 on the upper right corner of the screen to save the settings.


Result
Now you have enabled Automatic Replies in your Outlook for iOS or Android.
- If you set a time period for automatic replies, the auto reply will activate at the designated time, and you will then see the Automatic Replies bar.
- To turn off "Automatic Replies" in your Outlook for iOS or Android, open the email account that has this feature turned on, and then click the "Turn Off" button in the "Automatic Replies" bar.


In short, being able to set up out-of-office auto-replies in Outlook ensures that the people who contact you know you are away, thus maintaining professional and effective communication. Whether you use Outlook on Windows, Mac, Web, or mobile devices, the flexibility and depth that this feature provides is indispensable. We hope this comprehensive guide will equip you with the knowledge to seamlessly configure these replies on different platforms, ensuring a smooth experience for both you and your email correspondents. For those eager to delve deeper into Outlook's capabilities, our website boasts a wealth of tutorials. Discover more Outlook tips and tricks here.
Best Office Productivity Tools
Experience the all-new Kutools for Outlook with 100+ incredible features! Click to download now!
📧 Email Automation: Auto Reply (Available for POP and IMAP) / Schedule Send Emails / Auto CC/BCC by Rules When Sending Email / Auto Forward (Advanced Rules) / Auto Add Greeting / Automatically Split Multi-Recipient Emails into Individual Messages ...
📨 Email Management: Recall Emails / Block Scam Emails by Subjects and Others / Delete Duplicate Emails / Advanced Search / Consolidate Folders ...
📁 Attachments Pro: Batch Save / Batch Detach / Batch Compress / Auto Save / Auto Detach / Auto Compress ...
🌟 Interface Magic: 😊More Pretty and Cool Emojis / Remind you when important emails come / Minimize Outlook Instead of Closing ...
👍 One-click Wonders: Reply All with Attachments / Anti-Phishing Emails / 🕘Show Sender's Time Zone ...
👩🏼🤝👩🏻 Contacts & Calendar: Batch Add Contacts From Selected Emails / Split a Contact Group to Individual Groups / Remove Birthday Reminders ...
Use Kutools in your preferred language – supports English, Spanish, German, French, Chinese, and 40+ others!


🚀 One-Click Download — Get All Office Add-ins
Strongly Recommended: Kutools for Office (5-in-1)
One click to download five installers at once — Kutools for Excel, Outlook, Word, PowerPoint and Office Tab Pro. Click to download now!
- ✅ One-click convenience: Download all five setup packages in a single action.
- 🚀 Ready for any Office task: Install the add-ins you need, when you need them.
- 🧰 Included: Kutools for Excel / Kutools for Outlook / Kutools for Word / Office Tab Pro / Kutools for PowerPoint
Table of contents
- Video
- Send out of office replies on Windows
- Using Automatic Replies
- For Exchange accounts - Using Kutools for Outlook easily
- For all accounts, easy and flexible - Using rules
- For all accounts, complex - Send out of office replies on Mac
- Send out of office replies on Web
- Send out of office replies on mobile
- Related Articles
- The Best Office Productivity Tools
- Comments