How to create a QR code in a Word document?
Creating QR codes in Microsoft Word can be useful for embedding links, personal info, or scannable content directly in your documents. This guide introduces two methods to generate QR codes in Word and shows how to batch-generate them using Mail Merge.
Video: Create a QR code in Microsoft Word
Create a QR code in Word
This section introduces two simple methods for creating QR codes in Microsoft Word, allowing you to effortlessly insert QR codes into your documents.
Create QR code in a Word by using Field codes
Microsoft Word allows you to insert QR codes directly using field codes. Follow the steps below to create a QR code:
- Click where you want to insert the QR code.
- Press Ctrl + F9 to insert curly brackets {}. (It's necessary to use this key combination because manually typing curly brackets will not work correctly.)

- Within the curly brackets, type the following field code:
DISPLAYBARCODE "http://www.extendoffice.com" QR \q 3 \s 100 \u Explanation of parameters:
- http://www.extendoffice.com: The URL or data to encode.
- QR: Specifies that the barcode is a QR code.
- \q 3: Sets the error correction level to 3 (high).
- \s 100: Defines the size of the QR code as 100x100 pixels.
- \u: Ensures the data is treated as Unicode.
- After typing the field code, right-click the field and choose "Toggle Field Codes". The QR code will be displayed instantly.


Create QR code in a Word by using Kutools for Word
Enhance your Microsoft Word documents with the advanced capabilities of Kutools for Word! Not only does this powerful add-in allow you to effortlessly insert QR codes into your documents, but it also offers the unique ability to customize these codes by adding logos directly within them. Whether you're aiming to brand your QR codes for business purposes or add a personal touch for private documents, Kutools makes it simple. Plus, you can conveniently save these QR codes as images, making it easy to use them across various platforms and media.
Kutools for Word
Kutools for Word helps you handle everyday document tasks faster with practical tools built right into Microsoft Word—no coding, no complex setup.
- AI writing, polishing, translation, and summarization
- Batch find and replace across documents
- Merge and split Word documents easily
- Batch Word ↔ PDF conversion
- Click where you want to insert the QR code, then go to "Kutools" > "Barcode" > "QR Code".

- In the "Insert QR Code" dialog box, do the following:
- Select the QR code type from the "Type" dropdown list and set the size.
- Enter the data you want to encode into the "QR Code Data" box.
- If you want to insert a logo, check "Generate Logo QR code" and select your desired logo.

- Click "Insert". The QR code will be inserted into your document.


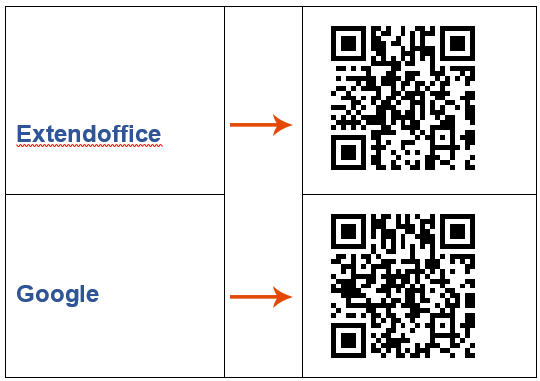
Create multiple QR codes in Word with Mail Merge feature
Creating multiple QR codes in a Microsoft Word document can streamline information sharing and enhance the functionality of business documents, event flyers, and more. By leveraging Word's Mail Merge feature along with QR code generation, you can efficiently produce personalized QR codes in bulk. This guide provides a detailed overview of how to use the Mail Merge feature in Word to create multiple QR codes simultaneously.
Step 1: Prepare the data you need
- Create the data in an Excel workbook that you want to insert QR codes for in the Word document. Once done, save and close the Excel file.
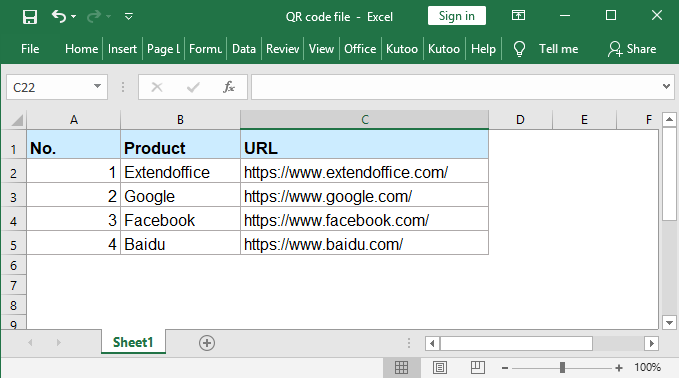
Note: When preparing your Excel data for Mail Merge, make sure the column that contains the QR code data (such as URLs, serial numbers, or contact info) has a clear and simple header, like "URL" or "Code". Avoid special characters or spaces in the header name to prevent merge errors in Word.
- Create a basic layout in the Word document.


Step 2: Apply the Mail Merge feature in Word
- Open the Word document where you want to insert the QR code. Then go to "Mailings" > "Select Recipients" > "Use an Existing List".

- In the Select Data Source window, select the Excel file that contains the information you want to use.

- Click "Open", then select the sheet that contains your data in the Select Table dialog box and click "OK".

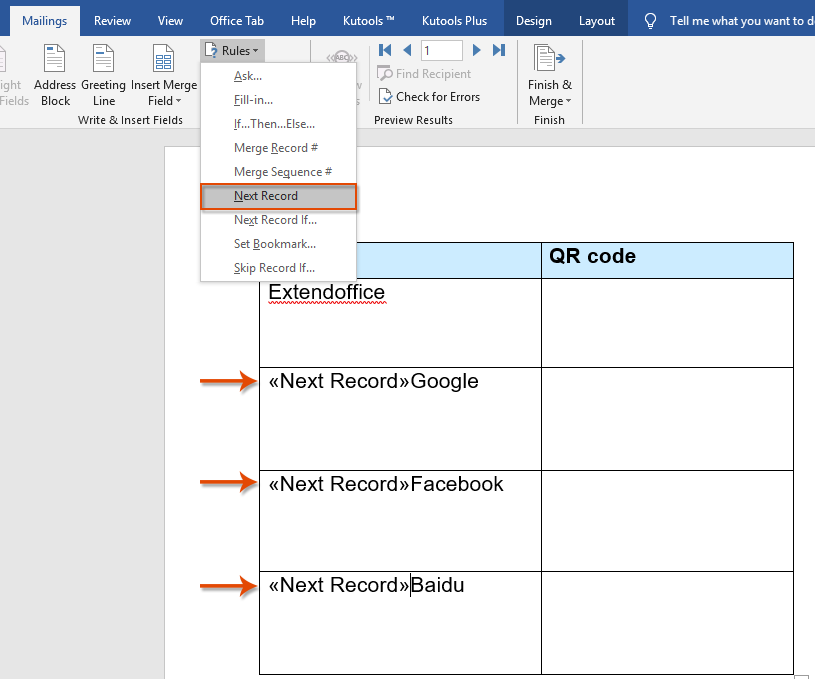
- In the Word document, go to "Rules" > "Next Record" under the "Mailings" tab to insert a next record rule before each label.
- Click where you want to insert the QR code. Press Ctrl + F9 to insert a pair of field braces, and type this between them: MERGEBARCODE URL QR.


Note: "URL" is the column header from the Excel file that you want to create the QR codes based on. You should change it to your actual column name.
- Right-click this field code and select "Update Field" from the context menu.

- Repeat steps 6 and 7 to insert all the necessary field codes.

- Click "Preview Results" under the "Mailings" tab to display all field codes as QR codes.


Tip: You can also change the size and color of the QR codes. Please follow these steps:
- Right-click the QR code and choose "Edit Barcode".

- In the "Select a Field and a Barcode Type" dialog box, click the "Advanced" button. Then, in the "Advanced option" dialog box, specify the size and color you need.

- Click "OK" > "OK" to close the dialogs. The QR code will be formatted as needed.


Related Articles:
- How to insert barcode easily in word?
- Many people may be perplexed when they need to insert barcode in Microsoft Word. This tutorial will introduce you two methods to insert barcode.
- How to insert text to the margin of the Word document?
- As we all know, we can only type the text in the edit area of the Word document. But, sometimes, you may want to insert some text on the margin of the Word document as following screenshot shown. How could you insert text to the margin of the Word quickly and easily?
- How to insert table of contents quickly in a Word document?
- Creating a table of contents in a long word document may help you to quickly navigate to the part of the content as you need. This article, I will talk about how to insert table of contents quickly and easily in a Word file.
Best Office Productivity Tools
Kutools for Word - Elevate Your Word Experience with Over 100 Remarkable Features!
🤖 Kutools AI Features: AI Assistant / Real-Time Assistant / Super Polish (Preserve Format) / Super Translate (Preserve Format) / AI Redaction / AI Proofread...
📘 Document Mastery: Split Pages / Merge Documents / Export Selection in Various Formats (PDF/TXT/DOC/HTML...) / Batch Convert to PDF...
✏ Contents Editing: Batch Find and Replace across Multiple Files / Resize All Pictures / Transpose Table Rows and Columns / Convert Table to Text...
🧹 Effortless Clean: Sweap away Extra Spaces / Section Breaks / Text Boxes / Hyperlinks / For more removing tools, head to the Remove group...
➕ Creative Inserts: Insert Thousand Separators / Check Boxes / Radio Buttons / QR Code / Barcode / Multiple Pictures / Discover more in the Insert group...
🔍 Precision Selections: Pinpoint Specific Pages / Tables / Shapes / Heading Paragraphs / Enhance navigation with more Select features...
⭐ Star Enhancements: Navigate to Any Location / Auto-Insert Repetitive Text / Toggle Between Document Windows / 11 Conversion Tools...
🌍 Supports 40+ Languages: Use Kutools in your preferred language – supports English, Spanish, German, French, Chinese, and 40+ others!

Office Tab - Brings Tabbed interface to Office, Make Your Work Much Easier
- Enable tabbed editing and reading in Word, Excel, PowerPoint, Publisher, Access, Visio and Project.
- Open and create multiple documents in new tabs of the same window, rather than in new windows.
- Increases your productivity by 50%, and reduces hundreds of mouse clicks for you every day!
✨ Kutools for Office – One Installation, Five Powerful Tools!
Includes Office Tab Pro · Kutools for Excel · Kutools for Outlook · Kutools for Word · Kutools for PowerPoint
📦 Get all 5 tools in one suite | 🔗 Seamless integration with Microsoft Office | ⚡ Save time and boost productivity instantly
Best Office Productivity Tools
Kutools for Word - 100+ Tools for Word
- 🤖 Kutools AI Features: AI Assistant / Real-Time Assistant / Super Polish / Super Translate / AI Redaction / AI Proofread
- 📘 Document Mastery: Split Pages / Merge Documents / Batch Convert to PDF
- ✏ Contents Editing: Batch Find and Replace / Resize All Pictures
- 🧹 Effortless Clean: Remove Extra Spaces / Remove Section Breaks
- ➕ Creative Inserts: Insert Thousand Separators / Insert Check Boxes / Create QR Codes
- 🌍 Supports 40+ Languages: Kutools speaks your language – 40+ languages supported!