Insert Emoji in Microsoft Word: A Comprehensive Guide
Emojis have become an integral part of digital communication, adding emotional nuance and clarity to text in a fun and visually appealing way. In Microsoft Word, integrating emojis can enhance your documents, whether you’re adding flair to your content or conveying emotions more effectively. This comprehensive guide will walk you through various methods to insert emojis into your Word documents across different platforms and versions.

- Using the Emoji pane(available in Windows 10 or 11)
- Using the Emoji Keyboard add-in(available in Word 2013 service pack 1 or later versions)
- Using the built-in Icons(Available for Office 365, Word 2019 or later versions on Windows)
- Using Kutools for Word(Available for all Word versions on Windows)
Insert Emoji in Word on Windows
For Windows users, Microsoft Word provides multiple convenient methods to insert emojis into your documents. Depending on your version of Windows and Word, you can choose from the following methods to add that perfect expressive touch to your text. Here's how to use each method effectively to enhance your documents with emojis.
Using the Emoji pane in Windows 10 or 11
Emojis can be easily inserted into your Word documents using the Emoji Pane in Windows 10 and 11. This feature offers a user-friendly interface for selecting and inserting emojis directly into your document. This section will show you how to use this Emoji pane.
- Place the cursor in the Word document where you want the emoji to appear.
- Use one of the following shortcuts to open the Emoji Pane.
- For Windows 10 or 11:
Press Windows + . (period) or Windows + ; (semicolon)
- For Mac system:
Press Control + Command + Space

- For Windows 10 or 11:
- In the Emoji Pane, there are different emoji groups. Clicking on any emoji will insert it into the document where the cursor is located.


- Search for the emoji you wantStart typing words directly when the pane is open, and it will show emojis that correspond to the text you enter. For example, typing "Party" will show various emojis related to parties. Then click it to insert it into the document.

- Adjust the size of the inserted emojiAdjusting the size of an emoji in Microsoft Word is like resizing any text character. Just select the emojis you have inserted into your document, go to the Home tab, and In the Font group, you can either choose a preset size from the Font size drop-down list or type a specific number into the box to set a custom size.


Using the Emoji Keyboard add-in
For users with Word 2013 Service Pack 1 or later, the Emoji Keyboard add-in provides an extensive collection of emojis. This section will show you how to use the Emoji Keyboard add-in to insert emojis in Word document.
Step 1: Install the Emoji Keyboard add-in on Word
- Go to Insert > Add-ins > Get Add-ins.
 Note: If you don’t see the Get Add-ins command under the Insert tab in the ribbon, you will need to add it manually. Below are the steps to add this command to the Quick Access Toolbar:
- Click the Customize Quick Access Toolbar drop-down arrow and select More Commands from the menu.

- In the Word Options window:
- Select Commands Not in the Ribbon from the Choose command from drop-down list.
- Find and select Get Add-ins in the left commands list.
- Click the Add button (the Get Add-ins option will be added to the right pane).
- Click OK to save the changes. See screenshot:

- The Get Add-ins command is now added to the Quick Access Toolbar. You can click on it to open the Office Add-ins store.

- Click the Customize Quick Access Toolbar drop-down arrow and select More Commands from the menu.
- In the Office Add-ins store:
- Type "emoji keyboard" in the search box and press Enter.
- Once the Emoji Keyboard add-in appears, click the Add button to install it.

- In the following prompt box, click Continue.


Once installed, the Emoji Keyboard add-in will be added to the ribbon under the Insert tab. And the Emoji Keyboard pane will automatically open on the right side of your document.

Step 2: Use emoji on the Emoji Keyboard
- Place the cursor in the Word document where you want the emoji to appear.
- Click on the emoji to insert it into the document where the cursor is located.
- Browse the emoji you want.
The Emoji Keyboard pane provides different emoji categories. You can choose the emoji you need under a certain category.

- Search for the emoji you want.
Typing words in the Search box shows emojis that correspond to the text you entered. For example, typing "sad" will show various emojis related to sad face. Then click on an emoji you need to insert it into the document.

- Browse the emoji you want.


- The Skin Tone options at the bottom of the pane allow you to adjust the skin tone of emojis that support different skin colors.
 If clicking on the skin tone options at the bottom of the Emoji Keyboard does not have any effect, it could be due to several reasons:
- Compatibility Issues: The feature might not be fully compatible with your version of Word or Windows.
- Bug in the Add-in: There could be a glitch or bug within the add-in that is preventing the skin tone changes from applying.
- Limited Functionality: The add-in might not support changing skin tones for all types of emojis, or the feature could be malfunctioning.
- At the bottom of the pane, there are TEXT and different size options, each serving different purposes.

- TEXT: Selecting TEXT will insert the emoji as a plain text character. This is useful when you want the emoji to align with the rest of your text formatting and behave like any textual character, including adapting to text color and size changes.
- Different sizes: Selecting a size will insert the emoji as an image. This allows the emoji to maintain a distinct visual appearance, independent of the text properties. Inserting emojis as images is beneficial when you need them to stand out or maintain consistency regardless of the text formatting surrounding them.


Using the built-in Icons to insert vector emojis
Microsoft 365 subscribers can also use built-in icons as emojis in their documents, offering another layer of customization. Please do as follows to use the built-in icons as emojis in Word.
- Place the cursor in the Word document where you want the emoji to appear.
- Go to the Insert tab and select Icons in the Illustrations group.

- Wait for a few seconds while the icon loads and then a Stock Images window will pop up. You need to do as follows:
- In the Icons menu, click on the left and right arrows to navigate through the different icon categories.
- Select an icon category. Here I select the Faces category.
- Select one or more face icons as you need.
- Click the Insert button.


Result
The selected faces are then added to the document.

- Higher Quality and Scalability: Emojis inserted via the Icons feature are vector graphics, which means they maintain high quality regardless of scaling. You can resize them without losing clarity, which is ideal for professional documents where presentation quality is crucial.
- Greater Customization: Icons can be formatted like any other graphic in Word. You can change their color, apply effects, and rotate them, providing flexibility that is not available with standard emojis from the Emoji Pane.

- Consistent Style Across Devices: Since the emojis are inserted as graphics, they will look the same on any device or platform that the Word document is opened on, regardless of the device's emoji support.

Using Kutools for Word to insert emojis
While Microsoft Word’s built-in emoji options are limited and often require keyboard shortcuts, Kutools for Word provides a much faster and more intuitive way to insert emojis directly into your document.
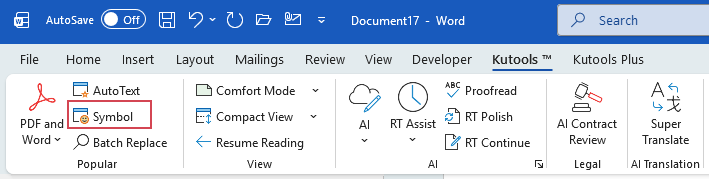
- Once you have Kutools for Word installed, go to the Kutools tab and click Symbol, see screenshot:
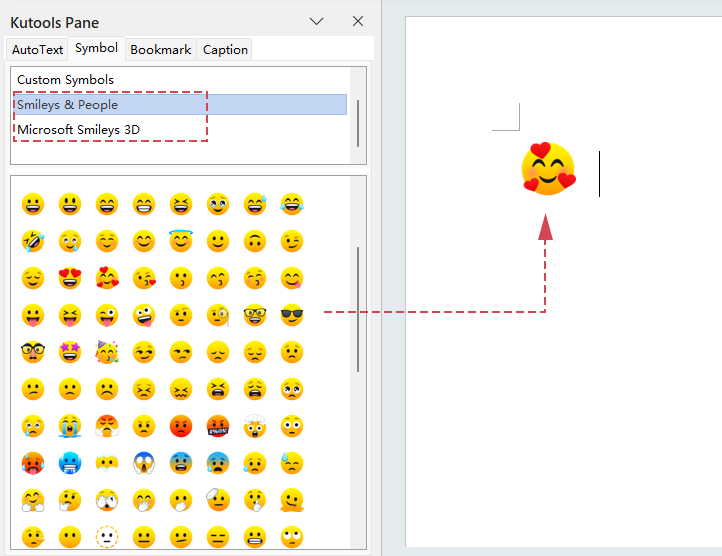
- Then, a Kutools Pane is displayed at the left side of the Word document. In the Symbol tab. select an emoji category such as: Smileys & People or Microsoft Smileys 3D.
- Place the cursor where you want the emoji, then click an emoji in the Kutools Pane to insert it instantly.


Insert Emoji in Word on the Web
Using Word on the Web comes with its own set of emoji tools, accessible directly within your web browser. The following steps demonstrate how to insert emoji in Word on the Web.
- Log in to your Microsoft Word account.
Tip: Accessing Word through the web requires a Microsoft 365 subscription or a free Microsoft account.
- Once logged in, navigate to the Word icon, and open a document Online (you can create a new blank document or open an existing one).

- In the document, go to the Insert tab, click the Emoji icon, and then choose the emoji to insert into your document.


- If you need more emojis, click on More Emojis in the drop-down menu to access a wider range of categories and emojis.

- Adjusting the size of an emoji in Microsoft Word is like resizing any text character.

Emojis are not just for informal chats; they can also be effective in professional documents to attract attention or convey messages succinctly. Whether using Windows or the web, Microsoft Word accommodates various methods to incorporate these expressive symbols, enhancing your document's appeal and communicative power. With tools like Kutools, you can streamline your workflow by keeping your most-used emojis at hand, ready to enhance any document at a moment's notice. For those eager to delve deeper into Word's capabilities, our website boasts a wealth of tutorials. Discover more Word tips and tricks here.
Best Office Productivity Tools
Kutools for Word - Elevate Your Word Experience
🤖 Kutools AI Features: AI Assistant / Real-Time Assistant / Super Polish (Preserve Format) / Super Translate (Preserve Format) / AI Redaction / AI Proofread...
📘 Document Mastery: Split Pages / Merge Documents / Export Selection in Various Formats (PDF/TXT/DOC/HTML...) / Batch Convert to PDF...
✏ Contents Editing: Batch Find and Replace across Multiple Files / Resize All Pictures / Transpose Table Rows and Columns / Convert Table to Text...
🧹 Effortless Clean: Sweap away Extra Spaces / Section Breaks / Text Boxes / Hyperlinks / For more removing tools, head to the Remove group...
➕ Creative Inserts: Insert Thousand Separators / Check Boxes / Radio Buttons / QR Code / Barcode / Multiple Pictures / Discover more in the Insert group...
🔍 Precision Selections: Pinpoint Specific Pages / Tables / Shapes / Heading Paragraphs / Enhance navigation with more Select features...
⭐ Star Enhancements: Navigate to Any Location / Auto-Insert Repetitive Text / Toggle Between Document Windows / 11 Conversion Tools...
🌍 Supports 40+ Languages: Use Kutools in your preferred language – supports English, Spanish, German, French, Chinese, and 40+ others!

Office Tab - Tabs for Office, Power for You
- Enable tabbed editing and reading in Word, Excel, PowerPoint, Publisher, Access, Visio and Project.
- Open and create multiple documents in new tabs of the same window, rather than in new windows.
- Increases your productivity by 50%, and reduces hundreds of mouse clicks for you every day!

✨ Kutools for Office – One Installation, Five Powerful Tools!
Includes Office Tab Pro · Kutools for Excel · Kutools for Outlook · Kutools for Word · Kutools for PowerPoint
📦 Get all 5 tools in one suite | 🔗 Seamless integration with Microsoft Office | ⚡ Save time and boost productivity instantly
Best Office Productivity Tools
Kutools for Word - 100+ Tools for Word
- 🤖 Kutools AI Features: AI Assistant / Real-Time Assistant / Super Polish / Super Translate / AI Redaction / AI Proofread
- 📘 Document Mastery: Split Pages / Merge Documents / Batch Convert to PDF
- ✏ Contents Editing: Batch Find and Replace / Resize All Pictures
- 🧹 Effortless Clean: Remove Extra Spaces / Remove Section Breaks
- ➕ Creative Inserts: Insert Thousand Separators / Insert Check Boxes / Create QR Codes
- 🌍 Supports 40+ Languages: Kutools speaks your language – 40+ languages supported!
Table of contents
- Video
- Insert Emoji in Word on Windows
- Using the Emoji pane
- Using the Emoji Keyboard add-in
- Using the built-in Icons
- Using Kutools for Word
- Insert Emoji in Word on the Web
- The Best Office Productivity Tools
Kutools for Word
Brings 100+ advanced features to Word
- ⬇️ Free Download
- 🛒 Purchase Now
- 📘 Feature Tutorials
- 🎁 60-Day Free Trial