How to Add Fonts to Word (Windows & Mac)
Fonts play a crucial role in enhancing the visual appeal and readability of documents. While Microsoft Word comes preloaded with a variety of fonts, sometimes you may need to add new ones to suit your specific needs or preferences. Whether you're using Windows or Mac, the process of adding fonts to Word is relatively straightforward. In this guide, we'll walk you through the steps for both operating systems.
Download the Font Files
To add a font to Microsoft Word, start by obtaining the font files. Fonts can be downloaded from various online sources, some of which provide free fonts for both personal and commercial use. Below, we've assembled a list of some of the most popular font sites offering a diverse selection of fonts:
Note: Before you download a font, please make sure that you trust the source.
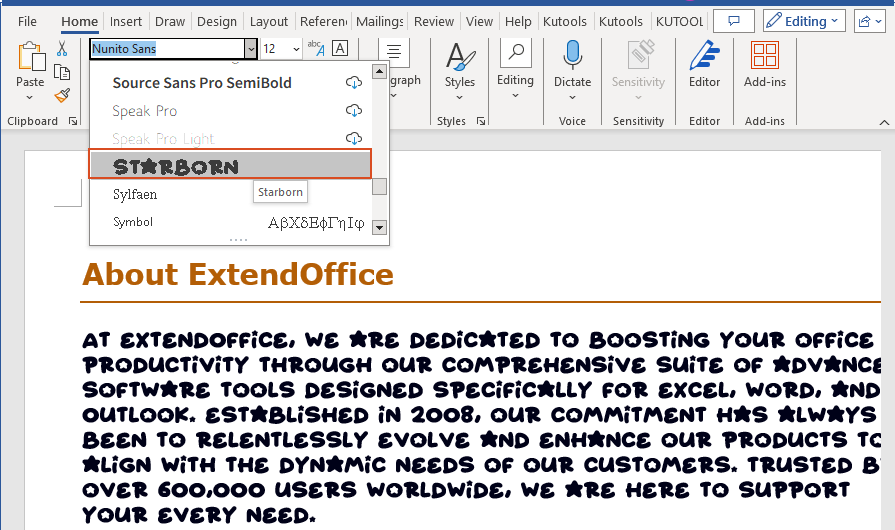
Step 1: Download the font file you want
Select a font size that suits your requirements best from these sites above. Once you've found the font you want to use, download the font file to your computer.
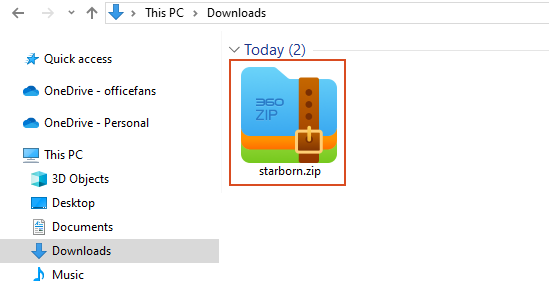
Step 2: Extract the font file if necessary
It’s very common that the downloaded font file comes as a ZIP file, you have to extract it. Unzip it by right clicking the .zip folder and then clicking Extract.
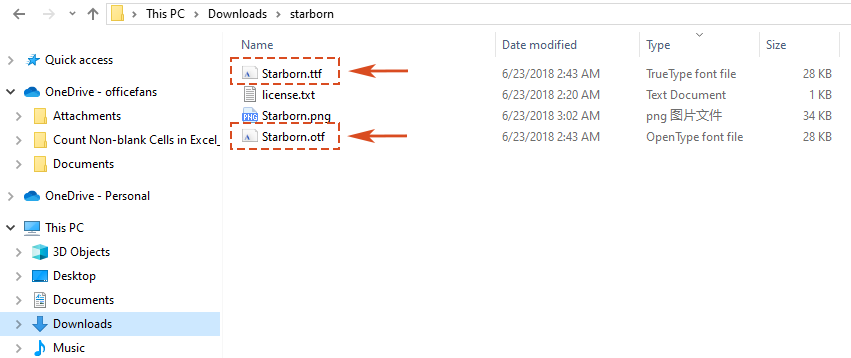
Now you'll see the available TrueType (file extension .ttf) and OpenType (.otf) font files:
Now we are ready to add the downloaded font to Word!
🌟 AI Assistant for Word: Rewrite, Compose, and Summarize 🌟
Save time and effort with Kutools for Word's AI Assistant feature! 🚀


📊 Kutools for Word: Chosen by over 18,000 users. Enjoy a full-featured FREE trial with no credit card required! 🚀
Install Fonts to Word on Windows
Windows offers a couple of methods for adding fonts to Microsoft Word.
Note: Before adding a font to Microsoft Word, you have to first download the font. And if it’s a zip file, you’ll have to extract it.
Method 1: Right-click to add fonts
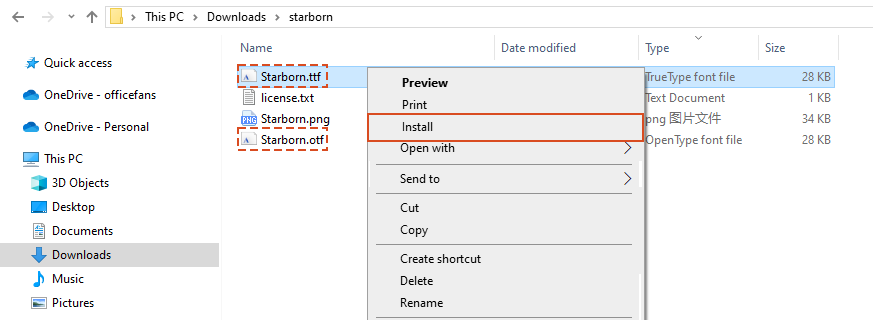
Step 1: Locate the Font File
After downloading the font file, navigate to its location on your computer in File explore.
Step 2: Right-click on the Font File and select Install
Once you've found the font file in .ttf format or .otf format, right-click on it to reveal a contextual menu. From the menu, choose Install to initiate the font installation process.
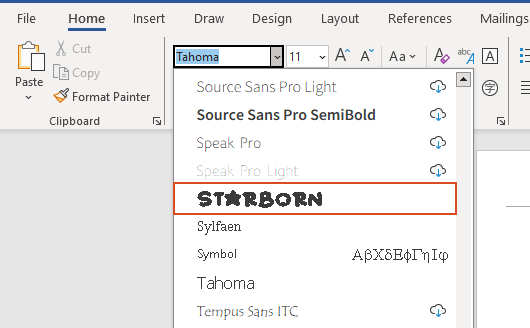
Step 3: Verify Installation
Open Microsoft Word. The new font is now installed on your Windows device and will appear in the fonts list in Word, as well as other apps such as Excel and PowerPoint.
Method 2: Drag and Drop to Add Fonts
Step 1: Locate the Font File
Like the first method, after downloading the font file in, navigate to its location on your computer in File explore.
Step 2: Right-click on the Font File and select Install
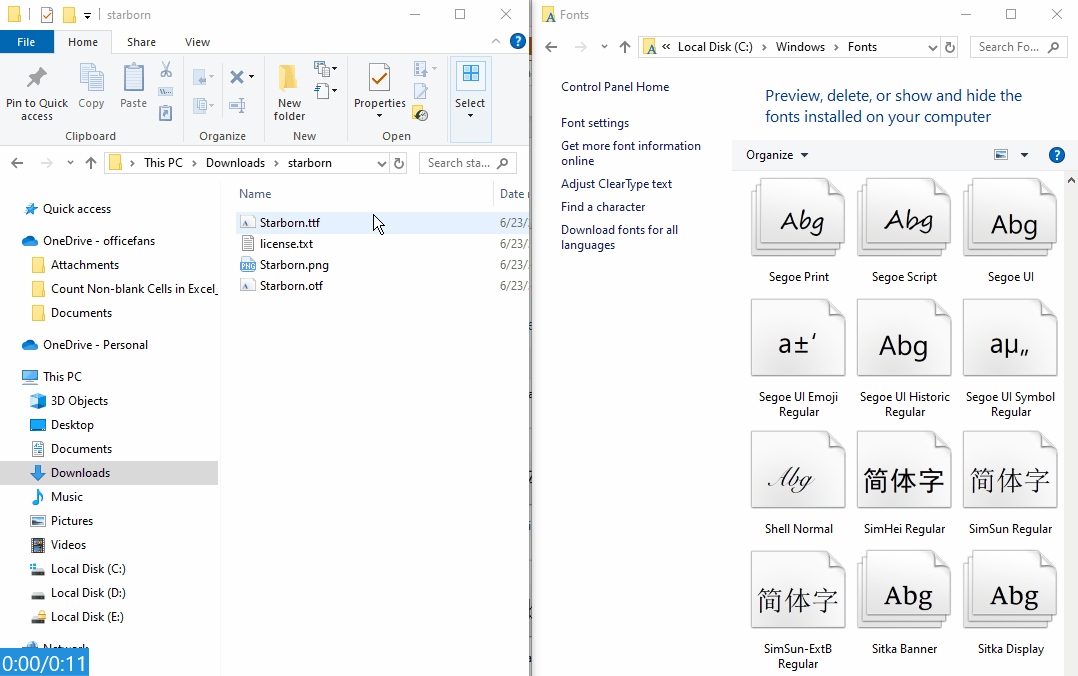
1. All fonts are stored in the C:\Windows\Fonts folder. Go to the C:\Windows\Fonts folder in File explore.
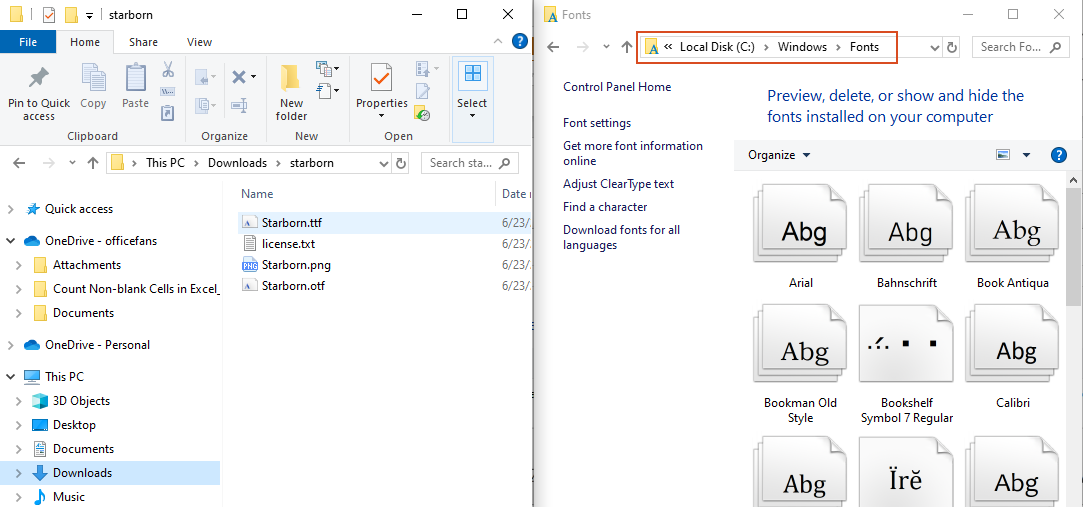
2. Drag the font file in .ttf format or .otf format from its location and drop it into the Fonts folder. Then the font will be automatically installed.
Step 3: Verify Installation
Open Microsoft Word. The new font is now installed on your Windows device and will appear in the fonts list in Word, as well as other apps such as Excel and PowerPoint.
Note:
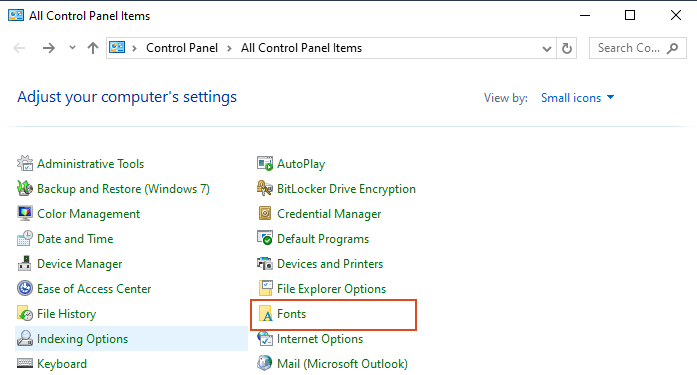
You can also see your installed fonts via the Control Panel. Go to the Control Panel and click on the Fonts folder.
Install Fonts to Word on Mac
Adding fonts to Microsoft Word on a Mac is also a straightforward process.
Note: Before adding a font to Microsoft Word, you have to first download the font. And if it’s a zip file, you’ll have to extract it.
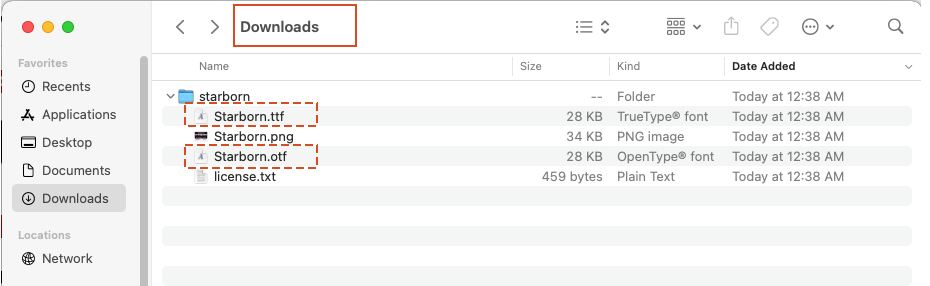
Step 1: Locate the Font File
After downloading the font file, locate the downloaded font file, typically found in the Downloads folder.
Step 2: Double-click on the Font File and click Install
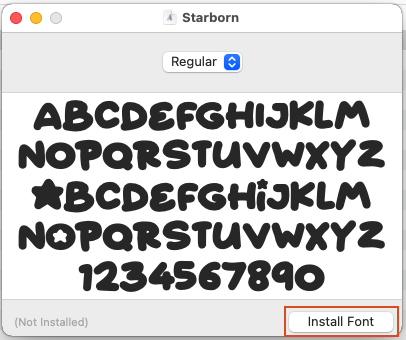
1. Once you've found the font file in .ttf format, , double-clicking the font file will open it in Font Book, the default font management tool on macOS.
2. In Font Book, click the Install Font button to install the font on your system.
Step 3: Verify Installation
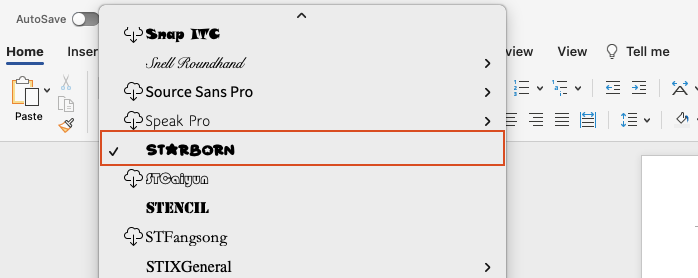
Launch Microsoft Word. Your new fonts will appear in the fonts list in Word.
By following these simple steps, you can easily expand your font library and customize your documents in Microsoft Word to suit your style and needs. Whether you're on Windows or Mac, adding fonts to Word is a quick and hassle-free process that can greatly enhance the visual appeal of your documents. For more Word tips and tricks, please click here to access our extensive collection of hundreds of tutorials.
Related articles
How to change the font and font size in all text boxes in Word document?
This article is talking about changing the font and font size in text boxes in current document or documents in a specified folder. Please try the VBA method in the article.
How to change font style of all equations in word?
This tutorial will introduce two methods to apply the same formatting (font style or font size) to all equations in Word.
How to change the font size of comment balloon in Word document?
As below screenshot shown, if you want to enlarge the font size of comment balloon in Word document, what can you do? This article will show you two methods to solve this problem.
Best Office Productivity Tools
Kutools for Word - Elevate Your Word Experience
🤖 Kutools AI Features: AI Assistant / Real-Time Assistant / Super Polish (Preserve Format) / Super Translate (Preserve Format) / AI Redaction / AI Proofread...
📘 Document Mastery: Split Pages / Merge Documents / Export Selection in Various Formats (PDF/TXT/DOC/HTML...) / Batch Convert to PDF...
✏ Contents Editing: Batch Find and Replace across Multiple Files / Resize All Pictures / Transpose Table Rows and Columns / Convert Table to Text...
🧹 Effortless Clean: Sweap away Extra Spaces / Section Breaks / Text Boxes / Hyperlinks / For more removing tools, head to the Remove group...
➕ Creative Inserts: Insert Thousand Separators / Check Boxes / Radio Buttons / QR Code / Barcode / Multiple Pictures / Discover more in the Insert group...
🔍 Precision Selections: Pinpoint Specific Pages / Tables / Shapes / Heading Paragraphs / Enhance navigation with more Select features...
⭐ Star Enhancements: Navigate to Any Location / Auto-Insert Repetitive Text / Toggle Between Document Windows / 11 Conversion Tools...
🌍 Supports 40+ Languages: Use Kutools in your preferred language – supports English, Spanish, German, French, Chinese, and 40+ others!

Office Tab - Tabs for Office, Power for You
- Enable tabbed editing and reading in Word, Excel, PowerPoint, Publisher, Access, Visio and Project.
- Open and create multiple documents in new tabs of the same window, rather than in new windows.
- Increases your productivity by 50%, and reduces hundreds of mouse clicks for you every day!

✨ Kutools for Office – One Installation, Five Powerful Tools!
Includes Office Tab Pro · Kutools for Excel · Kutools for Outlook · Kutools for Word · Kutools for PowerPoint
📦 Get all 5 tools in one suite | 🔗 Seamless integration with Microsoft Office | ⚡ Save time and boost productivity instantly
Best Office Productivity Tools
Kutools for Word - 100+ Tools for Word
- 🤖 Kutools AI Features: AI Assistant / Real-Time Assistant / Super Polish / Super Translate / AI Redaction / AI Proofread
- 📘 Document Mastery: Split Pages / Merge Documents / Batch Convert to PDF
- ✏ Contents Editing: Batch Find and Replace / Resize All Pictures
- 🧹 Effortless Clean: Remove Extra Spaces / Remove Section Breaks
- ➕ Creative Inserts: Insert Thousand Separators / Insert Check Boxes / Create QR Codes
- 🌍 Supports 40+ Languages: Kutools speaks your language – 40+ languages supported!