Clear recent documents in Word – a full step-by-step guide
When using Microsoft Word, you may frequently access various documents, which are conveniently listed in the "Recent Documents" section for quick retrieval. However, there are times when you may wish to clear these recent documents to protect your privacy or tidy up your work environment. This guide will demonstrate how to clear recent documents in Word and disable this feature if needed.
Remove a single recently used document in Word
In Word, you can easily remove a single recently used document. Here's how:
- Open the Microsoft Word application.
- On the main interface, click on the File tab to open the file menu.

- In the file menu, you'll see a list of recent documents. Right click the document you want to remove from the Recent list, and then select the Remove from list option from the right-clicking menu.


The specified document has now been removed from recent documents list.
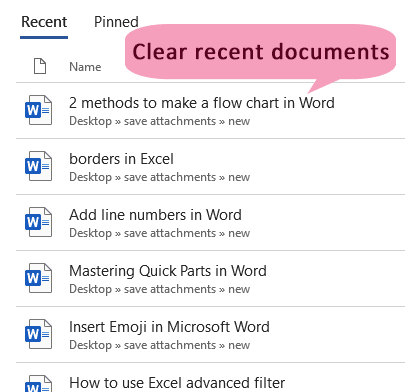
Clear all unpinned recently used documents in Word
Sometimes, you may want to clear all unpinned recently used documents at once to start a new work session. You can do as follows to get it done.
- Open the Microsoft Word application.
- Click on the File tab to open the file menu and then go to the Open section.

- All recently used documents are listed on the right of the Open section. Right click on any recent document and select Clear unpinned items from the context menu.

- And then click Yes in the next popping up Microsoft Word dialog box.


The system will immediately clear all unpinned recently used documents from the Recent documents list.
 </>
</>
Disable recently used documents in Word
In certain situations, you may wish to completely disable the recently used documents feature in Word. Here’s how to accomplish this.
- Open the Microsoft Word application.
- Click on the File tab to open the file menu.
- Select Options at the bottom.
- In the Word Options dialog box, select the Advanced tab, scroll down to the Display section and change the number in the Show this number of recent Documents box from 50 to 0. Finally, click the OK button to save the new settings.


From now on, regardless of how many documents you open in Word, they will no longer appear in the Recent Documents list.
In conclusion, managing your recent documents in Word can help maintain privacy. Whether you need to remove individual files, clear all unpinned documents, or disable the recent documents list entirely, this guide has provided you with step-by-step instructions for each option. By following these techniques, you can effectively manage your recent documents list according to your preferences and needs. For those eager to delve deeper into Word's capabilities, our website boasts a wealth of tutorials. Discover more Word tips and tricks here.
Best Office Productivity Tools
Kutools for Word - Elevate Your Word Experience
🤖 Kutools AI Features: AI Assistant / Real-Time Assistant / Super Polish (Preserve Format) / Super Translate (Preserve Format) / AI Redaction / AI Proofread...
📘 Document Mastery: Split Pages / Merge Documents / Export Selection in Various Formats (PDF/TXT/DOC/HTML...) / Batch Convert to PDF...
✏ Contents Editing: Batch Find and Replace across Multiple Files / Resize All Pictures / Transpose Table Rows and Columns / Convert Table to Text...
🧹 Effortless Clean: Sweap away Extra Spaces / Section Breaks / Text Boxes / Hyperlinks / For more removing tools, head to the Remove group...
➕ Creative Inserts: Insert Thousand Separators / Check Boxes / Radio Buttons / QR Code / Barcode / Multiple Pictures / Discover more in the Insert group...
🔍 Precision Selections: Pinpoint Specific Pages / Tables / Shapes / Heading Paragraphs / Enhance navigation with more Select features...
⭐ Star Enhancements: Navigate to Any Location / Auto-Insert Repetitive Text / Toggle Between Document Windows / 11 Conversion Tools...
🌍 Supports 40+ Languages: Use Kutools in your preferred language – supports English, Spanish, German, French, Chinese, and 40+ others!

Office Tab - Tabs for Office, Power for You
- Enable tabbed editing and reading in Word, Excel, PowerPoint, Publisher, Access, Visio and Project.
- Open and create multiple documents in new tabs of the same window, rather than in new windows.
- Increases your productivity by 50%, and reduces hundreds of mouse clicks for you every day!

✨ Kutools for Office – One Installation, Five Powerful Tools!
Includes Office Tab Pro · Kutools for Excel · Kutools for Outlook · Kutools for Word · Kutools for PowerPoint
📦 Get all 5 tools in one suite | 🔗 Seamless integration with Microsoft Office | ⚡ Save time and boost productivity instantly
Best Office Productivity Tools
Kutools for Word - 100+ Tools for Word
- 🤖 Kutools AI Features: AI Assistant / Real-Time Assistant / Super Polish / Super Translate / AI Redaction / AI Proofread
- 📘 Document Mastery: Split Pages / Merge Documents / Batch Convert to PDF
- ✏ Contents Editing: Batch Find and Replace / Resize All Pictures
- 🧹 Effortless Clean: Remove Extra Spaces / Remove Section Breaks
- ➕ Creative Inserts: Insert Thousand Separators / Insert Check Boxes / Create QR Codes
- 🌍 Supports 40+ Languages: Kutools speaks your language – 40+ languages supported!