Receive emails automatically
This tutorial will guide to create an auto send/receive group, and copy, edit, rename, or remove an auto send/receive group in Outlook easily.
- 1. Create an auto send/receive group
- 2. Copy an auto send/receive group
- 3. Edit an auto send/deceive Group
- 4. Rename an auto send/receive group
- 5. Remove an auto send/receive group
Note: This tutorial is introduced based on exchange account in Microsoft Outlook 2019 desktop program in Windows 10. And it may vary significantly or slightly depending on the types of email accounts (Exchange, IMAP or POP), the versions of Microsoft Outlook, and Windows environments.
1. Create a new Send/Receive Group
After adding email accounts in Outlook, it adds an auto send/receive group automatically for all accounts to send and receive items in Outlook. However, you can create a completely new auto send/receive group for specified email accounts and folders as you need.
You can easily create a new auto send/receive group as follows:
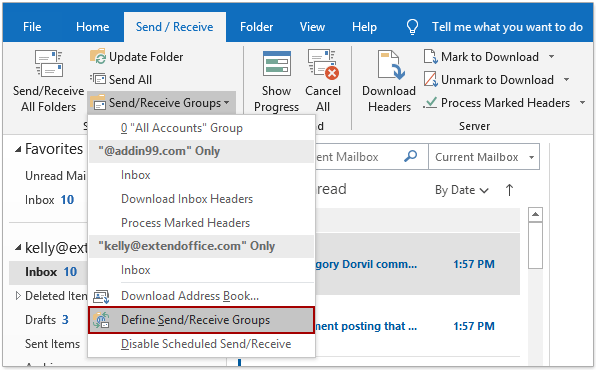
1. Click Send / Receive > Send/Receive Groups > Define Send/Receive Groups.

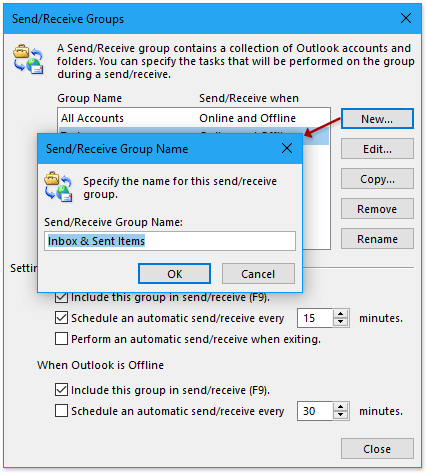
2. In the Send/Receive Groups dialog, please click the New button.
3. Then in the Send/Receive Group Name box, please enter a name for the new group, and click the OK button.
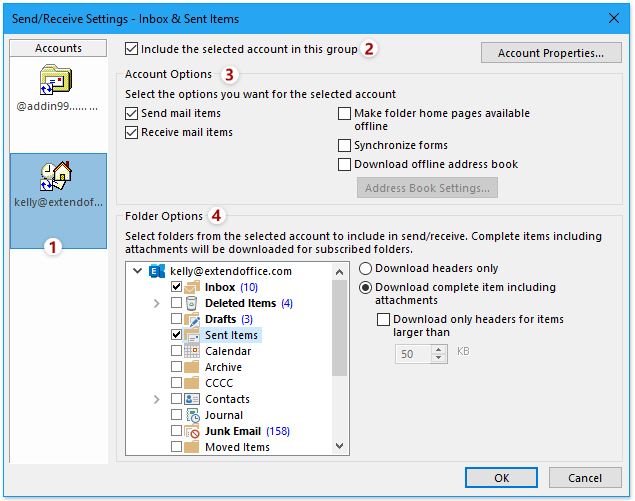
4. Now you get into the Send/Receive Settings dialog, please configure the settings as follows:
(1) In the Accounts pane, please click to select one email account;
(2) Tick the Include the selected account in this group option;
(3) In the Account Options section, please tick the options as you need;
(4) In the Folder Options section, please select the folders you will add in the new send/receive group, and specify the download options for each selected folder one by one.
(5) Repeat above (1)-(4) to add folders of other email accounts to the new send/receive group as you need.
5. Click the OK button to save the settings, and then close the Send/Receive Groups dialog as you need.
Tips: Click Edit an Auto Send Receive Group to get more detailed explanation about configuring settings of an auto Send/Receive group.
2. Copy an auto send/receive group
Apart from creating a completely new send/receive group, you can also copy an existing group and then edit the copy to create a new send/receive group. This tutorial will show the detailed steps to copy an auto send/receive group.
You can easily copy an existing auto send/receive group as follows:
1. Click Send / Receive > Send/Receive Groups > Define Send/Receive Groups.
2. In the Send/Receive Groups dialog, please click to select the send/receive group you will copy, and click the Copy button.

3. In the Send/Receive Group Name box, please type in a name for the new group, and click the OK button.
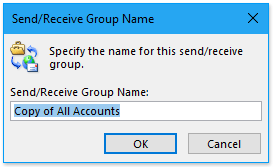
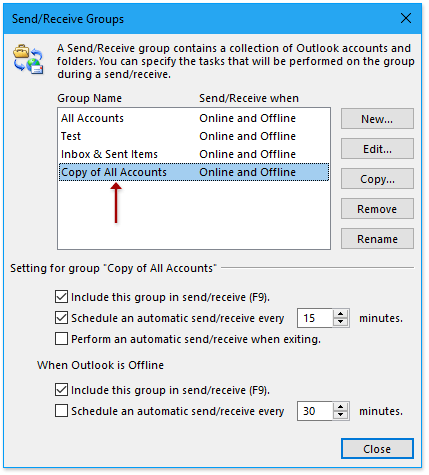
Now the specified send/receive group is copied, and its copy is added in send/receive group list box. See screenshot:
Tips: You can go ahead to edit the new send/receive group as you need. Click to view Edit an Auto Send Receive Group.
3. Edit an Auto Send/Receive Group
By default, Outlook receives emails automatically at a regular interval (30 minutes). You can change the auto send/receive rules as you need, says the send/receive interval when Outlook is online, and the like.
3.1 Edit online settings of a send/receive group
You can change both online and offline settings for a certain send/receive group separately in Outlook. This section will guide you to edit the online settings for a send/receive rule.
1. Click Send / Receive > Send/Receive Groups > Define Send/Receive Groups.

2. In the Send/Receive Groups dialog, please click to select the specified send/receive group you will edit, and then configure the online settings as you need.
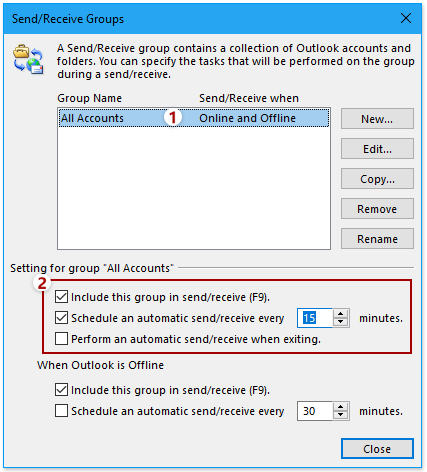
(1) Include this group in send/receive (F9): If you untick this option, you cannot send and receive items in this group manually by clicking Send / Receive > Send/Receive All Folders on the Ribbon or pressing F9 key.
(2) Schedule an automatic send/receive every x minutes: You can change the send/receive interval of this group by ticking this option and entering the specify number of minutes into the inline box.
(3) Perform an automatic send/receive when exiting: If you tick this option, Outlook will always run the send/receive process before completely exiting.
3.2 Edit offline settings of a send/receive group
You can also configure the offline settings for a send/receive group, and change the frequency of offline updates for the send/receive group in Outlook.
1. Click Send / Receive > Send/Receive Groups > Define Send/Receive Groups.
2. In the Send/Receive Groups dialog, please click to select the specified send/receive group you will edit, and change the settings under When Outlook is Offline.

(1) Include this group in send/receive (F9): If you disable this option, Outlook won’t connect to items in the specified send/receive group by clicking Send / Receive > Send/Receive All Folders or pressing F9 key when Outlook is offline.
(2) Schedule an automatic send/receive every x minutes: If you need Outlook to connect to items in the specified send/receive group at a fixed interval, you can tick this option and enter the specified number of minutes in the inline box.
3.3 Edit other settings of a send/receive group
In this section, I will show you the way to add or remove email accounts or folders in a certain send/receive group, and configure send/receive settings for a certain email account or folder as well.
1. Click Send / Receive > Send/Receive Groups > Define Send/Receive Groups.
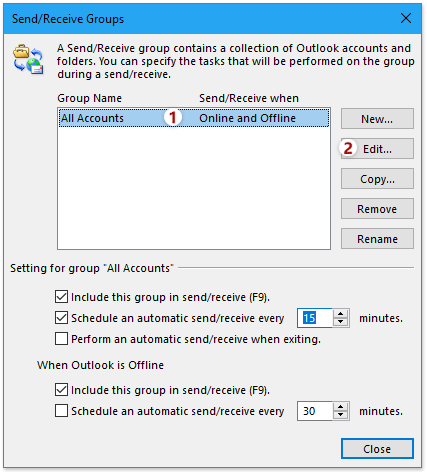
2. In the Send/Receive Groups dialog, please click to select the specified send/receive group you will edit, and click the Edit button.
3. In the Send/Receive Settings dialog, please change the settings as you need.
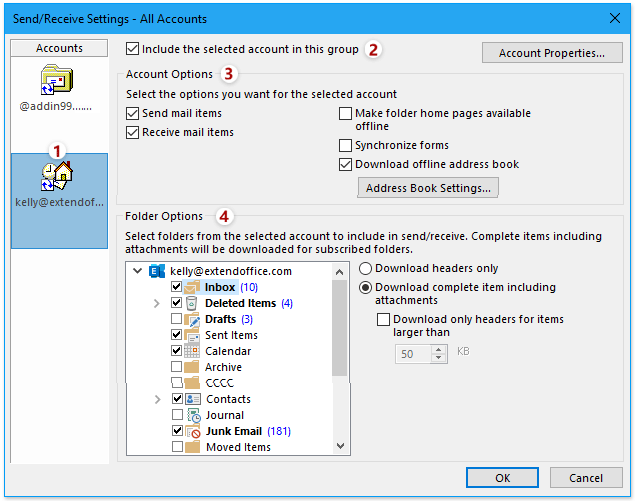
(1) Select an email account
Whether adding/removing an email account from the specified send/receive group, or editing settings for the email account, you need to select the email account in the Accounts pane firstly.
(2) Include the selected account in this group
If you want to add the selected email account into the specified send/receive group, please tick this option, otherwise clear this option.
(3) Account options
In the Account Options section, you can select or clear options for the specified email account only, including:
- Send mail items
- Receive mail items
- Make folder home pages available offline
- Synchronize forms
- Download offline address book
(4) Folder Options
After configuring the settings for the specified email account, you can go ahead to add or remove folders of the specified email account from the send/receive group, and change send/receive settings for specified folders only.
- Tick or untick the checkboxes before folders to add or remove them from the send/receive group.
- Click to select a folder, and then select or clear downloading options for it.
4. Click the OK button to save the changes.
4. Rename a Send/Receive group
You can easily rename an existing auto send/receive group in the Send/Receive Groups dialog.
Please follow below steps to rename an auto send/receive group.
1. Click Send / Receive > Send/Receive Groups > Define Send/Receive Groups.

2. In the Send/Receive Groups, please click to select the specified group you will name, and click the Rename button.
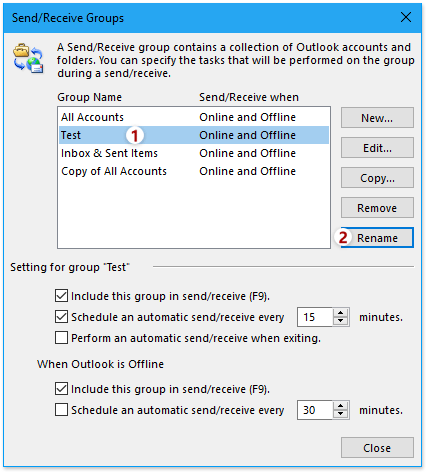
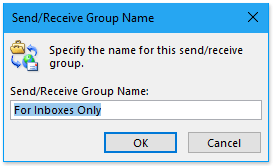
3. In the Send/Receive Group Name dialog, please type in a new name, and click the OK button.
Then it returns to the Send/Receive Groups dialog, and you can see the specified send/receive group has been renamed already. Please close the Send/Receive Groups dialog as you need.
5. Remove a Send/Receive Group
You might have created multiple auto send/receive groups before, but now you want to remove some of them. This tutorial will show the guidance to remove an auto send/receive group step by step.
If you need to remove an auto send/receive group, please do as follows:
1. Click Send / Receive> Send/Receive Groups > Define Send/Receive Groups.

2. In the Send/Receive Groups dialog, please click to select the specified send/receive group you will remove, and click the Remove button.
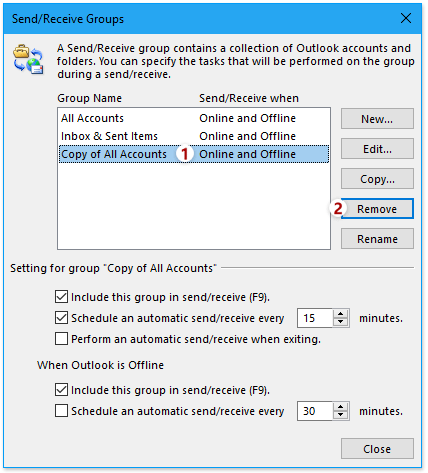
Now the specified send/receive group is removed immediately. And you can close the Send/Receive Groups dialog as you need.
More articles ...
Best Office Productivity Tools
Experience the all-new Kutools for Outlook with 100+ incredible features! Click to download now!
📧 Email Automation: Auto Reply (Available for POP and IMAP) / Schedule Send Emails / Auto CC/BCC by Rules When Sending Email / Auto Forward (Advanced Rules) / Auto Add Greeting / Automatically Split Multi-Recipient Emails into Individual Messages ...
📨 Email Management: Recall Emails / Block Scam Emails by Subjects and Others / Delete Duplicate Emails / Advanced Search / Consolidate Folders ...
📁 Attachments Pro: Batch Save / Batch Detach / Batch Compress / Auto Save / Auto Detach / Auto Compress ...
🌟 Interface Magic: 😊More Pretty and Cool Emojis / Remind you when important emails come / Minimize Outlook Instead of Closing ...
👍 One-click Wonders: Reply All with Attachments / Anti-Phishing Emails / 🕘Show Sender's Time Zone ...
👩🏼🤝👩🏻 Contacts & Calendar: Batch Add Contacts From Selected Emails / Split a Contact Group to Individual Groups / Remove Birthday Reminders ...
Use Kutools in your preferred language – supports English, Spanish, German, French, Chinese, and 40+ others!


🚀 One-Click Download — Get All Office Add-ins
Strongly Recommended: Kutools for Office (5-in-1)
One click to download five installers at once — Kutools for Excel, Outlook, Word, PowerPoint and Office Tab Pro. Click to download now!
- ✅ One-click convenience: Download all five setup packages in a single action.
- 🚀 Ready for any Office task: Install the add-ins you need, when you need them.
- 🧰 Included: Kutools for Excel / Kutools for Outlook / Kutools for Word / Office Tab Pro / Kutools for PowerPoint