How to always insert a blank row below instead of above in Excel?
In Excel, when you right-click a row and choose Insert, the new blank row is always inserted above the selected row by default. This behavior is built into Excel and cannot be changed directly in Excel Options. However, if you often need to insert a blank row below the current row, there are several practical workarounds. In this article, we will show you different ways to insert rows below in Excel.

Why does Excel insert rows above by default?
Insert a blank row below instead of above in Excel
- Method 1: Select the row below before inserting
- Method 2: VBA code to insert one or multiple blank rows
- Method 3: Kutools for Excel to insert one or multiple blank rows
Why does Excel insert rows above by default?
When you select a row and insert a new one, Excel shifts the selected row and all rows below it downward. This ensures that formulas, named ranges, and structured references (like in tables) adjust automatically without breaking. Inserting above is simply more predictable for most spreadsheet operations.
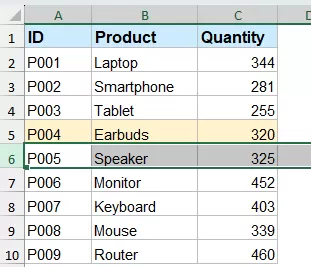
For example, if you select row 5 and insert a row, Excel adds the new blank row above row 5. So, to insert a blank row below row 5, you need to select row 6 first, then insert the row. This is simple, but it can become annoying if you need to do it repeatedly. Fortunately, there are workarounds.
Method 1: Select the row below before inserting
This is the easiest built-in method. Since Excel always inserts rows above the selected row, you can select the row below the target position.
- Click the row number below where you want to insert a blank row. For example, if you want to insert a blank row below row 5, select row 6.
- Right-click the selected row number. Choose Insert from the context menu.
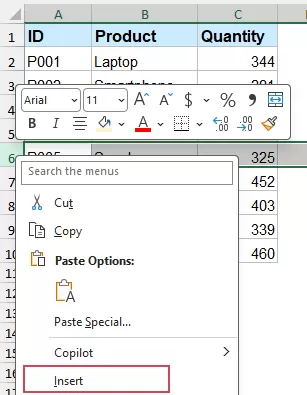
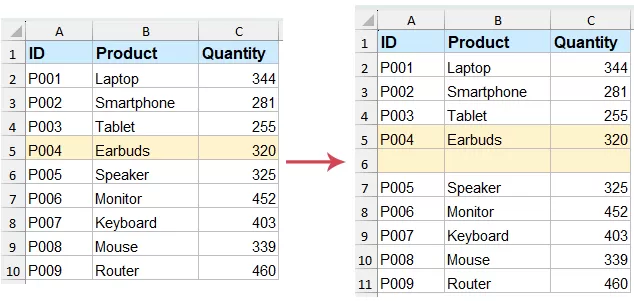
- A blank row will be inserted above row 6, which means it appears below row 5.


Tip: To insert multiple blank rows below, select multiple rows below your target row (e.g., select Rows 6, 7, 8 for three blank rows below Row 5) and insert.
Pros:
- No formula or VBA required.
- Works in all Excel versions.
- Easy for occasional use.
Cons:
- You must remember to select the row below first.
- Not efficient if you need to insert rows below frequently.
- Easy to make mistakes when working with large worksheets.
Method 2: VBA code to insert one or multiple blank rows
If you frequently need to insert blank rows below the selected row, using VBA is a more efficient solution. Instead of selecting the row below first every time, you can run a simple macro to insert a blank row directly under the current row. You can also use VBA to insert multiple blank rows at once, which is especially helpful when working with large worksheets or repetitive data entry tasks.
Insert one blank row below the selected row
If you only need to insert one blank row below the current row, use the following simple VBA code.
- Hold down the ALT + F11 keys, and it opens the Microsoft Visual Basic for Applications window.
- Then, click Insert > Module, and paste the following macro in the Module Window.
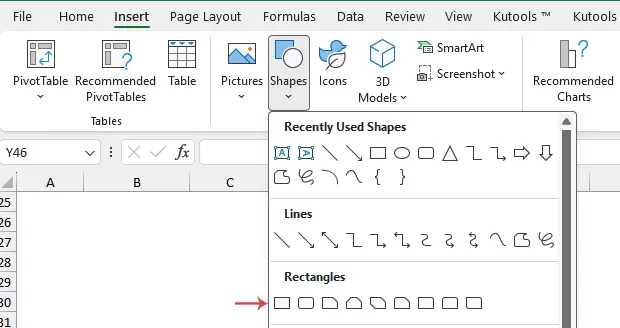
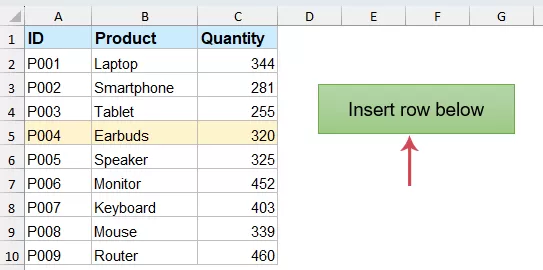
Sub InsertOneBlankRowBelow() ActiveCell.Offset(1, 0).EntireRow.Insert End Sub - Then, save and close this code window. Next, please click Insert > Shapes > Rectangle, see screenshot:
- Then, draw a rectangle button with dragging the cursor and format it as you need. See screenshot:
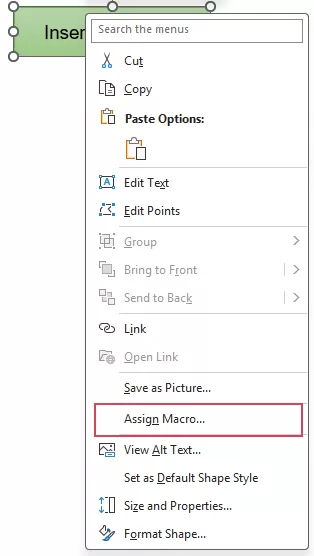
- After formatting it to your need, please right click it, and choose Assign Macro option, see screenshot:
- In the Assign Macro dialog box, select the macro name you inserted just now from the Macro name list box, see screenshot:
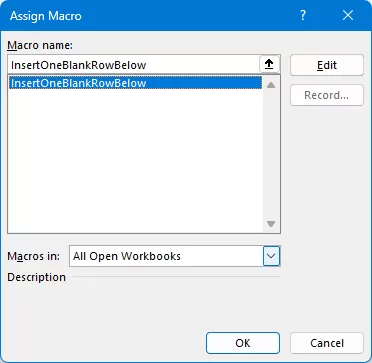
- Then, click OK to close the dialog box.


Now, when you click any cell, and then click the button, the blank row will be inserted below the selected cell as below demo shown:

Insert multiple blank rows below the selected row
If you want to insert more than one blank row at a time, use the following VBA code. After running the macro, Excel will ask you how many blank rows you want to insert.
- Follow the steps (1-7) above, then use the VBA code below to insert one or multiple blank rows below the selected row.
Sub InsertMultipleBlankRowsBelow() Dim RowCount As Long RowCount = Application.InputBox( _ Prompt:="Enter the number of blank rows to insert:", _ Title:="Insert Blank Rows Below", _ Default:=1, _ Type:=1) If RowCount <= 0 Then Exit Sub ActiveCell.Offset(1, 0).Resize(RowCount).EntireRow.Insert End Sub - Now, when you click any cell, and then click the button, in the pop-up box, enter the number of blank rows you want to insert.
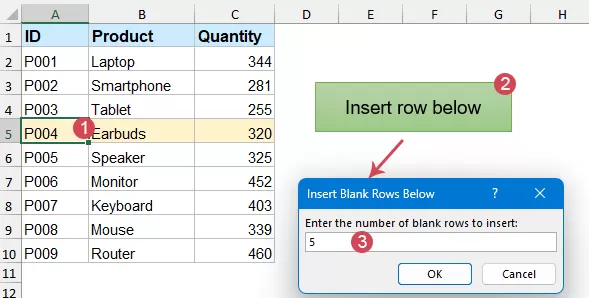
- Excel will insert the specified number of blank rows directly below the selected row.

Tip: The macro inserts rows based on the active cell, so make sure you select the correct cell or row before clicking the button.
Pros:
- Inserts rows below directly: Unlike Excel’s default Insert command, the VBA code can insert blank rows directly below the selected row.
- Saves time: It is useful if you need to insert blank rows frequently.
- Supports multiple rows: You can use VBA to insert one blank row or several blank rows at once.
- Can be reused: Once the macro is created, you can run it whenever needed.
Cons:
- Requires VBA setup: Beginners may find it a little difficult at first.
- Macros must be enabled: If macros are disabled, the code will not run.
- Workbook format may need to change: You may need to save the file as an Excel Macro-Enabled Workbook (*.xlsm).
- Not ideal for restricted work environments: Some companies block macros for security reasons.
- You must select the correct row first: The macro inserts rows based on the active cell or selected row, so selecting the wrong row may insert rows in the wrong place.
Method 3: Kutools for Excel to insert one or multiple blank rows
If you prefer a no-code solution, Kutools for Excel provides a much easier way to insert blank rows below the selected row. Instead of selecting the row below manually or writing VBA code, you can use Kutools to insert one blank row or multiple blank rows with just a few clicks.
This method is especially useful when you need to insert blank rows repeatedly, insert rows in bulk, or avoid macro-related security settings. It is more visual and beginner-friendly, making it a good choice for users who want a fast and convenient Excel add-in solution.
Insert one blank row below the selected row
- Click the row number where you want to insert a blank row below.
- Then, right click the selection, and choose Add Below from the context menu, see screenshot:
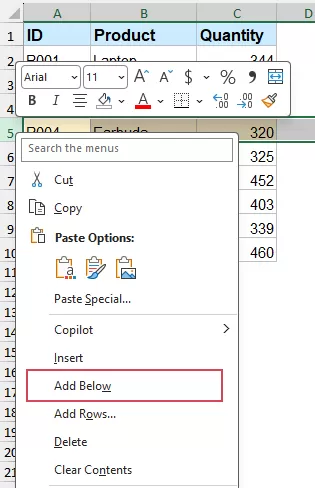

Now, a blank row is inserted directly below the selected row, rather than above it.
Insert multiple blank rows below the selected row
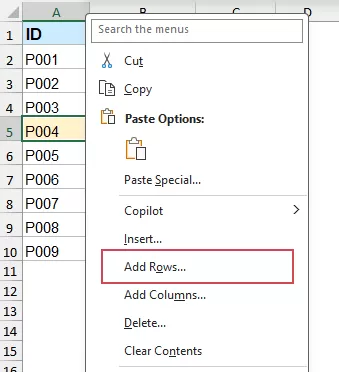
If you want to insert several blank rows below the selected row, Kutools for Excel also makes it easy. You only need to select the target row and specify how many blank rows you want to add.
- Right-click on a cell (A5 in this case) that you want to add rows below, and choose Add Rows from the context menu.
- In the pop-up dialog box, select Below the selection option, and enter the number of blank rows you want to insert. Click OK.
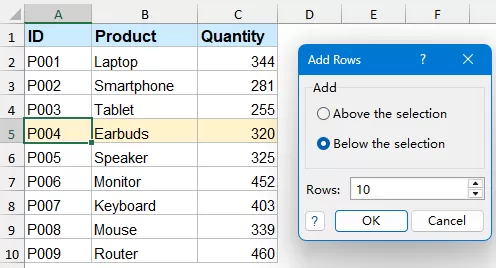


The specified number of blank rows will be inserted directly below the selected cell.
Insert Blank Rows Below with Just a Few Clicks
Kutools for Excel makes it easy to insert one or multiple blank rows directly below the selected row. No VBA, no repeated manual selection — just a simple and visual way to handle repetitive worksheet editing tasks faster.
Frequently Asked Questions (FAQs)
Can I change Excel’s default setting to insert rows below?
• No. Excel does not provide a built-in option to change the default insert behavior. By default, inserted rows always appear above the selected row.
Can I assign a shortcut to insert rows below?
• Excel does not have a built-in shortcut specifically for inserting rows below. However, you can create a VBA macro and assign it to the Quick Access Toolbar or a custom shortcut.
Does this work for columns too?
• Yes, the logic is similar. Excel inserts a new column to the left of the selected column. To insert a column to the right, select the column on the right first, then insert.
Conclusion
Excel’s default behavior of inserting rows above is logical from a formula-referencing standpoint, but it doesn’t always match user needs. Fortunately, you have multiple ways to insert a blank row below instead:
- Method 1 (manual) – select the row below before inserting. Fast and no setup.
- Method 2 (VBA) – ideal for frequent or automated use.
- Method 3 (Kutools) – great for non-technical users needing advanced options.
Choose the method that best fits your skill level, frequency of task, and budget. With these techniques, you can take full control of row insertion in Excel and build spreadsheets exactly the way you want.
Relative Articles:
- Insert Blank Rows When Value Changes In Excel
- Supposing you have a range of data, and now you want to insert blank rows between the data when value changes, so that you can separate the sequential same values in one column as following screenshots shown. In this article, I will talk about some tricks for you to solve this problem.
- Insert Multiple Rows Or Columns Quickly In Google Sheets
- This article, I will introduce an easy way to insert multiple blank rows or columns in a google sheet.
- Insert Blank Row Above Specific Text In Excel
- When you work on a worksheet, have you ever tried to insert blank row above a specific text in a column? For example, there are some names in column A, now, I want to insert blank rows above the cells which contain the name “Mike” as the left screenshot shown, maybe, there are no direct way for you to solve this task in Excel. This article, I will talk about some good tricks for dealing with this job in Excel.
Best Office Productivity Tools
Supercharge Your Excel Skills with Kutools for Excel, and Experience Efficiency Like Never Before. Kutools for Excel Offers Over 300 Advanced Features to Boost Productivity and Save Time. Click Here to Get The Feature You Need The Most...
Office Tab Brings Tabbed interface to Office, and Make Your Work Much Easier
- Enable tabbed editing and reading in Word, Excel, PowerPoint, Publisher, Access, Visio and Project.
- Open and create multiple documents in new tabs of the same window, rather than in new windows.
- Increases your productivity by 50%, and reduces hundreds of mouse clicks for you every day!
All Kutools add-ins. One installer
Kutools for Office suite bundles add-ins for Excel, Word, Outlook & PowerPoint plus Office Tab Pro, which is ideal for teams working across Office apps.
- All-in-one suite — Excel, Word, Outlook & PowerPoint add-ins + Office Tab Pro
- One installer, one license — set up in minutes (MSI-ready)
- Works better together — streamlined productivity across Office apps
- 30-day full-featured trial — no registration, no credit card
- Best value — save vs buying individual add-in
Table of contents
- Why does Excel insert rows above by default?
- Method 1: Select the row below before inserting
- Method 2: VBA code to insert one or multiple blank rows
- Method 3: Kutools for Excel to insert one or multiple blank rows
- Frequently Asked Questions (FAQs)
- Conclusion
- The Best Office Productivity Tools
Kutools for Excel
Brings 300+ advanced features to Excel
- ⬇️ Free Download
- 🛒 Purchase Now
- 📘 Feature Tutorials
- 🎁 30-Day Free Trial