How to highlight emails from specific sender in Outlook?
Supposing there is an important contact staying in your Outlook contact folder, and you want to easily find out all emails sent by this contact in the email folder at a glance, what can you do? Actually, highlighting all emails which sent from this specific sender is the best way to find out at a glance. With this tutorial, you can learn how to highlight emails from specific sender in Outlook.
Highlight emails from specific sender in Outlook
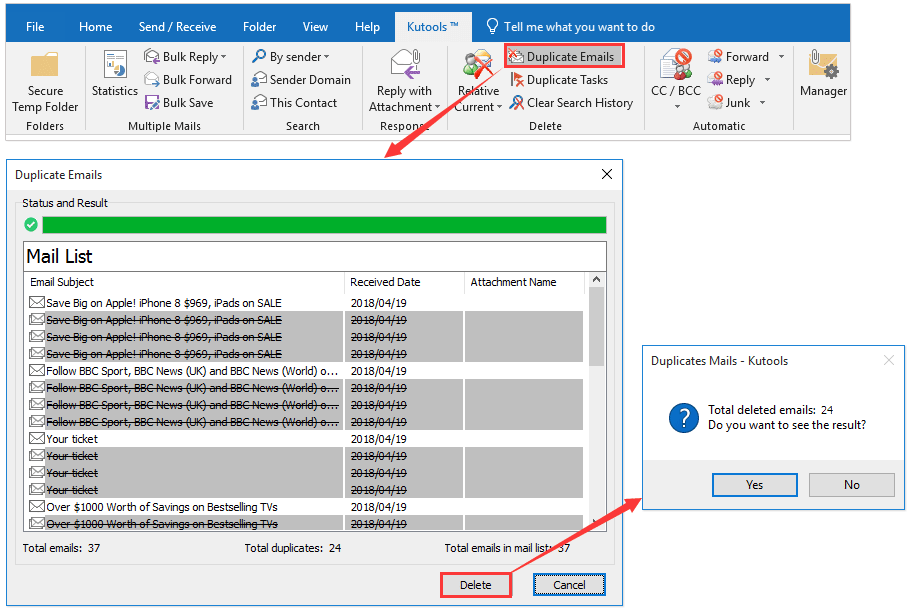
Quickly search and delete duplicate emails in Outlook
With Kutools for Outlook’s Duplicate Emails feature, you can quickly find and delete them from multiple mail folders, or find and delete all duplicates from the selected ones with two clicks in Outlook.
- Automate emailing with Auto CC/BCC, Auto Forward by rules; send Auto Reply (Out of Office) without requiring an exchange server...
- Get reminders like BCC Warning when replying to all while you're in the BCC list, and Remind When Missing Attachments for forgotten attachments...
- Improve email efficiency with Reply (All) With Attachments, Auto Add Greeting or Date & Time into Signature or Subject, Reply Multiple Emails...
- Streamline emailing with Recall Emails, Attachment Tools (Compress All, Auto Save All...), Remove Duplicates, and Quick Report...
 Highlight emails from specific sender in Outlook
1. Get into the email folder which you want to highlight emails from a specific sender.
2. Please click View > View Settings.
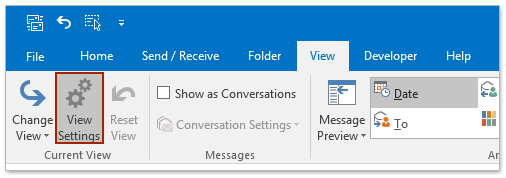
Note: In Outlook 2007 or earlier versions, please click View > Current View > Customize Current View.
3. In the Advanced View Setting dialog box, please click Conditional Formatting.
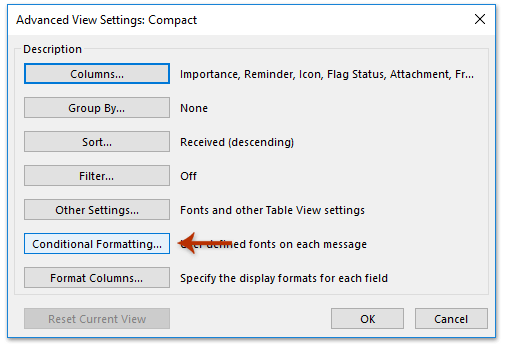
Note: In Outlook 2007 or earlier versions, please click Automatic Formatting button in the Custom View dialog box.
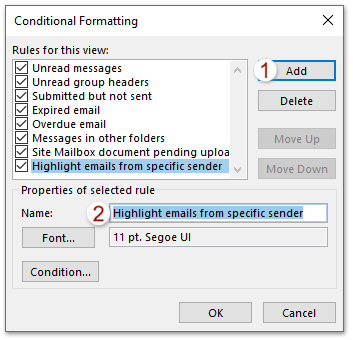
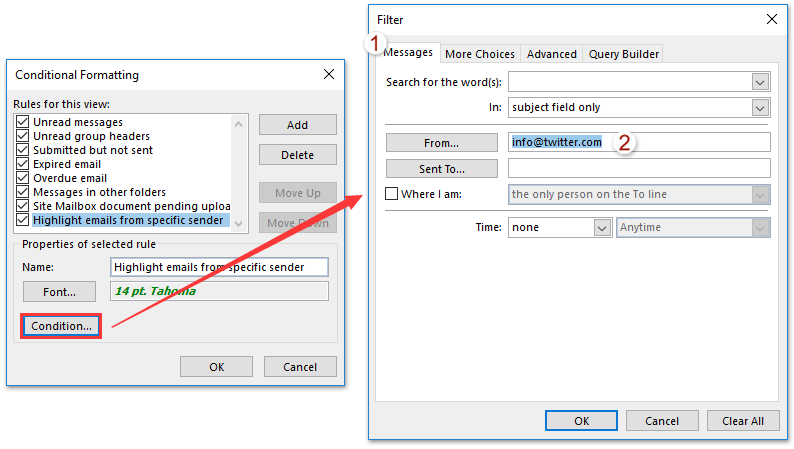
4. In the Conditional Formatting dialog box, please click the Add button, and then name the new conditional formatting rule in the Name box. See screenshot:
5. Still in the Conditional Formatting dialog box, please click the Font button to open the Font dialog box, and then specify the formatting you will set for the conditional formatting rule. See screenshot:

6. Still in the Conditional Formatting dialog box, please click the Condition button; in the opening Filter dialog box, please type the specified sender's email address into the From box. See screenshot:
7. Then click OK buttons to save the new conditional formatting rule.
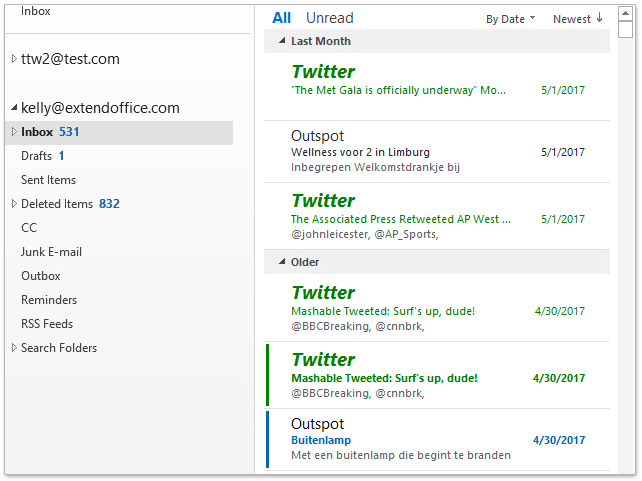
Now you can see all emails from the specified sender are highlighted with your specific formatting. And when you receive messages from this specified address next time, the emails are highlighted automatically.
Best Office Productivity Tools
Kutools for Outlook - Over 100 Powerful Features to Supercharge Your Outlook
🤖 AI Mail Assistant: Instant pro emails with AI magic--one-click to genius replies, perfect tone, multilingual mastery. Transform emailing effortlessly! ...
📧 Email Automation: Out of Office (Available for POP and IMAP) / Schedule Send Emails / Auto CC/BCC by Rules When Sending Email / Auto Forward (Advanced Rules) / Auto Add Greeting / Automatically Split Multi-Recipient Emails into Individual Messages ...
📨 Email Management: Easily Recall Emails / Block Scam Emails by Subjects and Others / Delete Duplicate Emails / Advanced Search / Consolidate Folders ...
📁 Attachments Pro: Batch Save / Batch Detach / Batch Compress / Auto Save / Auto Detach / Auto Compress ...
🌟 Interface Magic: 😊More Pretty and Cool Emojis / Boost Your Outlook Productivity with Tabbed Views / Minimize Outlook Instead of Closing ...
👍 One-click Wonders: Reply All with Incoming Attachments / Anti-Phishing Emails / 🕘Show Sender's Time Zone ...
👩🏼🤝👩🏻 Contacts & Calendar: Batch Add Contacts From Selected Emails / Split a Contact Group to Individual Groups / Remove Birthday Reminders ...
Over 100 Features Await Your Exploration! Click Here to Discover More.

