Using vivid emojis in Outlook: easily insert, add and manage
Kutools for Outlook
In today's digital communications, especially in business letters and daily email interactions, the use of emojis can make content more appealing and infuse warmth into dull text emails. Although Windows has improved its emoji functionality, limitations persist, such as simplistic designs and the inability to create custom emojis. "Kutools for Outlook"'s "Emoji" fills these gaps, offering a lot of vivid emojis (including 3D emojis) and GIFs in the "Kutools Emoji Pane", alongside the standard emojis of the "Windows Emoji Pane". With just a click, you can insert any emojis into the email body. In addition, you can easily add personalized emojis for future use and manage them as needed.
- Kutools Emoji Pane VS Windows Emoji Pane
- Enable the Emoji pane
- Easily insert vivid emojis into the message body
- Easily add personalized emoji images
- Manage personalized emoji images
Kutools Emoji Pane VS Windows Emoji Pane
Kutools for Outlook's "Emoji Floating Toolbar" includes both the "Windows Emoji Pane" and the "Kutools Emoji Pane". This integration provides a comprehensive collection of emojis—combining the standard Windows emojis from the Outlook Emoji Pane with the rich selection of vivid emojis (including 3D emojis) and GIFs found in the Kutools Emoji Pane. Below, we outline the advantages of the "Kutools Emoji Pane" over the "Windows Emoji Pane":
🖥️ System Compatibility:
The built-in Emoji Pane in Outlook is only available on Windows 10 and Windows 11. This means that users on other versions of the Windows operating system, such as Windows 8 or earlier, will not be able to use this feature and will need to look for alternative solutions. The Emoji Pane in Kutools for Outlook, on the other hand, is compatible with all Windows systems.
😊 A wide range of emojis:
Kutools offers a wider range of emojis than the default selection in Outlook, including unique and diverse emojis not found in Outlook. This allows users to express a broader range of emotions in their emails. Moreover, it provides beautiful emojis on Windows 10 similar to those on Windows 11, improving the visual experience.
🗂️ Functionality:
Kutools for Outlook's Emoji Pane offers enhanced functionality, including categorization, addition, and deletion of custom emojis, enriching the user experience. What’s more, users can curate a collection of their most used or favorite emoji images into personalized categories.
🚀 Ease of Use:
The Emoji Pane in Kutools is designed as a pane that remains visible in the mail window, eliminating the need to repeatedly bring up the pane every time it is needed. This provides a more intuitive interface for browsing and selecting emojis, making the process quicker and more convenient.
💫 Additional Features:
Kutools enhances email interactivity and enjoyment by offering Emoji GIFs, as well as a floating emoji panel that facilitates the quick insertion of emojis without requiring the Kutools pane to be opened.
Enable the Emoji pane
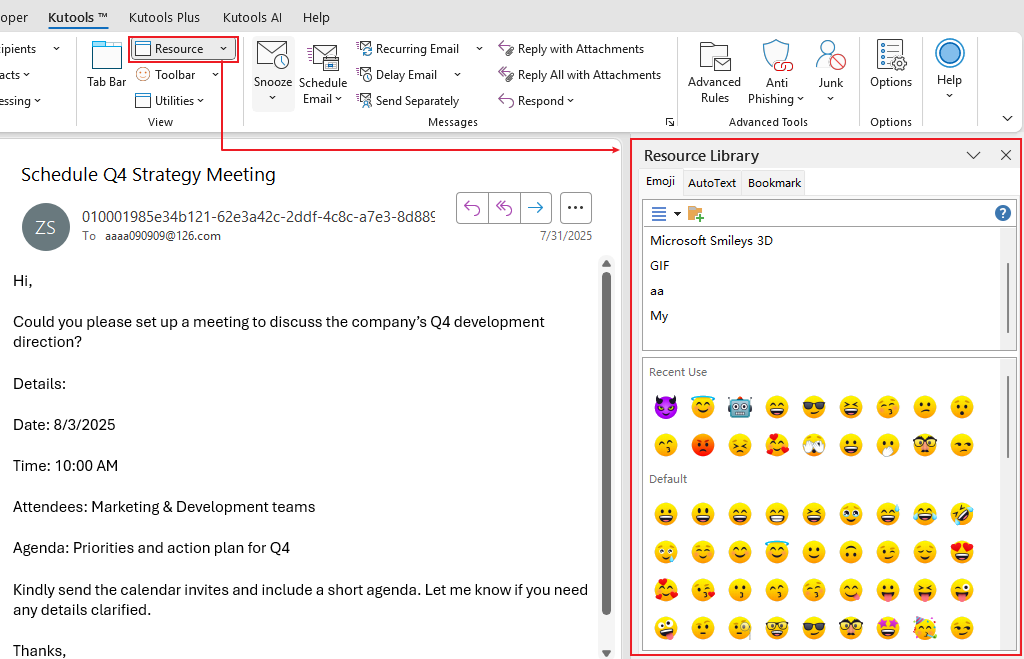
In the Reading pane: Click Kutools > Resource.
In Message window: Click Kutools > Resource.
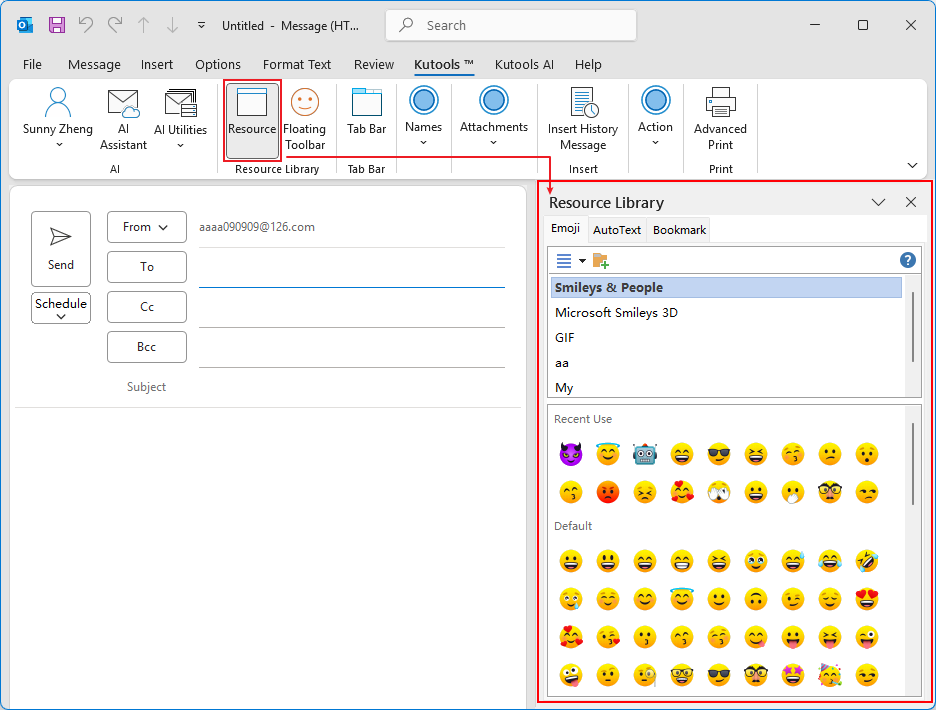


Note: Generally, the resource pane displays emojis. If the pane shows bookmarks or autotext, then click the emoji tab to display emojis.
Easily insert vivid emojis into the message body
- Place the cursor where you want to insert an emoji.
- Select a category.
- And then select the emoji you want to insert.

The selected emoji is inserted.

Insert emojis using the Floating Toolbar
Step 1. Enable the Kutools Emoji Floating Toolbar
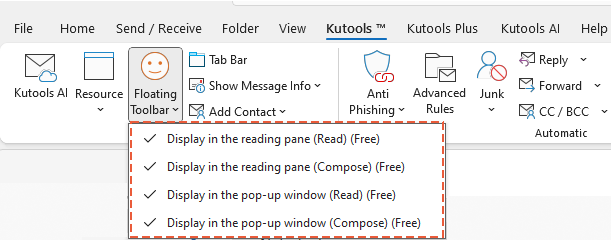
- In the composing Message window, click "Kutools" > "Floating Toolbar" to open the Emoji "Floating Toolbar". See screenshot:

- The Emoji "Floating Toolbar" appears. You can long-press the "Floating Toolbar" and drag it to any location within the Message window.

Step 2. Insert Emoji into the email body
- After positioning your cursor in the desired location within the email body, click the first emoji icon to open the "Windows Emoji Panel".
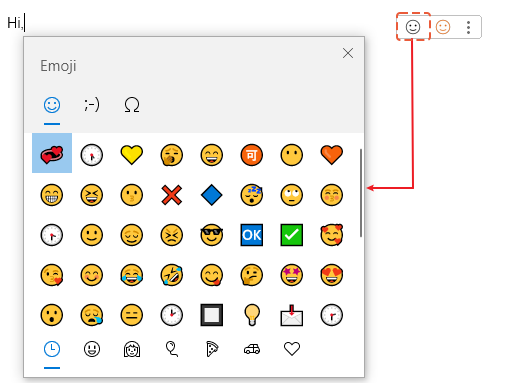
- Selecting any emoji from the "Windows Emoji Pane" will instantly insert it into the email body at the cursor's location.

If you want to show the Resource Library pane, click this icon.

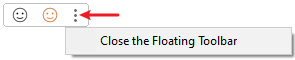
If you no longer want the "Floating Toolbar" to appear, click on the three dots to close it.


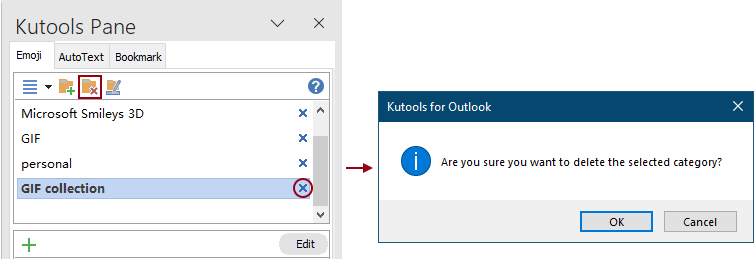
- Emojis within the default categories are not individually editable or removable; instead, the entire category can be removed. To remove a category, you need to select it and then click the Close button or the Delete Category button. In the popping up Kutools for Outlook dialog box, click the OK button.
- If you have deleted the default categories and wish to restore them, you need to:
- Click the drop-down list
 to expand the menu, and then select Restore Default Emoji.
 - In the opening Default Category dialog box, check the boxes for the default categories you wish to recover and then click OK.

- Click the drop-down list
- If the default list lacks the emoji you need, you can manually add the emojis you want into the Emoji pane. See the fourth section for details..


Easily add personalized emoji images
If you come across useful emojis in emails or have a collection of emojis you frequently use, the "Emoji pane" of "Kutools for Outlook" can help you save them for future use.
If you find some emojis in the emails you received that are useful to you and want to save for future use, you can do as follows.
Step 1. Create your own emoji category
In the Emoji pane, you need to:
- Click the Add Category button.
- In the New Category dialog box, type the name of the category and click OK. A new category (in this case, is the 'personal' category) is now created.


Step 2. Open an email containing the emojis you need to save for future use
In the Mail list, double-click to open an email containing the emojis you want to save for future use.
Step 3. Add emoji pictures to the Emoji pane
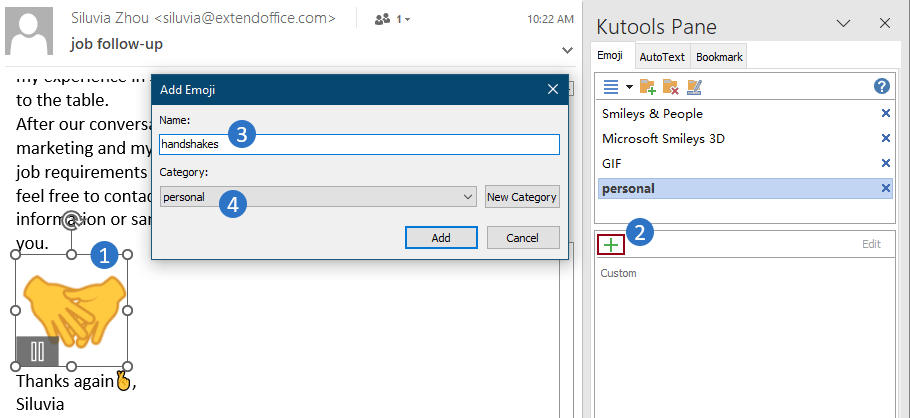
- In the email body, select the emoji you want to save.
- Click the Add to Emoji Library button
 in the new category.
 - In the opening Add Emoji dialog box, type a name in the Name textbox, choose the category you created in step 1, and then click the Add button. See screenshot:

Result
The selected emoji image has now been added to the new category you specified. If the added emoji image is in gif format, you will see it animated when you hover the cursor over it.
Import a group of emoji images to Emoji pane
If you have collected a set of emoji images, you can easily import them into the Emoji pane for future use. Please do as follows.
Step 1. Create an emoji category for saving these emoji images
In the Emoji pane, you need to:
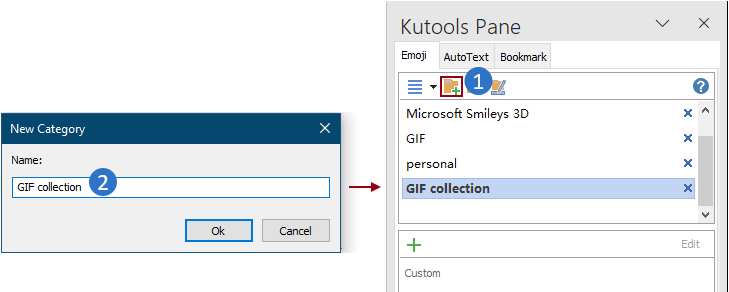
- Click the Add Category button.
- In the New Category dialog box, type the name of the category and click OK. A new category (in this case, is the 'GIF collection' category) is now created.

Step 2. Import the emoji images
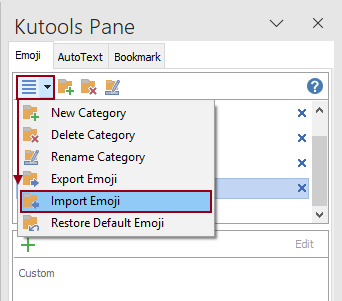
- In Emoji pane, click the drop-down list to expand the menu.
- Select Import Emoji from the menu.
- In the Import Emoji dialog box, you need to configure as follows. 3.1) Click the
 button, you will then see two options:
- File: Selecting this option will open an Open dialog box, allowing you to select individual emoji images by holding the Ctrl or Shift key.
- Folder: Choose this option if you have all your emoji images in one folder and wish to import them all at once. It will open the Browse For Folder dialog where you can select the necessary folder.
3.2) Specify the category in which you want to place the imported emoji images.3.3) Click the OK button.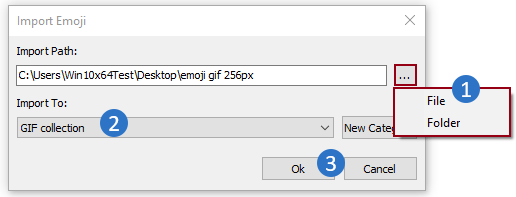 3.4) A Kutools for Outlook dialog box will pop up, alerting you about the handling of emojis with the same name. Choose the option you need.
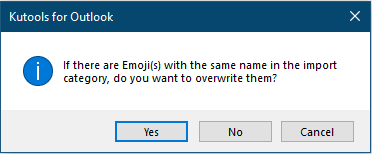


Result
Now, all emoji images in the selected folder are imported into the specified category you have created as shown in the screenshot below.
Manage personalized emoji images in the Kutools Emoji Pane of the Floating Toolbar
After adding your own personalized emoji images, you can easily manage them as needed. Please do as follows.
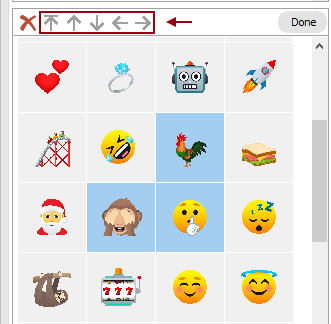
1. In the Emoji pane, get into the emoji category you have created, and click the Edit button.

All emoji images in the selected category are now in editing mode.
2. Select an emoji image, then you can:
- Delete
 : Clicking this button will delete the currently selected emojis.
 - Move to Front
 : Clicking this button will move the currently selected emoji to the front of all emoji images.
 - Move Up
 : Clicking this button will move the currently selected emoji up.
 - Move Down
 : Clicking this button will move the currently selected emoji down.
 - Move Left
 : Clicking this button will move the currently selected emoji to the left side.
 - Move Right
 : Clicking this button will move the currently selected emoji to the right side.

3. After finishing the management, click the Done button.

- You are allowed to delete multiple selected emoji images at a time in a personalized created category.
- But if you have selected multiple emoji images, the move buttons will be grayed out and unusable.
- You can rename an added category by selecting it and clicking the Rename Category button. In the Rename Category dialog box, enter a new name and click the OK button.

- To delete a category (including the default category), you need to select it and then click the Close or the Delete Category button. In the popping up Kutools for Outlook dialog box, click the OK button.
- To backup a certain emoji category, follow these steps: Click the drop-down list to expand the menu, and then click Export Emoji.In the Export Emoji dialog box, click the
 button to select a destination folder in the Export Path section, and then, choose the desired category from the Export Category drop-down list, at last, and OK.
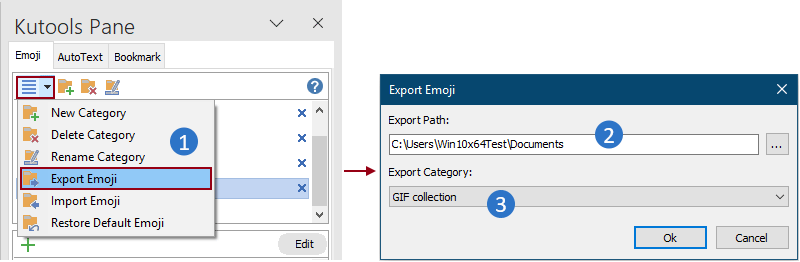
- If you have deleted the default categories and wish to restore them, you need to. Click the drop-down list to expand the menu, and then select Restore Default Emoji.In the opening Default Category dialog box, check the boxes for the default categories you wish to recover and then click OK.


Tips:
- The Emoji feature supports both reading pane and pop-up window views. You can configure it according to your preference:
- Go to the "Kutools" tab in Outlook. Then click the drop-down arrow of the "Floating Toolbar" button.
- Choose the pane or window where you want the "Floating Toolbar" to appear automatically.
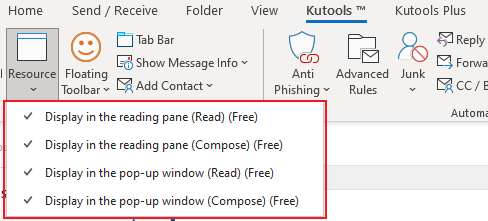
- Besides clicking the second emoji icon of the "Floating Toolbar" to open the "Kutools Emoji Panel", you can also click "Kutools" > "Resource" to open the "Kutools Emoji Panel". The "Resource" pane in Outlook also supports both reading pane and pop-up window views. You can configure it according to your preference:
- Go to the "Kutools" tab in Outlook. Then click the drop-down arrow of the "Resource" button.
- Choose the pane or window where you want the "Resource" pane to appear automatically.


Best Office Productivity Tools
Experience the all-new Kutools for Outlook with 100+ incredible features! Click to download now!
📧 Email Automation: Auto Reply (Available for POP and IMAP) / Schedule Send Emails / Auto CC/BCC by Rules When Sending Email / Auto Forward (Advanced Rules) / Auto Add Greeting / Automatically Split Multi-Recipient Emails into Individual Messages ...
📨 Email Management: Recall Emails / Block Scam Emails by Subjects and Others / Delete Duplicate Emails / Advanced Search / Consolidate Folders ...
📁 Attachments Pro: Batch Save / Batch Detach / Batch Compress / Auto Save / Auto Detach / Auto Compress ...
🌟 Interface Magic: 😊More Pretty and Cool Emojis / Remind you when important emails come / Minimize Outlook Instead of Closing ...
👍 One-click Wonders: Reply All with Attachments / Anti-Phishing Emails / 🕘Show Sender's Time Zone ...
👩🏼🤝👩🏻 Contacts & Calendar: Batch Add Contacts From Selected Emails / Split a Contact Group to Individual Groups / Remove Birthday Reminders ...
Use Kutools in your preferred language – supports English, Spanish, German, French, Chinese, and 40+ others!


🚀 One-Click Download — Get All Office Add-ins
Strongly Recommended: Kutools for Office (5-in-1)
One click to download five installers at once — Kutools for Excel, Outlook, Word, PowerPoint and Office Tab Pro. Click to download now!
- ✅ One-click convenience: Download all five setup packages in a single action.
- 🚀 Ready for any Office task: Install the add-ins you need, when you need them.
- 🧰 Included: Kutools for Excel / Kutools for Outlook / Kutools for Word / Office Tab Pro / Kutools for PowerPoint