Quickly use Outlook 2019
This is a simple tutorial to guide you quickly create and send an email via Outlook, create a contact or task, schedule an appointment, etc. in Outlook.
- Create and send an email in Outlook
- Create a contact in Outlook
- Schedule an appointment in Outlook calendar
- Create a new task in Outlook
Note: Methods introduced on this page apply to Microsoft Outlook 2019 desktop program in Windows 10. And the instructions may vary significantly or slightly depending on the version of Microsoft Outlook and the Windows environments.
Create and send an email in Outlook
Creating and sending emails are the most common operation in Outlook. This tutorial will show you how to quickly create an email and send it in Outlook.
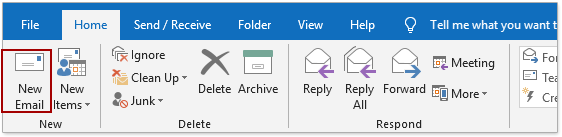
1. In the Mail view, click Home > New Email to create an email.
2. Now a new Message window opens. Please add information as you need:
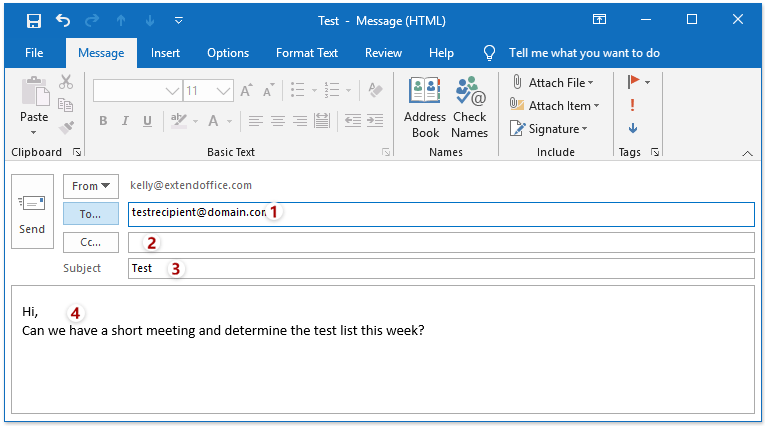
(1) Add recipients in the To field: you can type the recipients’ email addresses in the To filed directly, or click the To button to select recipients from address books.
(2) Add Cc recipients: It’s optional. You can type the Cc recipients’ email addresses in the Cc filed directly, or click the Cc button to select Cc recipients from address books.
(3) Add subject: Type the subject of this new email in the Subject field
(4) Add message content: Type the message content as you need.
3. After you finish composing the new message, click the Send button to send this new email.
Notes
1. You can save the composing email as a draft with clicking the Save button ![]() at the upper-left corner of the new message window.
at the upper-left corner of the new message window.
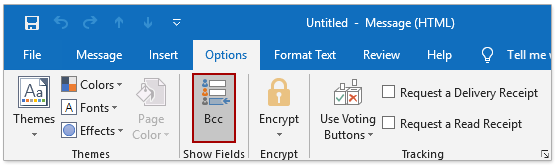
2. By default the Bcc filed is hidden in the new message window. You can click Options > Bcc to show the Bcc field, and then add the Bcc recipients.
3. You can mention someone in the message body. Type @ in the message body, and then select the specified person you want to mention. The mentioned person will be automatically added as a recipient in the To field too.

Create a contact in Outlook
In this tutorial, I will show you how to create a new contact manually in Outlook, and create a new contact based on the sender or recipients of a received email in Outlook.
Create a contact manually in Outlook
You can easily create a new contact manually in Outlook.
1. Click ![]() or People at the bottom of the Folder Pane to shift to the People view.
or People at the bottom of the Folder Pane to shift to the People view.
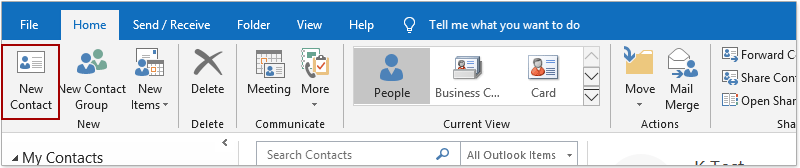
2. In the People view, click Home > New Contact.
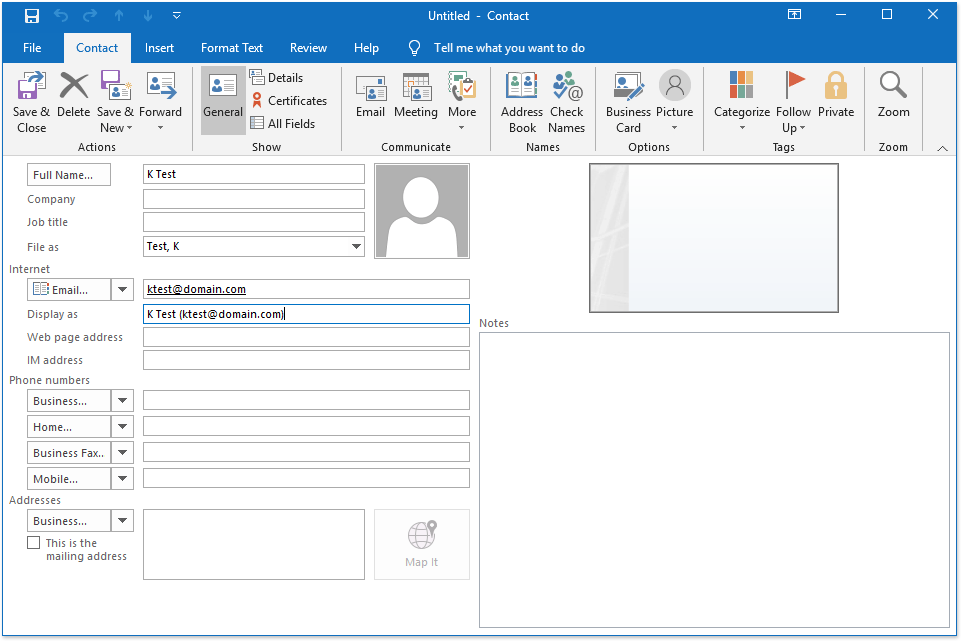
3. Now a new contact window is opening. Please enter the new contact’s information into corresponding fields as you need.
Tips:
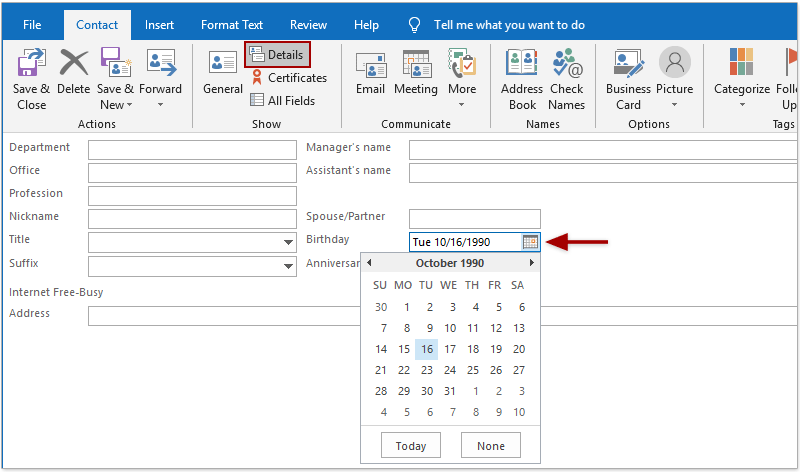
(1) For adding the birthday for the new contact, please click Contact > Details, find out the Birthday field, and then click the calendar icon to specify the birth of date from the drop-down calendar.
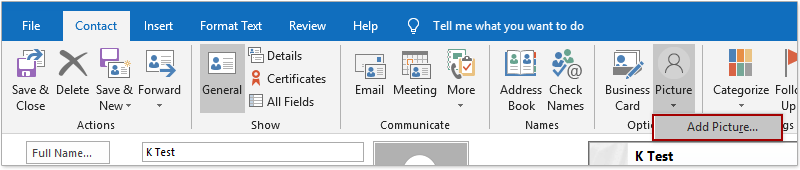
(2) For adding a photo for the new contact, please click Contact > Picture > Add Picture, then in the Add Contact Picture dialog select a photo or picture, and click Open.
4. Click Contact > Save & Close to save the new contact, and then exit the window.
So far, the new contact has been created and added to the current activated contact folder already. See screenshot:
Create a contact from a received email in Outlook
When you receive an email in Outlook, you can add the sender and other recipients of this email as new contacts directly.
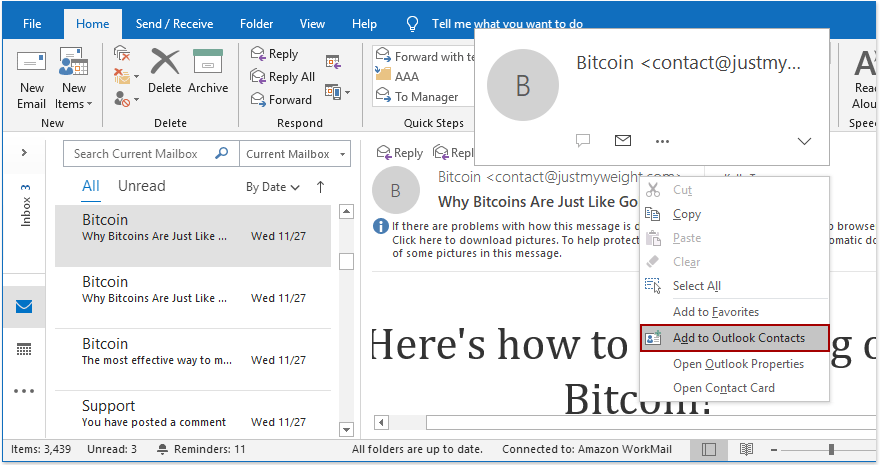
1. In the Mail view, go to the Message List, click the specified email to view it in the Reading Pane.
2. In the Reading Pane, right click the sender or any recipient you will add as new contact, and select Add to Outlook Contacts from the context menu.
3. Now a new contact window is opening. Information of the specified sender or recipient has been entered to corresponding fields. You can change the information, or add other information as you need.
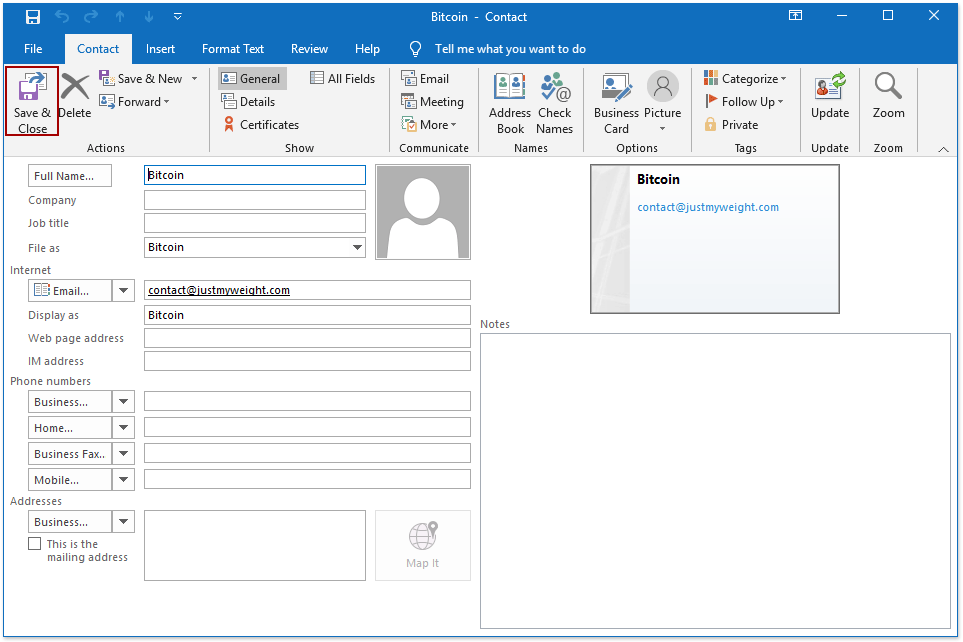
4. Click Save & Close to save the new contact, and close the contact window.
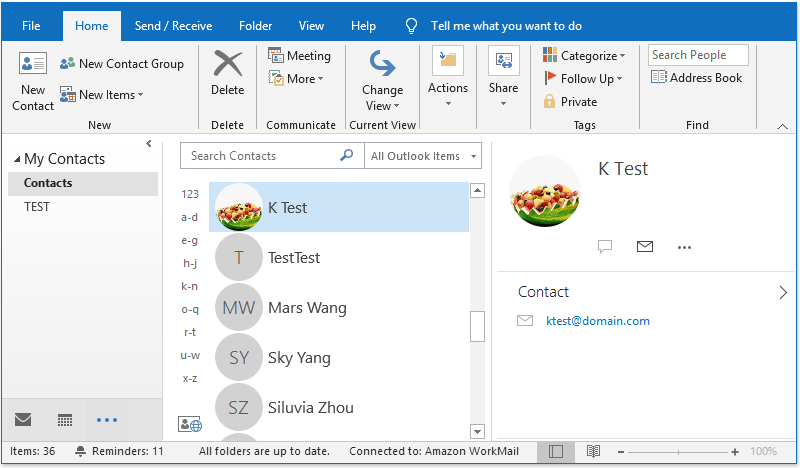
Now you can find out the new contact in the Contacts folder.
Note: This method can add a new contact from the email at a time. If you need to add the sender or all recipients as contacts, repeat above operation as you need.
Schedule an appointment in Outlook calendar
Outlook is a good personal information manager. In Outlook, you can quickly schedule your appointments in calendars with ease.
Schedule an appointment in Outlook calendar
1. Click ![]() or Calendar at the bottom of Folder Pane to shift to the Calendar view.
or Calendar at the bottom of Folder Pane to shift to the Calendar view.
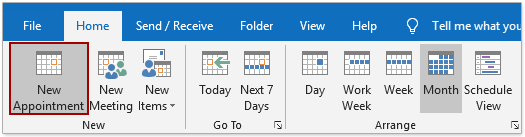
2. Click Home > New Appointment to create a new appointment.
3. In the new appointment window, please add information as you need:
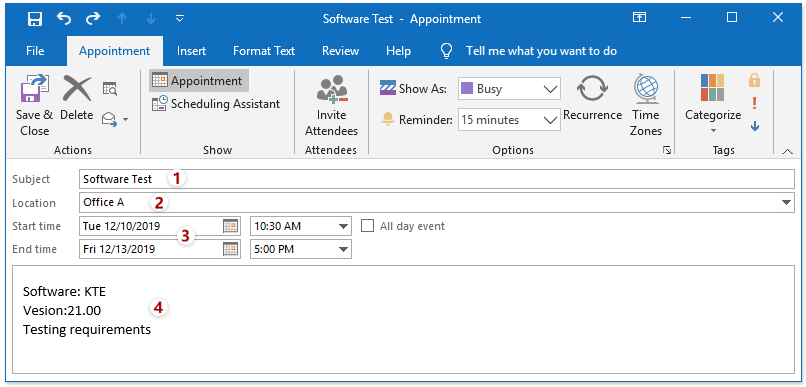
(1) Type the subject for this new appointment in the Subject field.
(2) Select or enter a location in the Location field.
(3) Specify the start time and end time for this new appointment. You can enter dates and times into proper boxes and press Enter key, or select dates and times from the drop-down menus.

(4) Type notes for the new appointment.
4. After you finish typing in information and composing the appointment note, please click Save & Close.
Notes
1. If you want to save the new appointment without closing the new appointment window, please click the Save button ![]() at the upper-left corner.
at the upper-left corner.
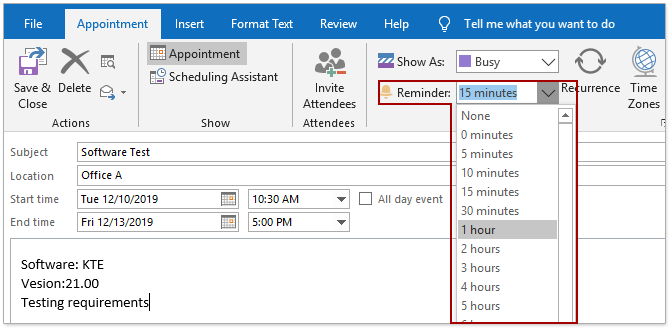
2. It will automatically add the default reminder for the new appointment. However, you can change or clear the reminder with the Reminder drop-down menu on the Appointment tab.
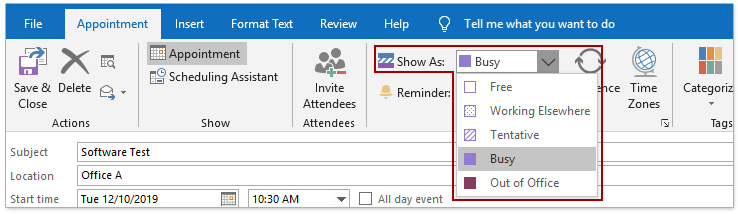
3. You can change the time status of this new appointment with the Show As drop-down menu on the Appointment tab.
Create a new task in Outlook
Some users are used to scheduling work with To-do list, and finish the tasks one by one. Now, in Outlook you can also create tasks to schedule work.
Create a new task in Outlook
1. Click ![]() or Tasks at the bottom of Folder Pane to shift to the Tasks view.
or Tasks at the bottom of Folder Pane to shift to the Tasks view.
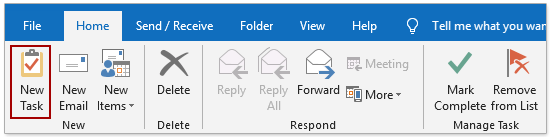
2. Click Home > New Task to create a new task.
3. Now a new task window opens. Please enter information as you need:
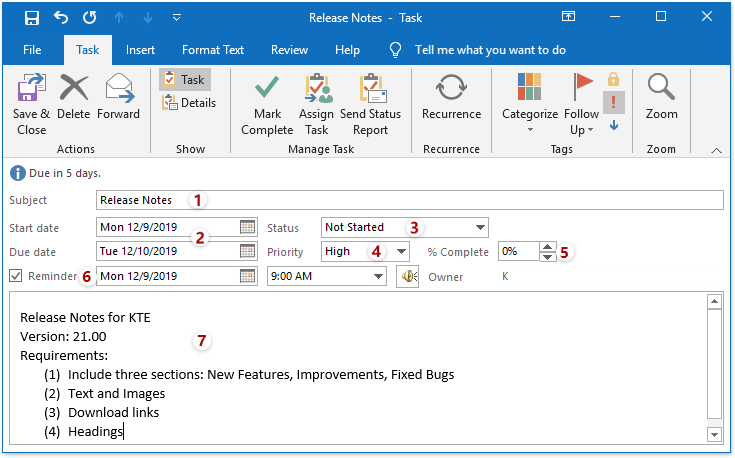
(1) Type a subject for the new task in the Subject field.
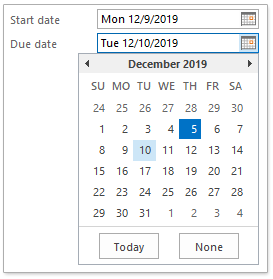
(2) Specify the start date and due date for the new task. You can enter the date and press Enter key directly, or select a date from the drop-down calendar.
(3) Specify the task status for this new task. Click the Status box, and select a task status from the drop-down list.

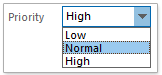
(4) Specify the task priority. Click the Priority box, and select a task priority from the drop-down list.
(5) Specify the percentage of completion for the task: type a percentage into the % complete box to mark the progress of the task.
(6) Set a reminder for the new task. Tick the Reminder option, then select a date from the following drop-down calendar and select a time from the following drop-down list.

(7) Type in the task notes as you need.
4. After you finish entering information and composing the task notes, please click Save & Close.
Notes
1. If you want to save the new task without closing the new task window, please click the Save button ![]() at the upper-left corner.
at the upper-left corner.
2. If you need to add or edit the secondary information about this new task, please click Task > Details to activate the details page.

More articles ...
Best Office Productivity Tools
Kutools for Outlook - Over 100 Powerful Features to Supercharge Your Outlook
🤖 AI Mail Assistant: Instant pro emails with AI magic--one-click to genius replies, perfect tone, multilingual mastery. Transform emailing effortlessly! ...
📧 Email Automation: Out of Office (Available for POP and IMAP) / Schedule Send Emails / Auto CC/BCC by Rules When Sending Email / Auto Forward (Advanced Rules) / Auto Add Greeting / Automatically Split Multi-Recipient Emails into Individual Messages ...
📨 Email Management: Easily Recall Emails / Block Scam Emails by Subjects and Others / Delete Duplicate Emails / Advanced Search / Consolidate Folders ...
📁 Attachments Pro: Batch Save / Batch Detach / Batch Compress / Auto Save / Auto Detach / Auto Compress ...
🌟 Interface Magic: 😊More Pretty and Cool Emojis / Boost Your Outlook Productivity with Tabbed Views / Minimize Outlook Instead of Closing ...
👍 One-click Wonders: Reply All with Incoming Attachments / Anti-Phishing Emails / 🕘Show Sender's Time Zone ...
👩🏼🤝👩🏻 Contacts & Calendar: Batch Add Contacts From Selected Emails / Split a Contact Group to Individual Groups / Remove Birthday Reminders ...
Over 100 Features Await Your Exploration! Click Here to Discover More.

