Export Outlook Task List to Excel: 4 Methods for Any Skill Level
In daily work, Outlook's task list is often used to track to-do items, project progress, deadlines, and completion status. But if you want to perform further statistics, filtering, summarization, or share the task list with colleagues, exporting it to Excel would be more convenient. This article will detail three common methods to help you export your Outlook task list to Excel.
Why Export Outlook Tasks to Excel?
Export Outlook Task List to Excel
Why Export Outlook Tasks to Excel?
Exporting your Outlook tasks to Excel can provide several benefits:
- Better analysis – Excel allows you to sort, filter, and analyze task data easily.
- Reporting and tracking – Create task progress reports or dashboards.
- Data backup – Keep an external record of important tasks.
- Sharing with others – Send task lists to colleagues who may not use Outlook.
- Project planning – Combine tasks with other project data inside Excel.
If you regularly manage multiple tasks or projects, exporting them to Excel can significantly improve your productivity.
Method 1: Export Outlook Tasks Using the List View Feature
If you only need to export a task list occasionally, the List View + Copy/Paste method is the quickest and simplest option. Outlook allows you to display tasks in a table-style List view, where key task information such as subject, due date, status, and priority is organized in columns. Once the tasks are displayed in this format, you can simply select all tasks, copy them, and paste them directly into Excel.
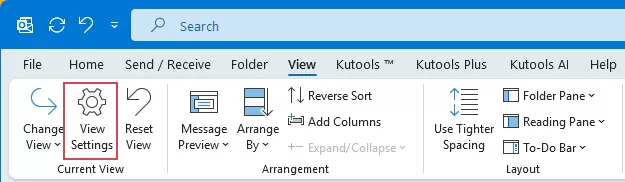
- Go to the Tasks pane and select one task folder. Click the View tab on the ribbon, then select Change View, choose Detailed from the available view options. See screenshot:

- Customize the columns you want in Excel. Click View > View Settings.
- In the Advanced View Settings dialog box, click Columns, then add or remove fields (such as Subject, Due Date, Start Date, Status, Notes, etc.) to match what you want to export to Excel.
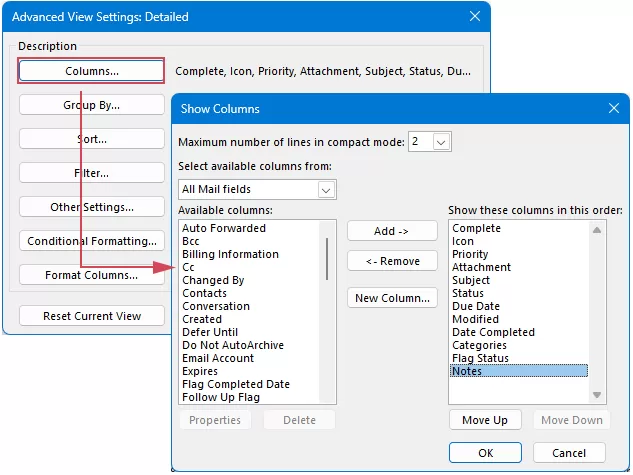
- Click OK > OK to close the dialog boxes.
- Now, click inside the task list, then press Ctrl + A to select all tasks, and Ctrl + C to copy.
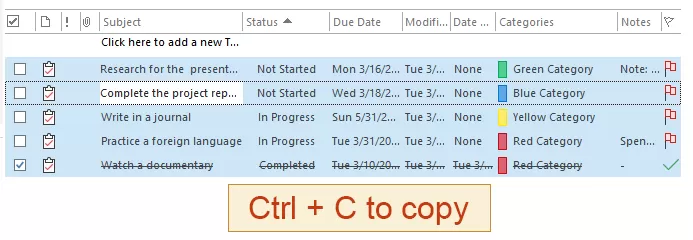
- Open a blank Excel workbook, select cell A1, and press Ctrl + V.


Limitations
- You export what’s visible in the current view (great for “current view reporting”).
- Formatting may vary; Excel usually pastes cleanly, but some fields may need cleanup and adjust.
Method 2: Export Outlook Tasks Using Import/Export feature
If you need a more structured export, Outlook’s Import/Export feature is a reliable built-in option. It allows you to export tasks as a CSV file, which can be easily opened in Excel. This method ensures your task data is organized into columns and saved as a file that can be shared, archived, or analyzed later.
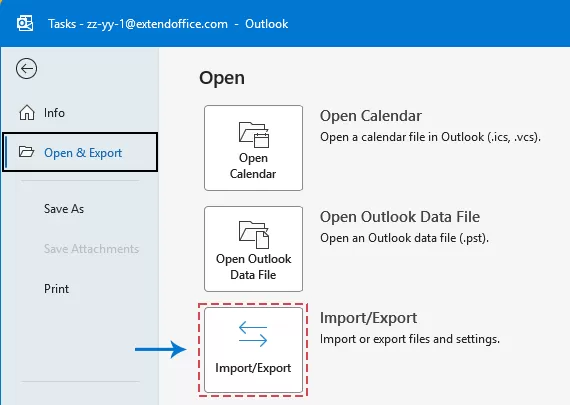
- Click File > Open & Export > Import/Export.
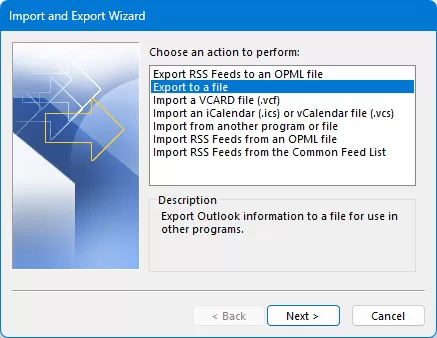
- In the Import and Export Wizard dialog box, click Export to a file, and click the Next button.
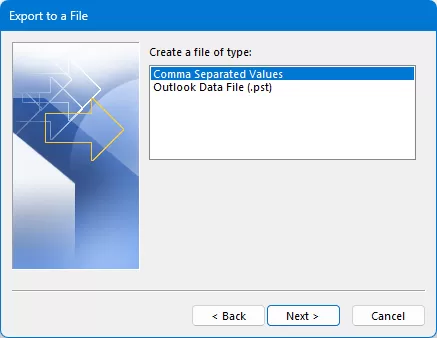
- Then, click Comma Separated Values, then click Next.
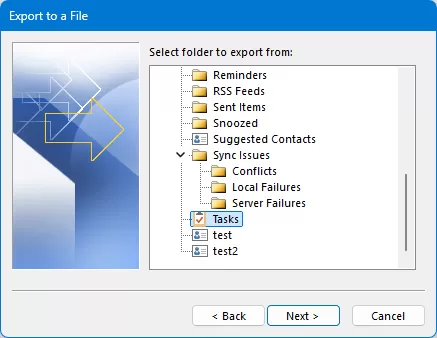
- Next, select the Tasks folder under the email account which you want to export to Excel, then click the Next button.
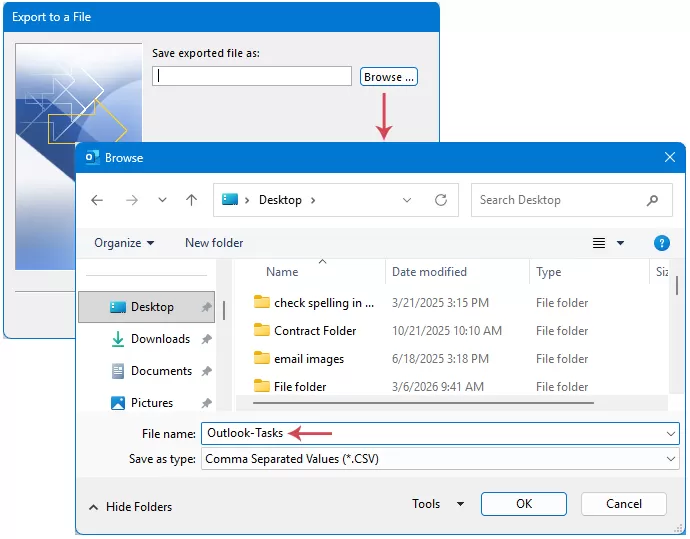
- Click Browse button to select a saving destination and name your file.
- In the last Export to a File dialog box, make sure the Export “E-Mail messages” from folder is checked..
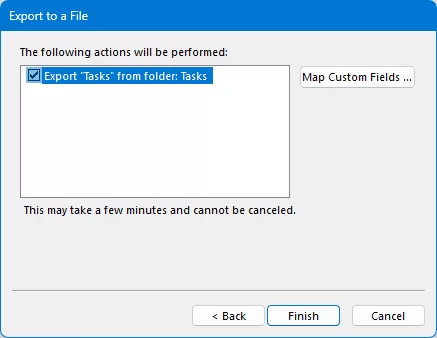 Tips: If needed, click Map Custom Fields to select the specific fields you want to include in the export.
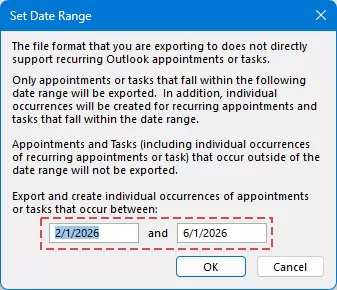
 - Finally, click Finish button to start exporting. A Set Date Range dialog box appears, enter the date range that you want to extract the tasks and then click the OK button.


Once the export is complete, open the exported CSV file directly in Excel. Now you can freely edit and analyze this task data in Excel.
Method 3: Export Outlook Tasks Using VBA code
If you need to export Outlook tasks regularly or want more control over the export process, using VBA code is a powerful option. With a simple macro, you can automatically extract task information—such as subject, start date, due date, status, and priority—and export it directly to an Excel worksheet.
- In Outlook, go to the Tasks pane and select one task folder you want to export. Press Alt + F11 to open the VBA Editor.
- Click Insert > Module. Copy and paste the following code into the window:
Sub ExportSelectedTasksFolderToExcel()
    Dim olApp As Outlook.Application
    Dim olNs As Outlook.NameSpace
    Dim olFolder As Outlook.MAPIFolder
    Dim olItems As Outlook.Items
    Dim olTask As Object
    Dim xlApp As Object
    Dim xlWB As Object
    Dim xlWS As Object
    Dim i As Long
    Dim rowNum As Long
    Dim savePath As Variant
    Dim folderName As String
    Set olApp = Outlook.Application
    Set olNs = olApp.GetNamespace("MAPI")
    Set olFolder = olApp.ActiveExplorer.CurrentFolder
    If olFolder.DefaultItemType <> olTaskItem Then
        MsgBox "Please select a Tasks folder before running this macro.", vbExclamation
        Exit Sub
    End If
    folderName = olFolder.Name
    Set xlApp = CreateObject("Excel.Application")
    savePath = xlApp.GetSaveAsFilename( _
        InitialFileName:="OutlookTasks.xlsx", _
        FileFilter:="Excel Workbook (*.xlsx), *.xlsx", _
        Title:="Save Exported Tasks As")
    If savePath = False Then
        MsgBox "Export cancelled.", vbInformation
        xlApp.Quit
        Set xlApp = Nothing
        Exit Sub
    End If
    Set xlWB = xlApp.Workbooks.Add
    Set xlWS = xlWB.Sheets(1)
    Set olItems = olFolder.Items
    olItems.Sort "[DueDate]"
    xlWS.Cells(1, 1).Value = "Subject"
    xlWS.Cells(1, 2).Value = "Status"
    xlWS.Cells(1, 3).Value = "Start Date"
    xlWS.Cells(1, 4).Value = "Due Date"
    xlWS.Cells(1, 5).Value = "% Complete"
    xlWS.Cells(1, 6).Value = "Priority"
    xlWS.Cells(1, 7).Value = "Categories"
    xlWS.Cells(1, 8).Value = "Created"
    xlWS.Cells(1, 9).Value = "Modified"
    xlWS.Cells(1, 10).Value = "Body"
    rowNum = 2
    For i = 1 To olItems.Count
        If TypeName(olItems(i)) = "TaskItem" Then
            Set olTask = olItems(i)
            xlWS.Cells(rowNum, 1).Value = olTask.Subject
            xlWS.Cells(rowNum, 2).Value = olTask.Status
            xlWS.Cells(rowNum, 3).Value = olTask.StartDate
            xlWS.Cells(rowNum, 4).Value = olTask.DueDate
            xlWS.Cells(rowNum, 5).Value = olTask.PercentComplete
            xlWS.Cells(rowNum, 6).Value = olTask.Importance
            xlWS.Cells(rowNum, 7).Value = olTask.Categories
            xlWS.Cells(rowNum, 8).Value = olTask.CreationTime
            xlWS.Cells(rowNum, 9).Value = olTask.LastModificationTime
            xlWS.Cells(rowNum, 10).Value = olTask.Body

            rowNum = rowNum + 1
        End If
    Next i
    xlWS.Columns.AutoFit
    xlWB.SaveAs CStr(savePath), 51
    xlWB.Close False
    xlApp.Quit
    Set xlWS = Nothing
    Set xlWB = Nothing
    Set xlApp = Nothing
    Set olItems = Nothing
    Set olFolder = Nothing
    Set olNs = Nothing
    Set olApp = Nothing
    MsgBox "Tasks exported successfully from folder:" & vbCrLf & _
           folderName & vbCrLf & _
           "Saved to:" & vbCrLf & CStr(savePath), vbInformation

End Sub
- Press F5 to run the macro. In the window, choose a save location and specify a file name for the exported file.
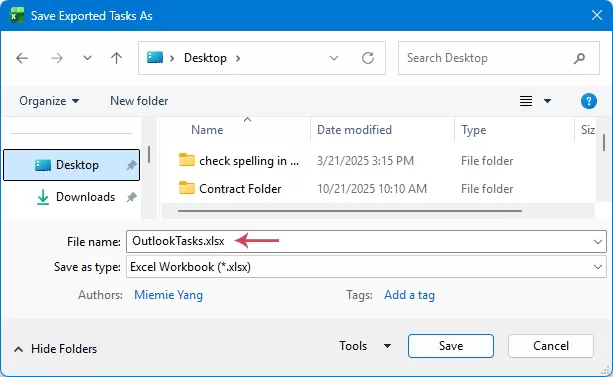
- Then, click Save button. The macro will automatically export your Outlook tasks to a new Excel workbook, including details such as Subject, Status, Date, Categories, Body/Notes and other task properties.

Method 4: Export Outlook Tasks Using Kutools for Outlook
If you prefer a faster and more user-friendly solution, Kutools for Outlook provides an efficient way to export Outlook tasks to Excel. With its Quick Report feature, you can generate a structured task report in just a few clicks—no complex settings or coding required.
After downloading and installing Kutools for Outlook, please do as this:
- Select the task folder you want to export to Excel.
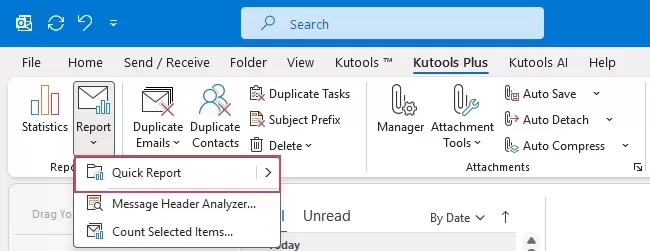
- Then, click Kutools Plus > Report > Quick Report, see screenshot:
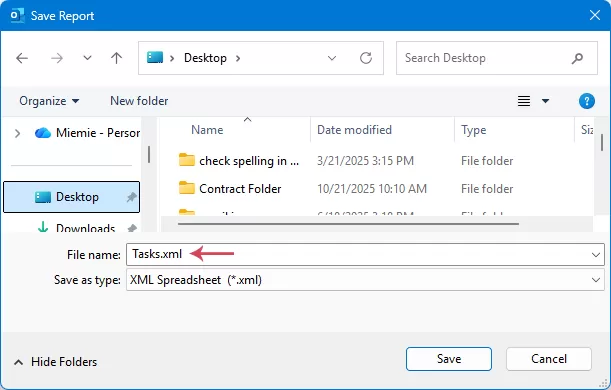
- In the Save Report dialog box, first select the destination folder where you want to save the Excel file. Then, enter a name for the exported file in the File name field, and finally click Save button.
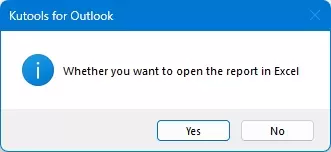
- After exporting, a dialog box will appear asking whether you want to open the exported file. Click Yes to open it immediately.


Kutools will automatically create a structured report of your Outlook tasks in Excel, including task details such as: Subject, Start Date, Due Date, Status, Categories, Body and so on.
You can specify which task fields to include in the export by clicking Kutools Plus > Report > Quick Report > Settings, and then selecting the items you want to export by checking the corresponding boxes.

Kutools for Outlook
Simplify your Outlook workflow with over 100 advanced features. Export tasks to Excel with a single click and automate repetitive email tasks.
Conclusion
Exporting Outlook tasks to Excel is a practical way to better organize, analyze, and share your task information. In this guide, we explored four effective methods to accomplish this.
Each method has its own advantages depending on your needs. If you need a quick manual export, the List View method works well. For creating a reusable file, the Import/Export feature is a reliable choice. If you want automation and flexibility, VBA provides more control. And for the fastest and most convenient solution, Kutools for Outlook can generate professional task reports with just a few clicks.
By choosing the method that best fits your workflow, you can easily move your Outlook tasks into Excel and take advantage of Excel’s powerful tools for sorting, filtering, and task analysis.
| Method | Difficulty | Best For | Key Advantages | Limitations |
|---|---|---|---|---|
| List View + Copy/Paste | Very Easy | Quick one-time export | Fast and simple, no setup required | Not ideal for large task lists |
| Import/Export Feature | Easy | Creating reusable export files | Built-in Outlook feature, exports to CSV format | Requires several steps |
| VBA Code | Advanced | Automation and frequent exports | Fully customizable, can export many fields | Requires VBA knowledge |
| Kutools for Outlook | Very Easy | Fast and professional task reports | One-click report generation, structured output | Requires installing Kutools |
Best Office Productivity Tools
Experience the all-new Kutools for Outlook with 100+ incredible features! Click to download now!
📧 Email Automation: Auto Reply (Available for POP and IMAP) / Schedule Send Emails / Auto CC/BCC by Rules When Sending Email / Auto Forward (Advanced Rules) / Auto Add Greeting / Automatically Split Multi-Recipient Emails into Individual Messages ...
📨 Email Management: Recall Emails / Block Scam Emails by Subjects and Others / Delete Duplicate Emails / Advanced Search / Consolidate Folders ...
📁 Attachments Pro: Batch Save / Batch Detach / Batch Compress / Auto Save / Auto Detach / Auto Compress ...
🌟 Interface Magic: 😊More Pretty and Cool Emojis / Remind you when important emails come / Minimize Outlook Instead of Closing ...
👍 One-click Wonders: Reply All with Attachments / Anti-Phishing Emails / 🕘Show Sender's Time Zone ...
👩🏼🤝👩🏻 Contacts & Calendar: Batch Add Contacts From Selected Emails / Split a Contact Group to Individual Groups / Remove Birthday Reminders ...
Use Kutools in your preferred language – supports English, Spanish, German, French, Chinese, and 40+ others!


🚀 One-Click Download — Get All Office Add-ins
Strongly Recommended: Kutools for Office (5-in-1)
One click to download five installers at once — Kutools for Excel, Outlook, Word, PowerPoint and Office Tab Pro. Click to download now!
- ✅ One-click convenience: Download all five setup packages in a single action.
- 🚀 Ready for any Office task: Install the add-ins you need, when you need them.
- 🧰 Included: Kutools for Excel / Kutools for Outlook / Kutools for Word / Office Tab Pro / Kutools for PowerPoint
Table of Contents
- Why Export Outlook Tasks to Excel?
- Method 1:Use Outlook’s List View feature
- Method 2:Use Outlook’s Import/Export feature
- Method 3: Use VBA code
- Method 4: Use Kutools for Outlook
- Conclusion
- Best Office Productivity Tools
Kutools for Outlook
Brings 100+ advanced features to Outlook
- ⬇️ Free Download
- 🛒 Purchase Now
- 📘 Feature Tutorials
- 🎁 30-Day Free Trial