How to auto forward certain incoming emails with custom subject and body in Outlook?
Auto-forwarding specific emails in Outlook can save a lot of time, especially when you need to keep others informed or forward important information to different accounts. In this tutorial, we will show you two ways to auto-forward specific incoming emails while customizing the subject and body: using Outlook's built-in rules and Kutools for Outlook's Advanced Rules feature for more flexibility and control.
- Auto forward certain incoming emails with custom subject and body in Outlook using VBA
- Auto forward certain incoming emails with custom subject and body in Outlook using Advanced Rules
Auto forward certain incoming emails with custom subject and body in Outlook using VBA
You can combine an "auto forward emails" rule and a VBA script to automatically forward certain incoming emails with custom subject and body. Please do as follows:
Create a VBA script:
1. Launch Outlook, press "Alt" + "F11" to open the "Microsoft Visual Basic for Applications" window.
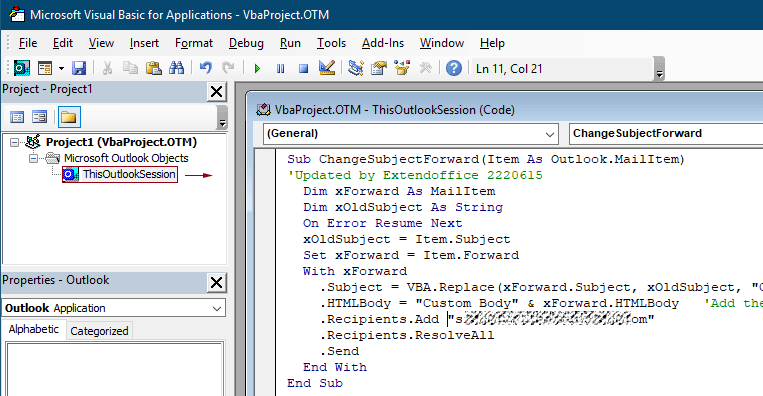
2. In the left pane, double-click "Project1" > "Microsoft Outlook Objects" > "ThisOutlookSession", and then copy the following VBA code into the "ThisOutlookSession (Code)" window:
VBA code: Forward emails with custom subject and body
Sub ChangeSubjectForward(Item As Outlook.MailItem)
    'Updated by Extendoffice 20220615
    Dim xForward As MailItem
    Dim xOldSubject As String
    On Error Resume Next
    xOldSubject = Item.Subject
    Set xForward = Item.Forward
    With xForward
        .Subject = VBA.Replace(xForward.Subject, xOldSubject, "Custom Subject")
        .HTMLBody = "Custom Body" & xForward.HTMLBody
        .Recipients.Add "Recipient’s Email Address"
        .Recipients.ResolveAll
        .Send
    End With
End Sub
Notes:
- Replace "Custom Subject" and "Custom Body" with your desired subject and body text.
- Replace "Recipient’s Email Address" with the target recipient’s email address.
3. Press "Alt" + "Q" to close the "Microsoft Visual Basic for Applications" window.
Create an auto-forward rule to run the script:
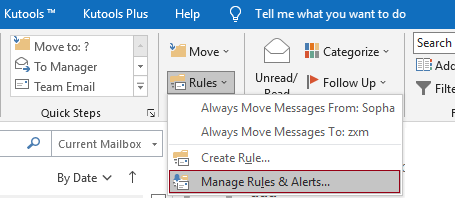
4. In the Mail view, click "Home" > "Rules" > "Manage Rules & Alerts".
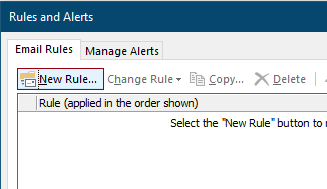
5. In the "Rules and Alerts" dialog box, click the "New Rule" button.
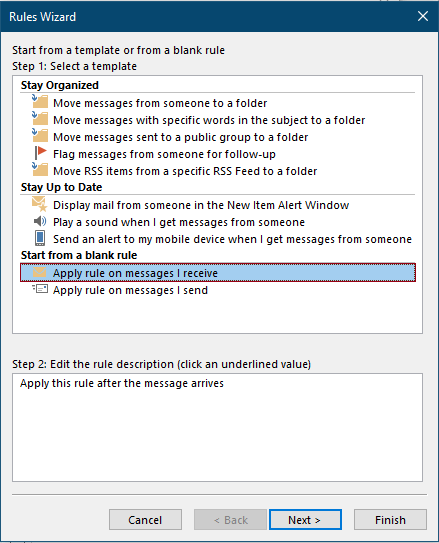
6. In the first "Rules Wizard", select "Apply rule on messages I receive" under "Start from a blank rule", and click the "Next" button.
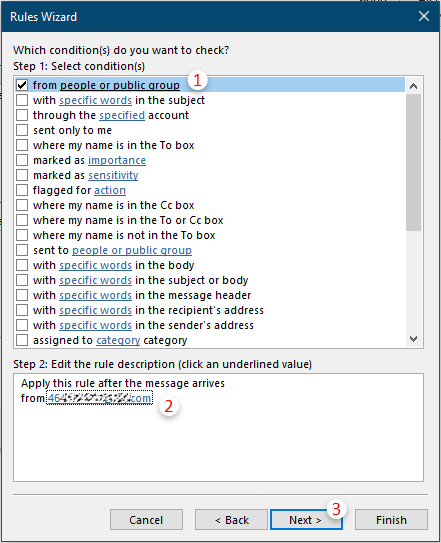
7. In the second "Rules Wizard":
- Check "from people or public group".
- Click the underlined text to select the specific sender.
- Click the "Next" button.
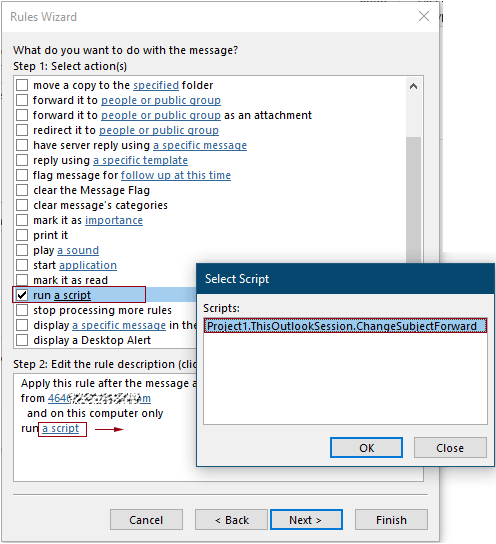
8. In the third "Rules Wizard":
- Check "run a script".
- Click the underlined "a script", select the script created earlier, and click "OK".
- Click the "Next" button.
Tips: If the "run a script" option is missing, refer to Restore missing Run A Script option in Outlook rule.
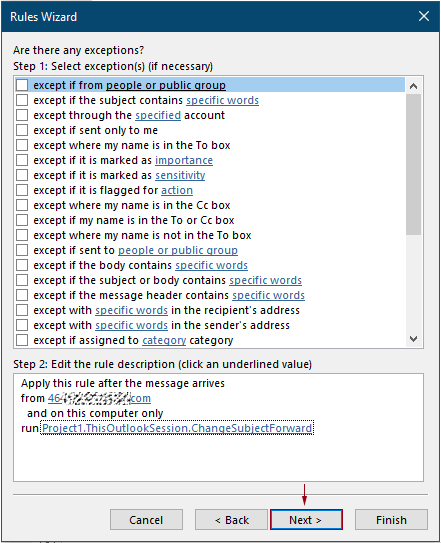
9. In the fourth "Rules Wizard", configure exceptions if needed, otherwise, click "Next".
10. In the last "Rules Wizard", specify a rule name, ensure "Turn on this rule" is checked, then click "Finish".
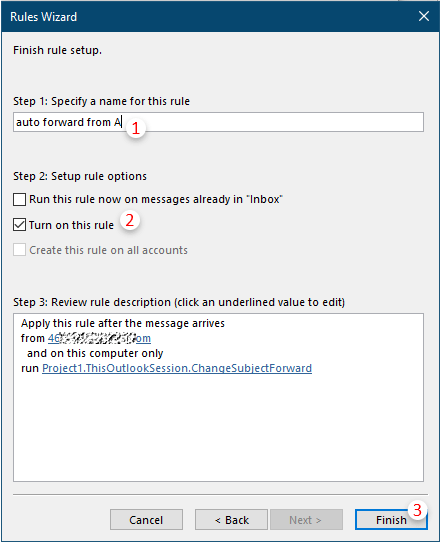
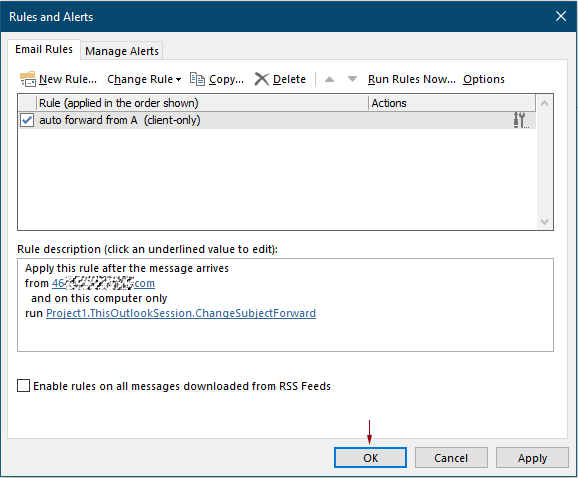
11. In the popping up "Microsoft Outlook" warning box, click "OK".

12. Finally, click "OK" again to exit the "Rules and Alerts" dialog box and save the rule.
From now on, when an email meeting the specified condition arrives, it will be auto-forwarded with your customized subject and body automatically.
Auto forward certain incoming emails with custom subject and body in Outlook using Advanced Rules
"Kutools for Outlook" offers a more advanced way to auto-forward emails with customizable subjects and bodies. Here’s how it works:
Say goodbye to Outlook inefficiency! Kutools for Outlook makes batch email processing easier - now with a 30-day free trial! Download Kutools for Outlook Now!!
1. Download and install Kutools for Outlook, then activate Outlook.
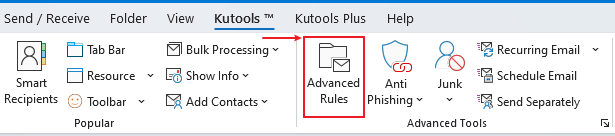
2. Click "Kutools" > "Advanced Rules".
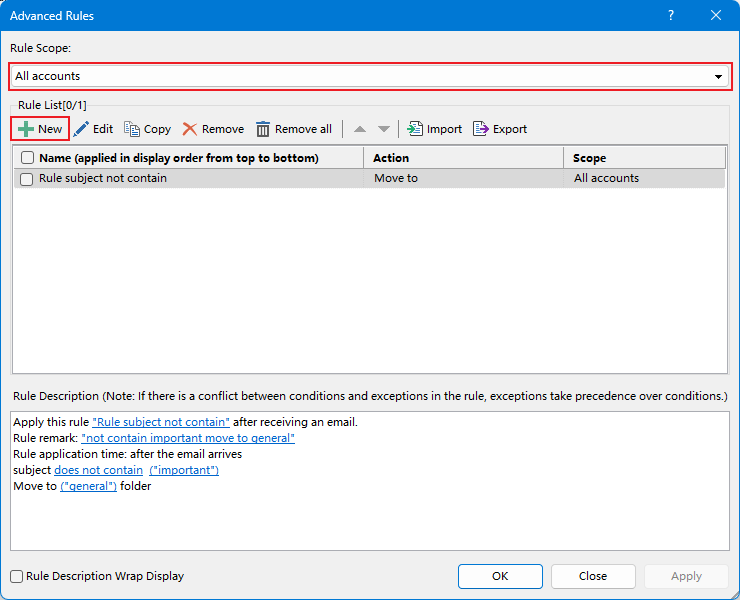
3. In the "Advanced Rules" dialog, choose the rule scope (All accounts or specific account), and then click the "New" button to create a new rule.
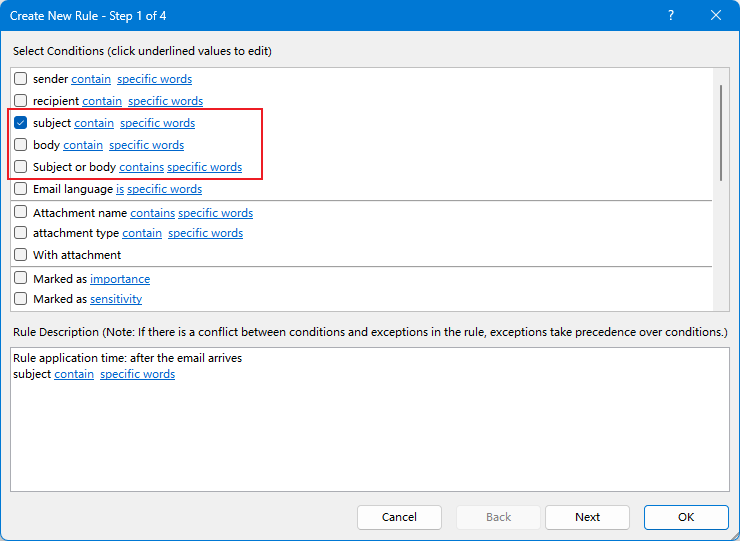
4. In step 1 of the rule creation dialog, tick the conditions as needed, then click "specific words" to add custom text.
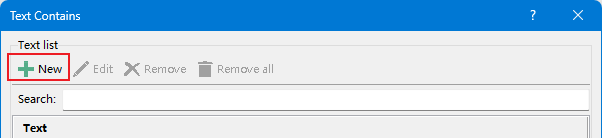
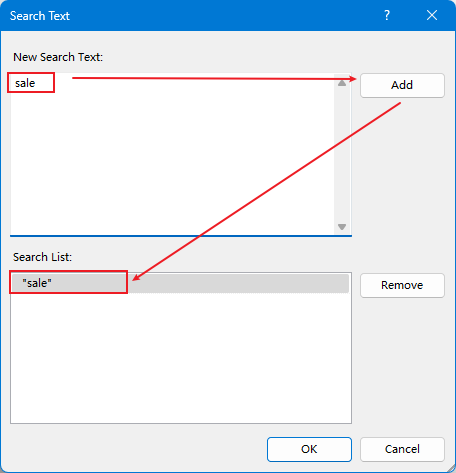
5. In the "Text Contains" dialog:
- Click "New" to add new words.
- In the "Search Text" dialog, input the text and click "OK".
- Click "OK" again to confirm adding the text.
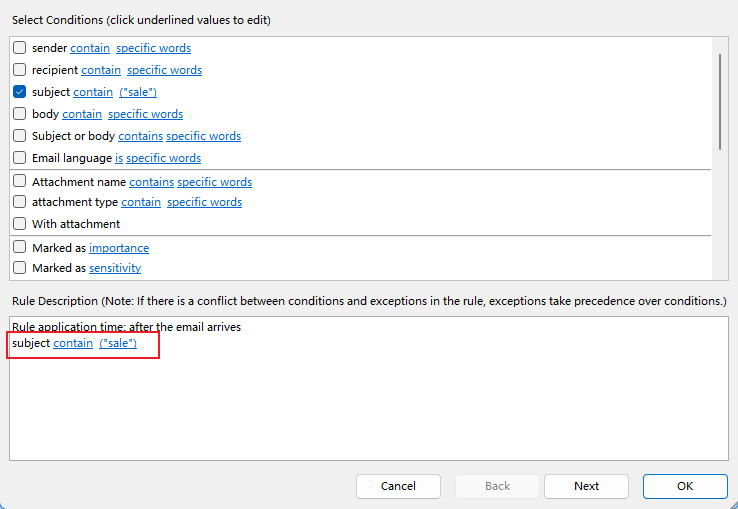
You will now see that the search condition has been configured:
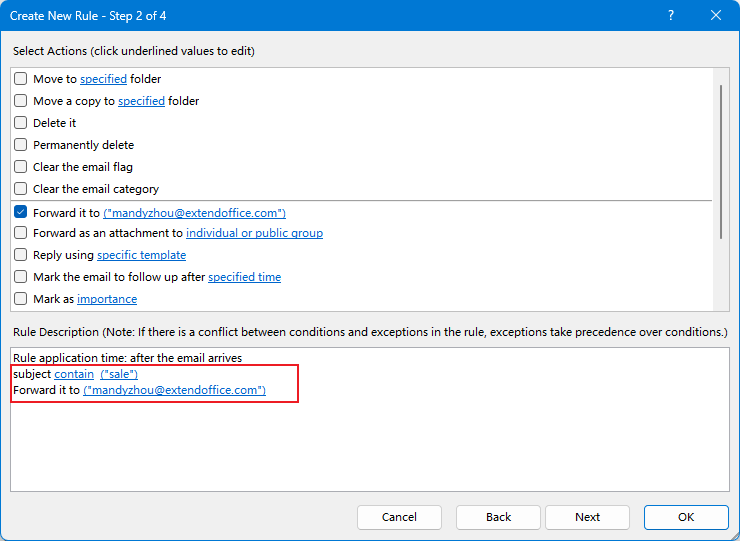
6. Click "Next" to proceed to step 2, tick "Forward it to individual or public group", then add the recipients and click "OK".
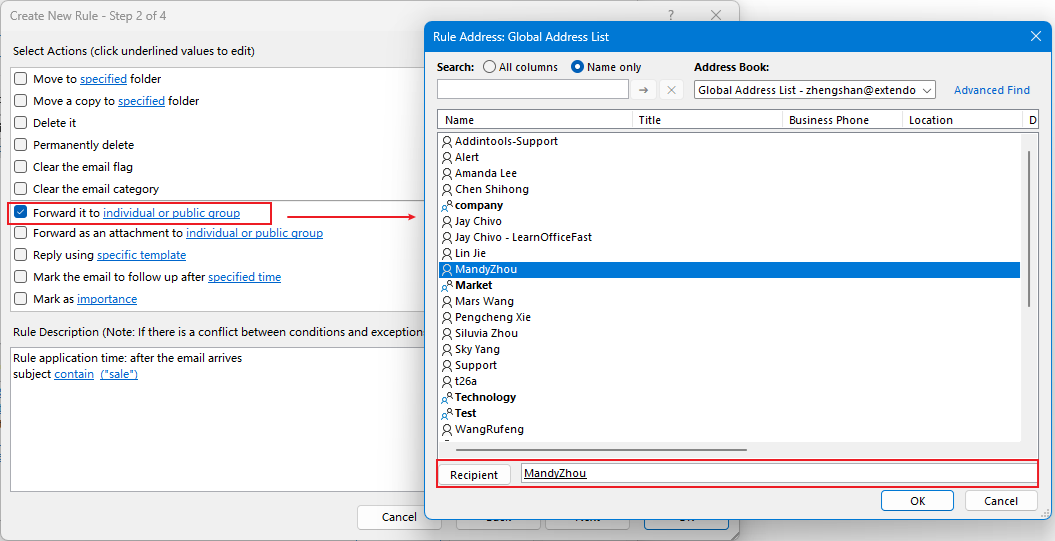
Now the subject and recipients have been configured:
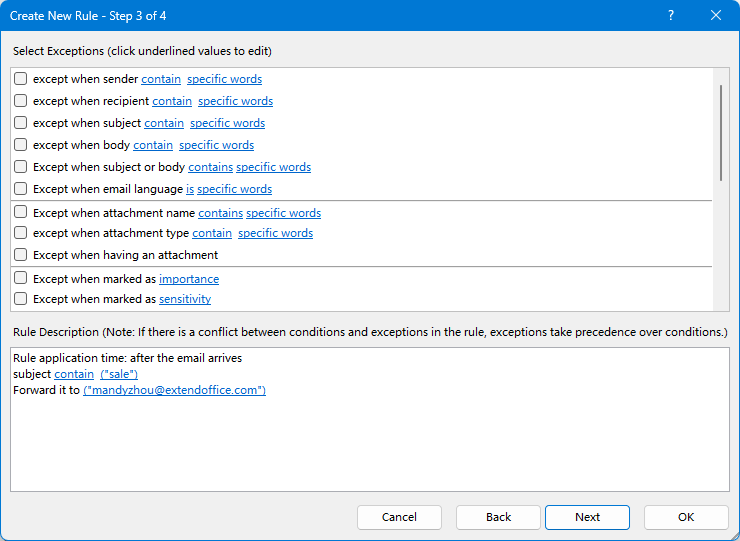
7. Click "Next" to proceed to step 3, where you can set exceptions. If no exceptions are needed, just click "OK" to continue.
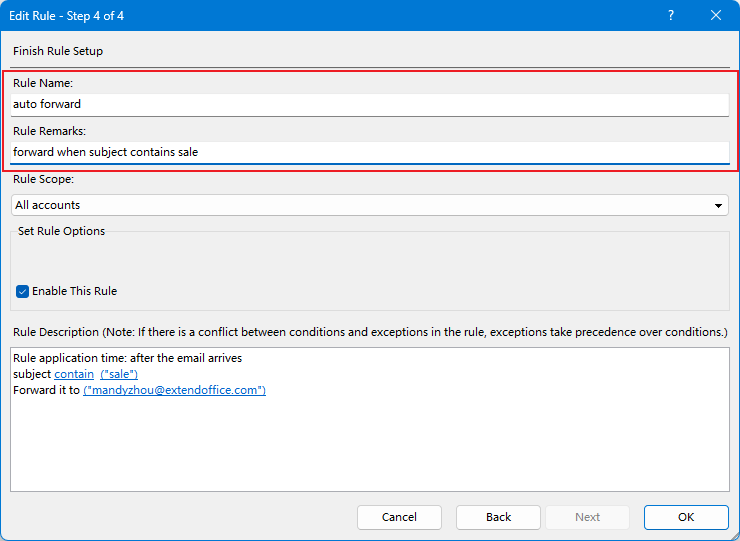
8. In the final step, assign a name to the rule, add any remarks if necessary, and click "OK" to save the rule.
Now the rule is created. Click "OK" or "Apply" to activate it:
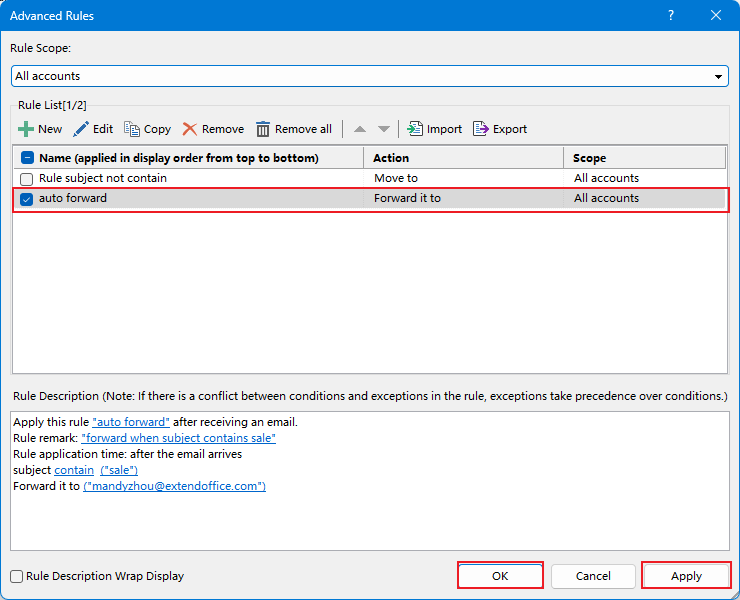
All incoming messages containing "sale" in their subject line will be automatically forwarded to the specified recipient.
Related Articles
Best Office Productivity Tools
Experience the all-new Kutools for Outlook with 100+ incredible features! Click to download now!
📧 Email Automation: Auto Reply (Available for POP and IMAP) / Schedule Send Emails / Auto CC/BCC by Rules When Sending Email / Auto Forward (Advanced Rules) / Auto Add Greeting / Automatically Split Multi-Recipient Emails into Individual Messages ...
📨 Email Management: Recall Emails / Block Scam Emails by Subjects and Others / Delete Duplicate Emails / Advanced Search / Consolidate Folders ...
📁 Attachments Pro: Batch Save / Batch Detach / Batch Compress / Auto Save / Auto Detach / Auto Compress ...
🌟 Interface Magic: 😊More Pretty and Cool Emojis / Remind you when important emails come / Minimize Outlook Instead of Closing ...
👍 One-click Wonders: Reply All with Attachments / Anti-Phishing Emails / 🕘Show Sender's Time Zone ...
👩🏼🤝👩🏻 Contacts & Calendar: Batch Add Contacts From Selected Emails / Split a Contact Group to Individual Groups / Remove Birthday Reminders ...
Use Kutools in your preferred language – supports English, Spanish, German, French, Chinese, and 40+ others!


🚀 One-Click Download — Get All Office Add-ins
Strongly Recommended: Kutools for Office (5-in-1)
One click to download five installers at once — Kutools for Excel, Outlook, Word, PowerPoint and Office Tab Pro. Click to download now!
- ✅ One-click convenience: Download all five setup packages in a single action.
- 🚀 Ready for any Office task: Install the add-ins you need, when you need them.
- 🧰 Included: Kutools for Excel / Kutools for Outlook / Kutools for Word / Office Tab Pro / Kutools for PowerPoint