Harness Smart Recipients to Enhance Outlook Contact Management
Managing email recipients can be a cumbersome task, especially when working across multiple accounts or dealing with extensive contact lists. Kutools for Outlook introduces the Smart Recipients feature to revolutionize the way you manage your email recipients, offering enhanced capabilities beyond Outlook’s native functionality. With cross-account contact access, advanced search, effortless sorting and filtering, customizable display options, and intuitive visual indicators, Smart Recipients ensures that your email communication is seamless and efficient. This guide will explore why Smart Recipients is an indispensable tool, how to activate it, and how to make the most of its robust features.
Why Choose Smart Recipients
Managing recipients efficiently is crucial for productivity, especially when working with multiple accounts or large contact lists. Outlook’s built-in tools can fall short in these situations, but Smart Recipients enhances recipient management with greater control and ease. Below are the key advantages of this feature:
📂 Seamless Multi-Account Contact Management
Smart Recipients enables seamless access to contacts across all your email accounts in Outlook, allowing you to either view contacts from all accounts simultaneously or focus on a specific account. This flexibility eliminates the hassle of switching between accounts and ensures that you always have the right contacts at your fingertips.
🔍 Advanced Quick Search and Filter Capabilities
With Smart Recipients, you can easily search through extensive contact lists using multiple fields, including name, email, company, or phone number. The advanced search and filter functionality enables you to quickly pinpoint the exact contacts you need, even when managing large and complex contact databases. By refining results, this feature helps save valuable time when composing emails to specific individuals or groups.
↕️ Versatile and Flexible Sorting Options
Smart Recipients offers a range of sorting options to help you organize your contacts more effectively. You can sort by various fields, such as name, email domain, company, or custom criteria, in ascending, descending, or even random order. This flexibility in sorting ensures you can quickly browse through contacts in a way that best suits your workflow, making it easier to manage large contact lists without getting overwhelmed.
⚙️ Customizable Contact Display for Maximum Efficiency
Smart Recipients gives you full control over how contact information is displayed. In the left pane of the Smart Recipients window, you can customize which fields—such as name, title, company, or email—are visible, helping you focus on the most relevant details for your current task. This personalized view reduces clutter and boosts productivity by showing only the data you need. In the right pane, all non-empty fields for the selected contacts, including name, title, company, phone number, and email, are displayed.
✅ Error-Free Recipient Handling with Visual Markers
One of the standout features of Smart Recipients is its use of color-coded visual markers, which are automatically applied when you add contacts to the “To,” “Cc,” or “Bcc” fields. These markers help you immediately see which recipients have already been added, preventing duplicate entries and ensuring that your recipient lists are accurate and well-organized.
⏱️ Streamlined Interface for Time-Saving Efficiency
The intuitive and easy-to-navigate interface of Smart Recipients reduces the time spent managing recipients, allowing you to focus more on composing your emails rather than dealing with the logistics of adding contacts. With its streamlined design, this feature improves productivity and simplifies email recipient management.
How to Activate Smart Recipients in Kutools for Outlook
To use Smart Recipients every time you send an email:
Step 1. Click the "Kutools" tab. Click the arrow next to "Smart Recipients".
Step 2. Select "Smart Recipients".

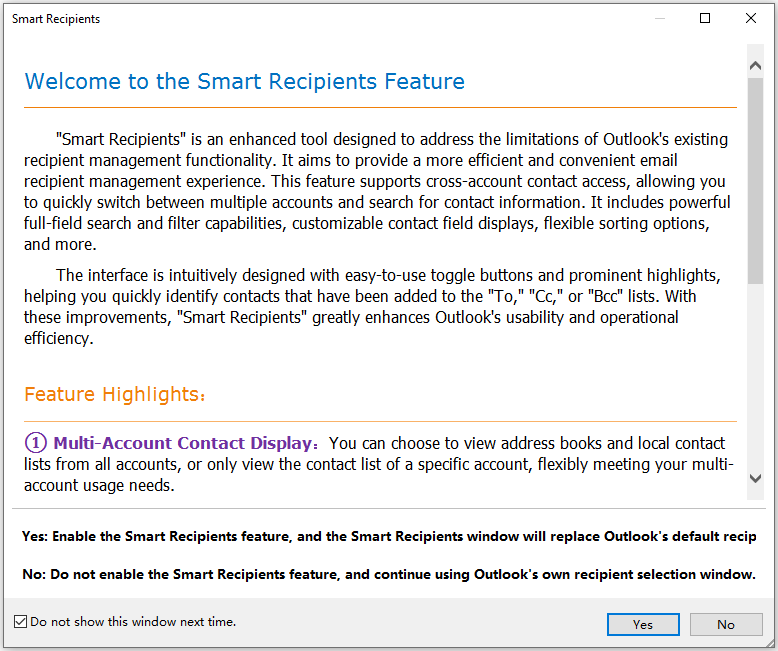
When using Smart Recipients for the first time, a welcome window will appear
- Click "Yes" to enable (this replaces Outlook's default recipient window).
- Click "No" to continue using Outlook's default window.
- Check "Do not show this window next time" to skip future welcome messages.
To use Smart Recipients just for your current email:
Step 1. Click the "Kutools" tab. Click the arrow next to "Smart Recipients".
Step 2. Choose "Send an email immediately using Smart Recipients".

How the use the Smart Recipients feature
Step 1: Select "Kutools" > "Smart Recipients" to activate this feature.
Step 2: Click "New Email" under the "Home" tab to start composing a new message.

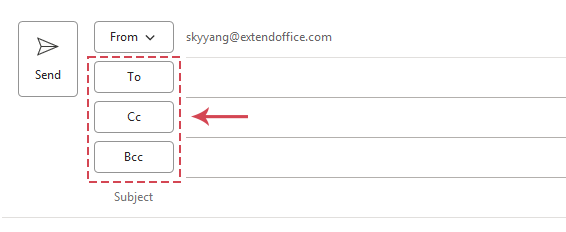
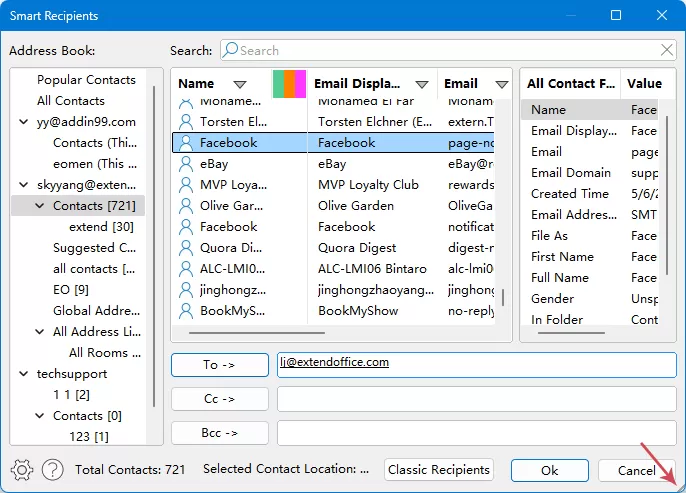
Step 3: In the email composition window, click the "To", "Cc", or "Bcc" button to open the Smart Recipients window.
Step 4: Add recipients in the Smart Recipients window
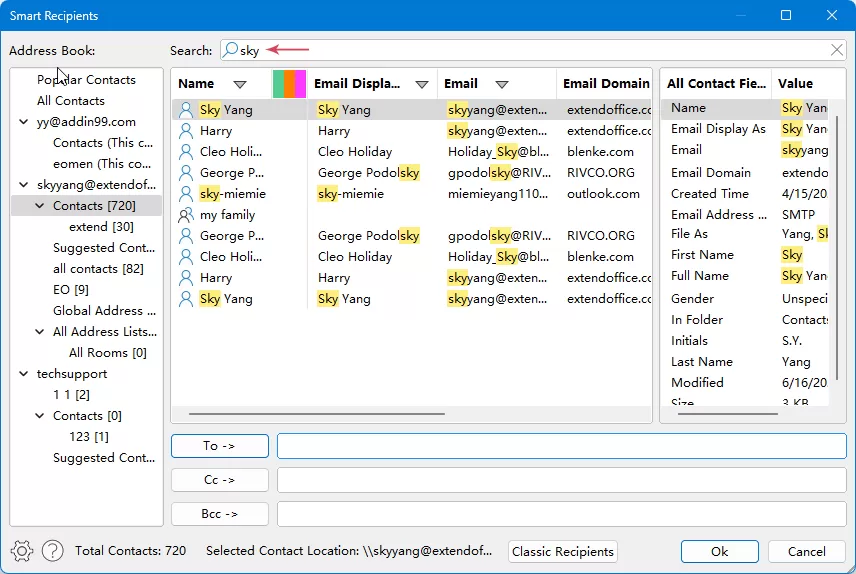
- Select a contact folder you want to add recipients from the "Address Book" drop-down list.
- Double-click on a contact, and the contact will be added to the To, Cc, or Bcc button field. If you want to add contacts to another field, for example, the CC field, place the cursor on the CC field, and then double-click on a contact in the Smart Recipients window. The contact will be automatically added to the CC field. A prominent visual marker (color indicator) will appear next to added contacts, helping you avoid accidental or duplicate selections.
- Select a contact, then click the "To", "Cc", or "Bcc" button to add the recipient to the corresponding field. A prominent visual marker (color indicator) will appear next to added contacts, helping you avoid accidental or duplicate selections.
- Click "OK".

Advanced Usage
To quickly locate your desired contacts, enter a keyword in the "Search" textbox. It supports searching across all contact fields, and matching contacts will be highlighted in yellow.
To sort or filter the contacts, click the filter button at the top of the column you wish to sort or filter. You can sort by name, email, email domain, company, and other fields in ascending, descending, or random order.
You can also filter the displayed columns.If you want to filter contacts based on a specific criterion, such as filtering the contacts whose name contains "m", click on the filter button to display the filter menu, then type "m" into the "Search" box. The filter result will be displayed in the filter menu, click "Ok". Only the contacts whose names contain "m" are displayed.

Or you can filter contact directly in a field by ticking the items you want in the filter menu, and click Ok.

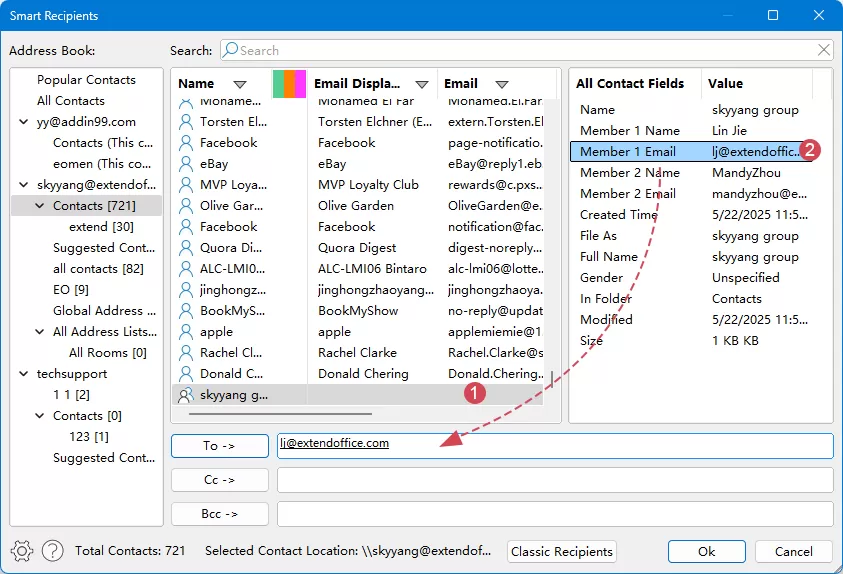
If you want to add specific contacts from a contact group,
- Click on the contact group
- Go to the detailed information list in the right section, and double-click to add the specific member email to the desired field.


Resizing the Window
Click and drag the bottom-right corner of the Smart Recipients window to adjust its size for optimal viewing
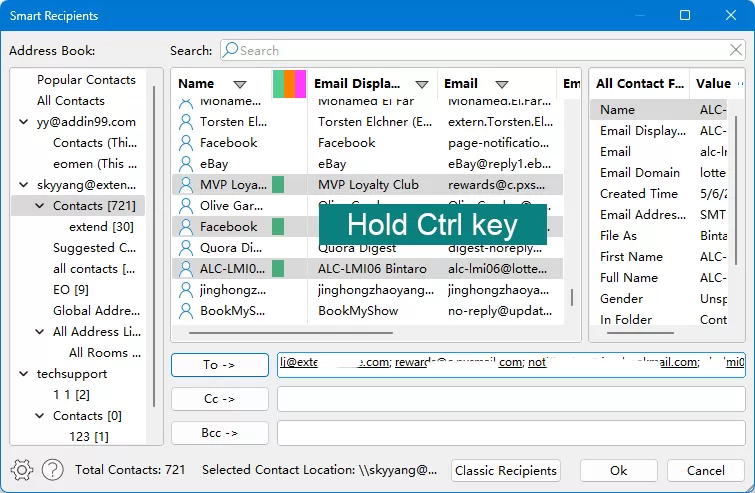
To add multiple contacts simultaneously
Hold "Ctrl" to select individual contacts; Hold "Shift" to select a range of contacts
Click your desired field button (To/Cc/Bcc) to add all selected contacts
Right-click any contact to access quick actions
- Add to To/Cc/Bcc field
- Remove from the fields

Classic Recipients
Click this button to switch to Outlook’s built-in contact selection window. To return to Kutools’ Smart Recipients interface, simply click the Smart Recipients button on the toolbar.


Disable the Smart Recipients feature
Step 1. Click the "Kutools" tab. Click the arrow next to "Smart Recipients".
Step 2. Select "Smart Recipients".
Step 3. When the confirmation dialog appears, click "OK" to disable the feature
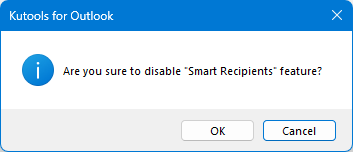
This will revert to Outlook's default recipient selection window.
Demo: Comprehensive Guide to Smart Recipients Feature
Explore the Kutools / Kutools Plus tab in this video – packed with powerful features, including powerful AI tools! Try all features free for 30 days with no limitations!
Best Office Productivity Tools
Experience the all-new Kutools for Outlook with 100+ incredible features! Click to download now!
📧 Email Automation: Auto Reply (Available for POP and IMAP) / Schedule Send Emails / Auto CC/BCC by Rules When Sending Email / Auto Forward (Advanced Rules) / Auto Add Greeting / Automatically Split Multi-Recipient Emails into Individual Messages ...
📨 Email Management: Recall Emails / Block Scam Emails by Subjects and Others / Delete Duplicate Emails / Advanced Search / Consolidate Folders ...
📁 Attachments Pro: Batch Save / Batch Detach / Batch Compress / Auto Save / Auto Detach / Auto Compress ...
🌟 Interface Magic: 😊More Pretty and Cool Emojis / Remind you when important emails come / Minimize Outlook Instead of Closing ...
👍 One-click Wonders: Reply All with Attachments / Anti-Phishing Emails / 🕘Show Sender's Time Zone ...
👩🏼🤝👩🏻 Contacts & Calendar: Batch Add Contacts From Selected Emails / Split a Contact Group to Individual Groups / Remove Birthday Reminders ...
Use Kutools in your preferred language – supports English, Spanish, German, French, Chinese, and 40+ others!


🚀 One-Click Download — Get All Office Add-ins
Strongly Recommended: Kutools for Office (5-in-1)
One click to download five installers at once — Kutools for Excel, Outlook, Word, PowerPoint and Office Tab Pro. Click to download now!
- ✅ One-click convenience: Download all five setup packages in a single action.
- 🚀 Ready for any Office task: Install the add-ins you need, when you need them.
- 🧰 Included: Kutools for Excel / Kutools for Outlook / Kutools for Word / Office Tab Pro / Kutools for PowerPoint
Table of contents
- Why Choose Smart Recipients
- How to Activate Smart Recipients in Kutools for Outlook
- How the use the Smart Recipients feature
- Disable the Smart Recipients feature
Kutools for Outlook
Brings 100+ advanced features to Outlook