How to remove or delete created custom form in Outlook?
When working with Microsoft Outlook, users often create custom forms to streamline data entry, gather specific information, or modify the way items such as emails, contacts, or appointments are presented. While these forms can be quite useful for particular projects or workflows, there may come a time when you need to remove them—perhaps they are no longer needed, testing is complete, or you simply want to tidy up your available form list. Deleting unused or outdated custom forms helps keep Outlook organized and ensures users do not inadvertently select the wrong template when performing routine tasks.
However, removing custom forms is not always intuitive, especially since Outlook’s form-management options are located deep within advanced settings. If you are unsure how to locate and delete these forms, you are not alone; many users find this process confusing. This step-by-step guide will show you how to delete your own published custom forms in various versions of Outlook, and also point out important cautions and tips along the way. Understanding the procedure for each Outlook version ensures you avoid mistakes like removing the wrong form or overlooking a hidden one.
Remove self-created custom form in Outlook 2010 and later versions
Remove self-created custom form in Outlook 2007
Remove self-created custom form in Outlook 2010 and later versions
For users of Outlook 2010 and later versions, removing a custom form involves accessing specific settings within Outlook’s advanced options. The method outlined below helps ensure that you safely delete only the intended form, avoiding any changes to built-in or other users' forms. Before starting, be sure you have appropriate permissions—only forms you've published to your Personal Forms library or designated location can be deleted by you, while organization-wide forms might require admin rights.
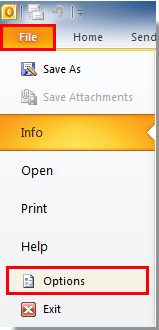
1. Open Outlook, then click the File tab in the upper left corner, and choose Options. This opens the Outlook Options window, where most program settings are adjusted.
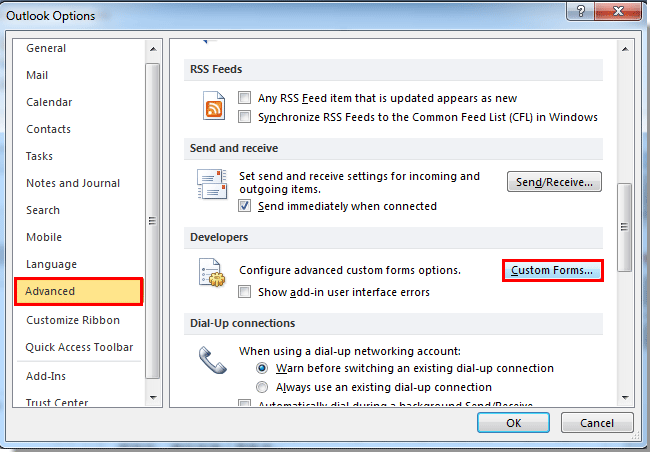
2. In the Outlook Options dialog box, look at the left panel and select Advanced. Scroll down to the Developers section, typically located towards the bottom, and click the Custom Forms button.
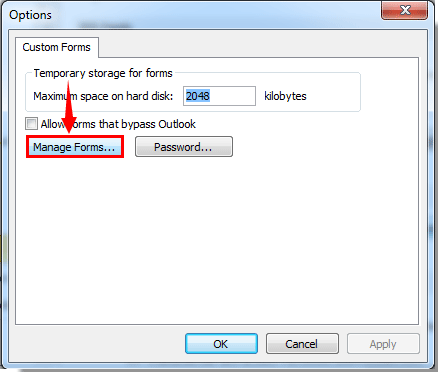
3. In the dialog box that opens, click the Manage Forms button to proceed.
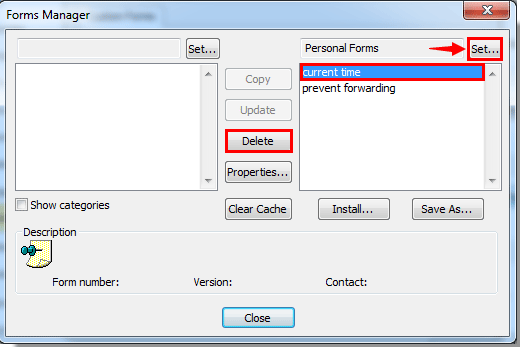
4. The Forms Manager dialog box appears. Here’s how to locate and delete your form:
1). Click the Set button to choose the correct location where your custom form is stored (often “Personal Forms”, but could be “Organizational Forms” or “User Templates in File System” depending on your setup). Selecting the right location is critical; if the custom form was published in a shared library, only users with higher permissions can delete it.
2). In the right-side list box, select the custom form you want to remove. Make sure to double-check the form’s name and location to avoid deleting a form that is still in use or required by you or others.
3). Click the Delete button. Outlook will prompt you to confirm this action in the next step.
4). A confirmation dialog box pops up. Review the form name carefully to ensure you’re deleting the correct one, then click Yes to confirm and proceed with the removal. If you selected the wrong form by mistake, click No and return to select the proper form.

5. Click the Close button in the Forms Manager dialog to exit. This step ensures your changes are saved and the dialog is dismissed cleanly.
6. In any subsequent open dialog boxes, click the OK buttons to fully complete the deletion process and return to the Outlook main interface.
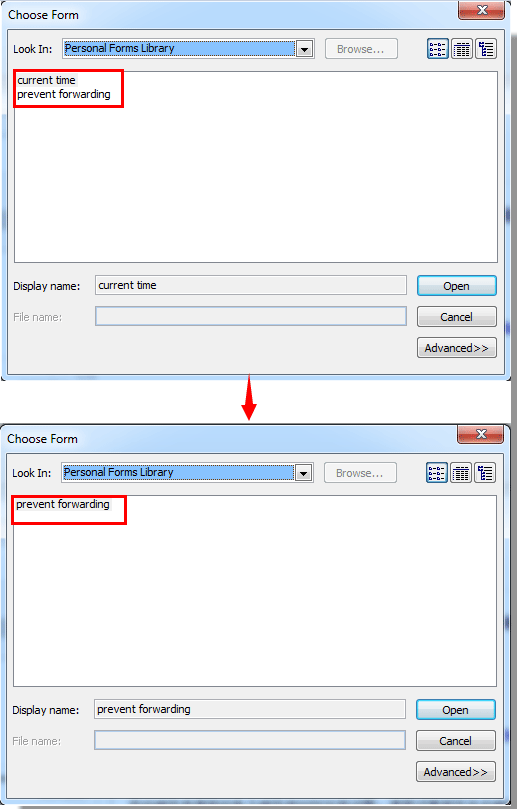
If you now open the Choose Form dialog box (found in the Developer tab or by starting a new form), you should see that the form you deleted no longer appears. This confirms successful removal.
Remove self-created custom form in Outlook 2007
If you are still using Outlook 2007, the process to remove a custom form is slightly different due to interface and menu changes, but the Forms Manager approach is fundamentally similar. Deleting custom forms in Outlook2007 helps maintain performance and keeps the Outlook environment uncluttered, especially for users who have experimented with form design or testing.
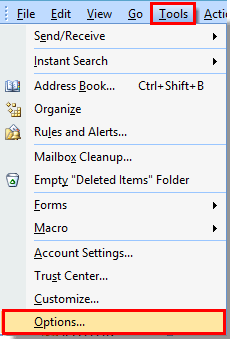
1. Open Outlook and click Tools in the menu bar. Then select Options from the dropdown.
2. In the Options dialog box, switch to the Other tab. Under the General section, click the Advanced Options button.

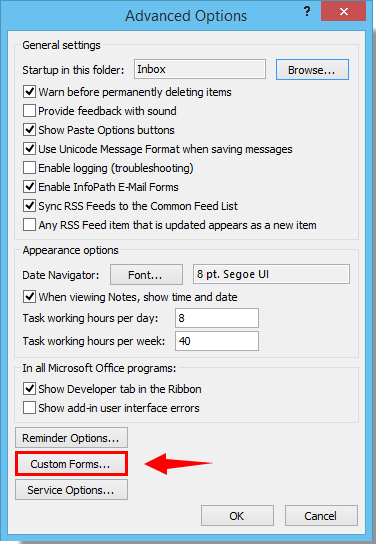
3. In the Advanced Options dialog box, click the Custom Forms button to continue.
4. The Options dialog will pop up. From here, follow the same series of actions as described in the steps for Outlook 2010 and later versions above: use the Manage Forms interface to select the correct location (“Set”), choose your custom form from the list, and delete it.
Best Office Productivity Tools
Experience the all-new Kutools for Outlook with 100+ incredible features! Click to download now!
📧 Email Automation: Auto Reply (Available for POP and IMAP) / Schedule Send Emails / Auto CC/BCC by Rules When Sending Email / Auto Forward (Advanced Rules) / Auto Add Greeting / Automatically Split Multi-Recipient Emails into Individual Messages ...
📨 Email Management: Recall Emails / Block Scam Emails by Subjects and Others / Delete Duplicate Emails / Advanced Search / Consolidate Folders ...
📁 Attachments Pro: Batch Save / Batch Detach / Batch Compress / Auto Save / Auto Detach / Auto Compress ...
🌟 Interface Magic: 😊More Pretty and Cool Emojis / Remind you when important emails come / Minimize Outlook Instead of Closing ...
👍 One-click Wonders: Reply All with Attachments / Anti-Phishing Emails / 🕘Show Sender's Time Zone ...
👩🏼🤝👩🏻 Contacts & Calendar: Batch Add Contacts From Selected Emails / Split a Contact Group to Individual Groups / Remove Birthday Reminders ...
Use Kutools in your preferred language – supports English, Spanish, German, French, Chinese, and 40+ others!


🚀 One-Click Download — Get All Office Add-ins
Strongly Recommended: Kutools for Office (5-in-1)
One click to download five installers at once — Kutools for Excel, Outlook, Word, PowerPoint and Office Tab Pro. Click to download now!
- ✅ One-click convenience: Download all five setup packages in a single action.
- 🚀 Ready for any Office task: Install the add-ins you need, when you need them.
- 🧰 Included: Kutools for Excel / Kutools for Outlook / Kutools for Word / Office Tab Pro / Kutools for PowerPoint