How to change the font color of incoming messages based on sender or subject in Outlook?
In Outlook, managing a large volume of emails efficiently can be a challenge, especially when trying to spot messages from important contacts or those containing specific subjects. Highlighting these emails by changing their font size or color can help you quickly identify them in your inbox, making email management more streamlined and reducing the chance of missing critical information. In this article, you will learn various methods to automatically change the font size or color for incoming messages that meet certain sender or subject criteria, along with some alternative solutions and practical tips for different usage needs.
Change the font size or color of incoming emails based on sender or subject in Outlook
Organize incoming emails using Outlook Rules as a complementary method
Change the font size or color of incoming emails based on sender or subject in Outlook
Outlook’s Conditional Formatting feature allows you to personalize how specific emails appear in your message list based on criteria such as sender, subject, or other properties. This functionality is particularly useful in business environments where quickly identifying critical messages is essential, or in personal scenarios for organizing newsletters, reminders, or alerts from specific contacts.
Here's how to use Conditional Formatting in Outlook to make target emails stand out visually:
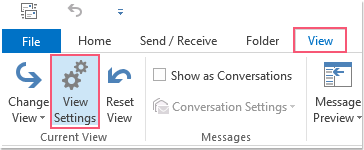
1. Open Outlook and go to your mail view. Click the View tab on the ribbon, then select View Settings. See screenshot:
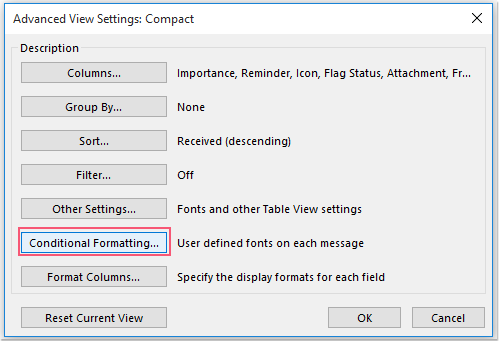
2. In the Advanced View Settings dialog box, click the Conditional Formatting button. See screenshot:
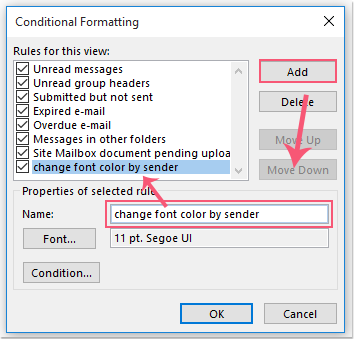
3. In the Conditional Formatting dialog that appears, click the Add button to create a new rule. Enter a descriptive name into the Name text box to help you identify this formatting rule later. See screenshot:
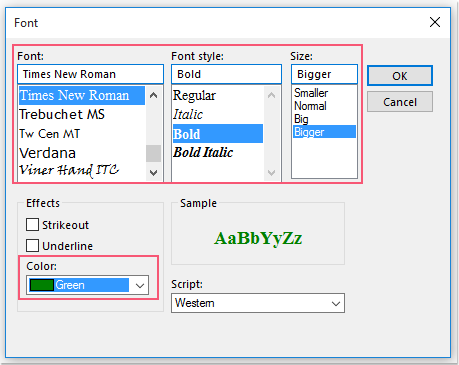
4. With your new rule selected, click the Font button. In the Font dialog box, choose your preferred font, style, size, and most importantly, the color you want Outlook to use for qualifying messages. See screenshot:
5. After confirming your font settings, click OK to return to the Conditional Formatting dialog box. Next, click the Condition button to set your filtering criteria.
6. In the Filter dialog, under the Messages tab, enter the desired sender’s email address into the From field. This ensures only emails from this address are formatted as specified. See screenshot:
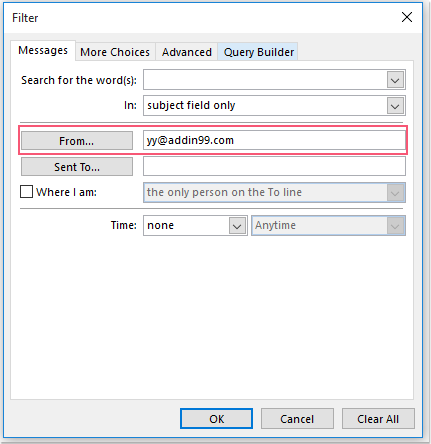
Tip: You can enter multiple email addresses separated by semicolons to highlight messages from several senders at once.
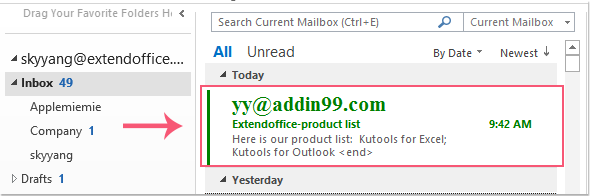
7. When finished, click OK in each dialog box to close them. From now on, whenever a message that matches your criteria arrives, Outlook will automatically apply your chosen font formatting as soon as the email appears in the message list. See the example below:
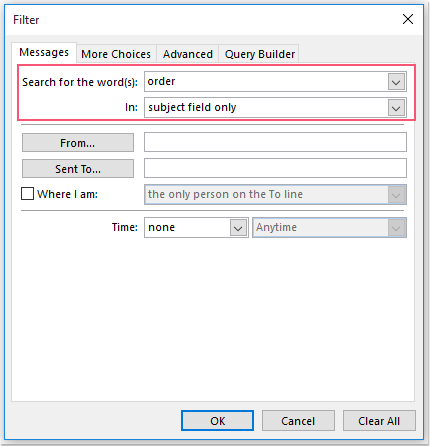
Note: If you wish to target emails based on the subject rather than the sender, switch to using the Search for the word(s) field under the subject category in the In drop-down of the Filter dialog. For example, typing "urgent" would highlight all emails with "urgent" in the subject. See screenshot:
Precautions and tips: Conditional Formatting only changes the appearance of messages in the Outlook view and does not alter the actual content of the emails. Rules for text search are not case sensitive. You may need to experiment with different criteria to achieve your preferred result, especially if your mailbox contains nested folders.
Practical suggestion: You can use multiple Conditional Formatting rules to target different senders, keywords, or categories, assigning distinct colors or styles to make your inbox more efficient and visually organized. Test the rules with sample messages to ensure the right effect.
Organize incoming emails using Outlook Rules as a complementary method
While Outlook’s Rule feature does not allow you to change font color directly, it can help organize, move, flag, or otherwise process incoming emails before further formatting is applied. Using Rules in combination with Conditional Formatting or VBA allows for a robust multi-step organization workflow. For instance, messages from a specific sender can first be moved to a designated folder via Rules and then be highlighted with Conditional Formatting or categorized using VBA for enhanced visibility.
Applicable scenarios:
- You need to route emails from certain addresses or with certain subjects to dedicated folders automatically.
- You wish to flag messages or set reminders for important senders.
- You want to reduce inbox clutter before visual formatting is applied.
Pros: Easy to set up, processes messages in real time, supports multiple actions (move, assign category, flag, mark as important).
Cons: Does not directly change font color or size in the message list; best used alongside Conditional Formatting or other formatting methods.
To create a rule for organizing incoming emails:
- Go to the Home tab in Outlook, and click Rules > Manage Rules & Alerts.
- Click New Rule. Choose a template (e.g., “Move messages from someone to a folder”).
- Follow the prompts to specify sender or subject, choose the folder or action, and save your rule.
- Run the rule on your mailbox, or let Outlook process new messages automatically.
Best Office Productivity Tools
Experience the all-new Kutools for Outlook with 100+ incredible features! Click to download now!
📧 Email Automation: Auto Reply (Available for POP and IMAP) / Schedule Send Emails / Auto CC/BCC by Rules When Sending Email / Auto Forward (Advanced Rules) / Auto Add Greeting / Automatically Split Multi-Recipient Emails into Individual Messages ...
📨 Email Management: Recall Emails / Block Scam Emails by Subjects and Others / Delete Duplicate Emails / Advanced Search / Consolidate Folders ...
📁 Attachments Pro: Batch Save / Batch Detach / Batch Compress / Auto Save / Auto Detach / Auto Compress ...
🌟 Interface Magic: 😊More Pretty and Cool Emojis / Remind you when important emails come / Minimize Outlook Instead of Closing ...
👍 One-click Wonders: Reply All with Attachments / Anti-Phishing Emails / 🕘Show Sender's Time Zone ...
👩🏼🤝👩🏻 Contacts & Calendar: Batch Add Contacts From Selected Emails / Split a Contact Group to Individual Groups / Remove Birthday Reminders ...
Use Kutools in your preferred language – supports English, Spanish, German, French, Chinese, and 40+ others!


🚀 One-Click Download — Get All Office Add-ins
Strongly Recommended: Kutools for Office (5-in-1)
One click to download five installers at once — Kutools for Excel, Outlook, Word, PowerPoint and Office Tab Pro. Click to download now!
- ✅ One-click convenience: Download all five setup packages in a single action.
- 🚀 Ready for any Office task: Install the add-ins you need, when you need them.
- 🧰 Included: Kutools for Excel / Kutools for Outlook / Kutools for Word / Office Tab Pro / Kutools for PowerPoint