How to automatically forward all emails from specified sender/domain in Outlook?
This article is talking about creating rules to automatically forward all emails from the specified senders’ email addresses or domains in Outlook.
- Automatically forward all emails from specified sender/domain with Rule
- Automatically forward all emails from specified sender/domain with Kutools for Outlook
Automatically forward all emails from specified sender/domain with Rule
This method will guide you to create a rule to automatically forward all emails from the specified sender or sender domain in Outlook. Please do as follows:
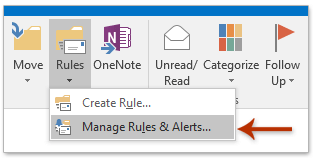
1. In the Mail view, please click Home > Rules > Manage Rules & Alerts. See screenshot:
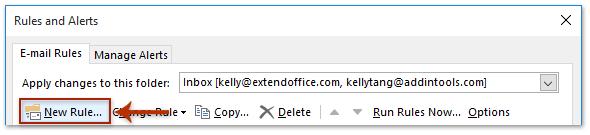
2. In the Rules and Alerts dialog box, please click the New Rule button on the E-mail Rules tab. See screenshot:
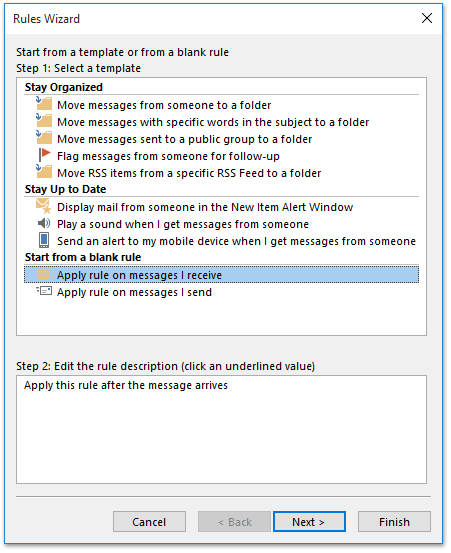
3. Now you get into the Rules Wizard. Please click to select the Apply rule on messages I received option, and click the Next button. See screenshot:
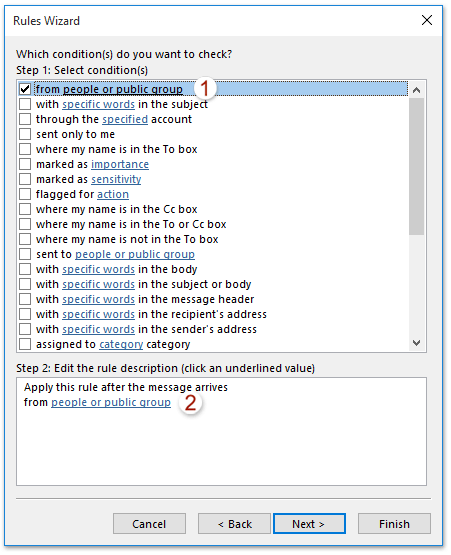
4. In the Rules Wizard (which condition(s) do you want to check?), please check the from people or public group option in the Step 1 section, and then click the linked text ofpeople or public group in the step 2 Section. See screenshot:
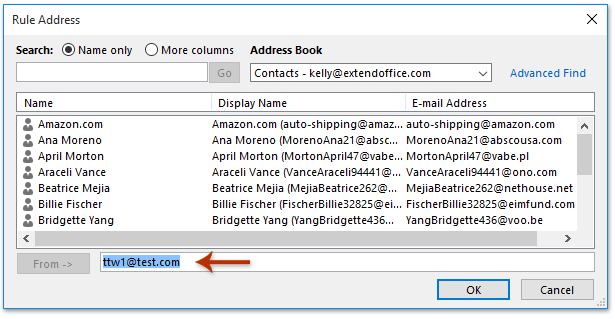
5. In the opening Rule Address dialog box, please type the specified sender’s email address or sender domain into the From box, and click the OK button. And then click the Next button in the Rules Wizard.
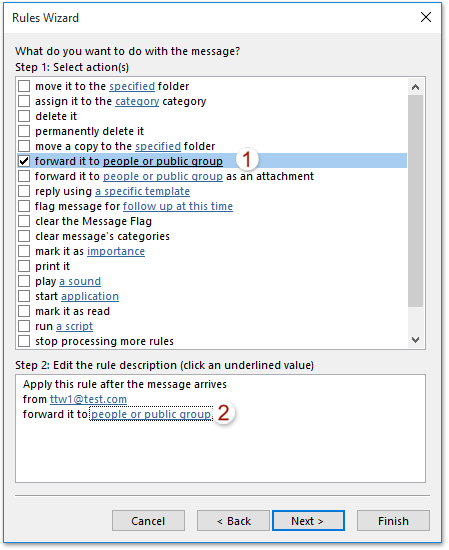
6. In the Rules Wizard (what do you want to do with the message?), please check the forward it to people or public group option in the Step 1 section, and click the linked text of people or public group in the Step 2 section. See screenshot:
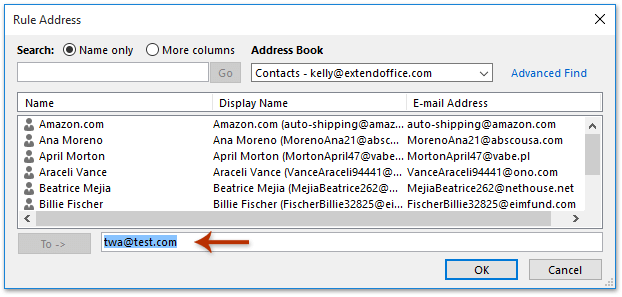
7. In the coming Rule Address dialog box, please type the recipients’ email addresses into the To box, and click the OK button. And then click the Next button in the Rules Wizard.
8. Click the Next button directly in the Rules Wizard (Are there any exceptions?).
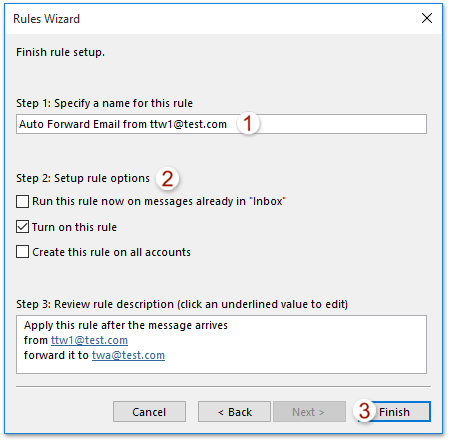
9. In the Rules Wizard (Finish rule setup.), please (1) type a name for the new rule in the Step 1 box; (2) check the Turn on this rule option in the Step 2 section; (3) Click the Finish button.
10. Now the rule for auto forwarding emails from the specified sender or sender domain is created and turned on. Please click the OK button in the Rules and Alerts dialog box.
From now on, all email from the specified sender or sender domain will be forwarded to the specified recipients in your Outlook.
Automatically forward all emails from specified sender/domain with Kutools for Outlook
If you have Kutools for Outlook installed, you can also apply its (Automatic) Forward feature to forward all emails from the specified sender or sender domain in Outlook.
Say goodbye to Outlook inefficiency! Kutools for Outlook makes batch email processing easier - now with a 30-day free trial! Download Kutools for Outlook Now!!
1. In Outlook, click Kutools > Forward > Rule Manager.

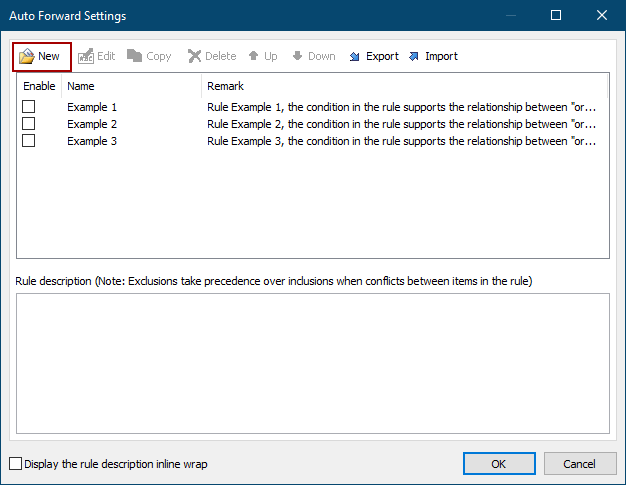
2. In the Auto Forward Settings dialog, click the New button.
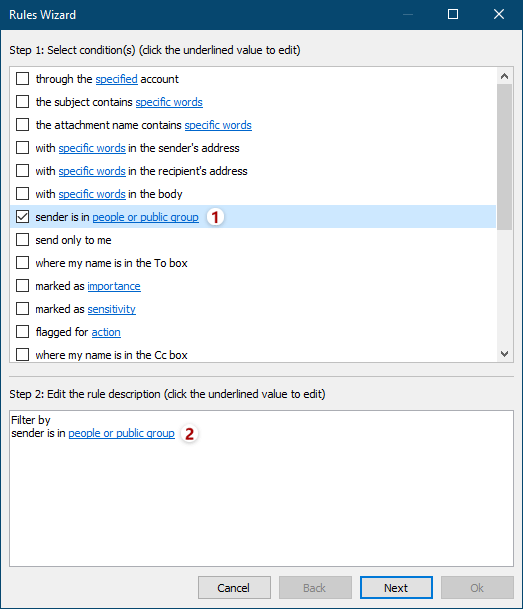
3. In the Rules Wizard, tick the Sender is in people or public group in the Step 1 section, and then click the underlined text people or public group in the Step 2 section.
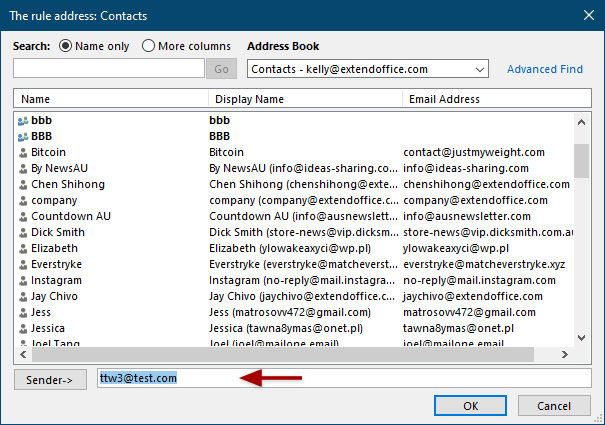
4. In the popping out The rule address dialog, type in one or multiple specified senders’ email addresses in the Sender box, and click the OK button.
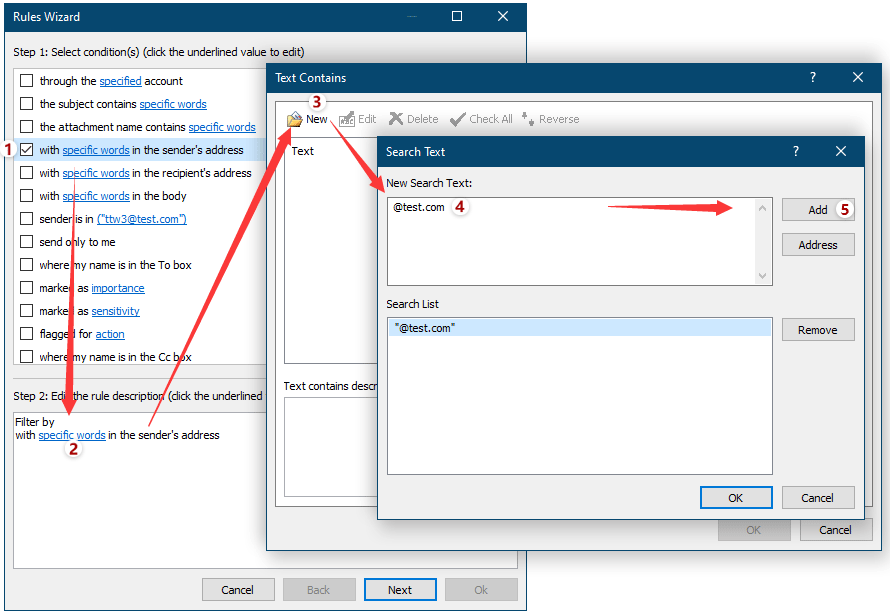
Tips: If you want to automatically forward emails from the specified domain, you can:
(1) In the Rules Wizard, tick the with specific words in the sender’s address option in the Step 1 section, and click the underlined text specific words in the Step 2 section;
(2) Click the New button in the Text Contains dialog;
(3) In the Search Text dialog, type in the specified domain in the New Search Text box, and click the Add button.
(4) Click the OK buttons to save the domain information.
5. Click the Next button in the Rule Wizard.
6. In the second Rule Wizard, set forwarding exceptions as you need, or just do not set any exceptions, and click the Next button.
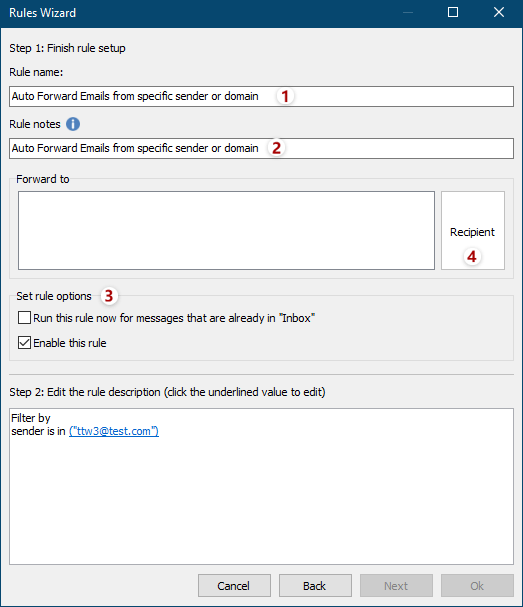
7. In the last Rules Wizard, do as follows:
(1) Type a name for the auto forwarding rule in the Rule name box;
(2) Type the rule descriptions in the Rule notes box;
(3) Tick the running options in the Set rule options section;
(4) Click the Recipient button.
8. In the Select Member dialog, type in the email addresses of recipients, and click the OK button.

9. Then it goes back to the last Rules Wizard, click the OK button to save the changes.
10. It returns to the Auto Forward Settings dialog. Ensure the new auto forwarding rule is checked, and click the OK button.
11. Go ahead to click Kutools > Forward > Enable Auto Forward to enable this feature.
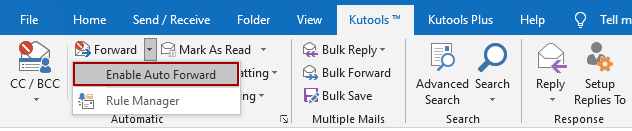
And click the OK button in the popping out reconfirming dialog.
From now on, all emails from the specific senders or sender domains will be automatically forwarded to the specified recipients.
Related Articles
Forward all emails from specified sender in Outlook
Forward an entire conversation (email chains) in Outlook

