How to convert range of cells to image in Excel?
There are many situations in which you may want to present Excel data as a non-editable, visual image rather than a standard, interactive cell range. For example, you might want to add a table snapshot to a PowerPoint presentation, embed static data into a Word document, send a specific report section via email, or simply keep a record of your worksheet’s appearance at a particular moment. In these scenarios, converting your selected cells into an image ensures the data’s formatting and layout are preserved exactly as displayed—regardless of how the recipient opens it.
This guide introduces multiple methods to convert any range of Excel cells into an image, catering to different user needs from basic to advanced. Each method is practical and easy to follow, and you can choose the option that best fits your scenario and requirements.
Convert a range of cells to image with Copy as Picture feature
Convert a range of cells to image with Kutools for Excel
Convert a range of cells to image with VBA code
Alternative: Convert a range to an image using Excel via Microsoft PowerPoint Export
Convert a range of cells to image with Copy as Picture feature
Excel provides a built-in feature called "Copy as Picture," which enables you to quickly turn any selection of cells into an image. This method is straightforward and does not require any additional tools or technical skills. It's best suited for occasional use, for preparing quick snapshots, or when you need to manually export and insert cell visuals elsewhere. Some users might find limitations, such as lack of batch processing or customization, but it remains a widely applicable option for most users.
- Select the range of cells you want to convert to an image. Make sure your range includes all rows and columns you want to capture, as the appearance will be preserved exactly as shown. Press Ctrl + C to copy the selection.
- On the Home tab in the Ribbon, locate the Copy button (clipboard icon). Click the drop-down arrow below it and select Copy as Picture from the list. This option may also be accessible by clicking the small arrow next to the Copy icon. See screenshot:

- In the "Copy Picture" dialog box that appears, set the following options:
- As shown on screen: Ensures that the exported image reflects the appearance of your selection as displayed on the worksheet, including fonts, colors, borders, and other formatting.
- Picture: This option copies your selection as a static image rather than as text or an embedded object.

- Click OK to confirm these settings. Next, move to the worksheet (or any other application) where you want to insert the image and press Ctrl + V to paste.
- After pasting, to save the image as a standard picture file, right-click on the pasted image and choose Save as Picture from the context menu. This action works both in Excel or after pasting into other Office apps. See screenshot:

- In the "Save as Picture" window, select the folder in which you want to store the image, enter a file name, and pick a picture format (PNG, JPG, GIF, etc.) from the "Save as type" drop-down list. See screenshot:

- Click the Save button. Your selected cell range is now exported as a standard picture in your chosen folder.


Tips and troubleshooting: If the pasted image doesn't look as expected, double-check your selection or try adjusting zoom, row heights, and column widths beforehand. Note that very large selections may result in reduced image quality, so split large ranges into smaller segments if necessary.
Convert a range of cells to image with Kutools for Excel
If you often need to export a range as an image, Kutools for Excel provides an efficient and flexible approach. The Export Range as Graphic function enables you to export a specific cell range directly as a high-definition image in formats like PNG, JPG, GIF, and TIF.
After installing Kutools for Excel, follow these steps to export your selected range as an image:
- Select the range of cells that you need to convert. Make sure your selection is accurate, as the tool will export this area exactly as it appears. Next, go to Kutools Plus > Import / Export group > Export Range as Graphic.

- In the "Export Range as Graphic" dialog box, you will be prompted to:
- Specify the target folder where the graphic image should be saved, which helps you organize exported files easily.
- Select the image output format (PNG, JPG, BMP, GIF, TIF, etc.) under the "Export format" section. Choosing the appropriate format depends on your usage: PNG and JPG are most widely supported and suitable for most documents.
- Click the OK button to proceed.

- In the following prompt dialog, enter the desired file name for your image.

- Click OK. The selected cell range is then exported as an image in the chosen format and location.


Advantages: Compared to built-in Excel export, Kutools’ process is faster when dealing with repetitive tasks or strict image quality requirements.
If you encounter issues with image resolution or unexpected formatting, make sure the cells are properly formatted and visible when making the selection. Kutools generally captures the range as displayed, so ensure no hidden rows or columns are present.
Convert a range of cells to image with VBA code
For more advanced users or those who want to automate the process—such as repeatedly exporting different ranges or integrating image export into a larger macro—VBA (Visual Basic for Applications) can be used to programmatically convert a selected Excel cell range into an image. This method is ideal when you require consistent, repeatable results, or wish to minimize manual effort.
- Select the range of cells in your worksheet that you want to export as an image.
- Press ALT + F11 on your keyboard to open the Microsoft Visual Basic for Applications (VBA) editor window.
- In the VBA editor, click Insert > Module. Copy and paste the following code into the code window:
Parameter explanations:Sub SaveSelectedRangeAsImage() 'Updateby Extendoffice Dim rng As Range Dim chartObj As ChartObject Dim imgPath As Variant Dim fileName As String If TypeName(Selection) <> "Range" Then MsgBox "Please select a range before running the macro.", vbExclamation Exit Sub End If Set rng = Selection imgPath = Application.GetSaveAsFilename( _ InitialFileName:="RangeImage.png", _ FileFilter:="PNG Files (*.png), *.png", _ Title:="Save Image As") If imgPath = False Then Exit Sub rng.CopyPicture Appearance:=xlScreen, Format:=xlPicture Set chartObj = ActiveSheet.ChartObjects.Add(Left:=100, Top:=100, Width:=rng.Width, Height:=rng.Height) chartObj.Activate chartObj.Chart.Paste chartObj.Chart.Export fileName:=imgPath, FilterName:="PNG" chartObj.Delete MsgBox "Image saved to: " & imgPath, vbInformation End Sub- rng: the user’s current selection in the sheet, must be a cell range.
- imgPath: lets you choose the folder and filename for the image.
- The code creates a temporary chart to host the image and then deletes it once exported. The final result is saved as a .PNG file.
- Press F5 to run the macro or click the "Run" button within the VBA window. A file dialog will appear—select a folder and assign a file name for the image, as shown:
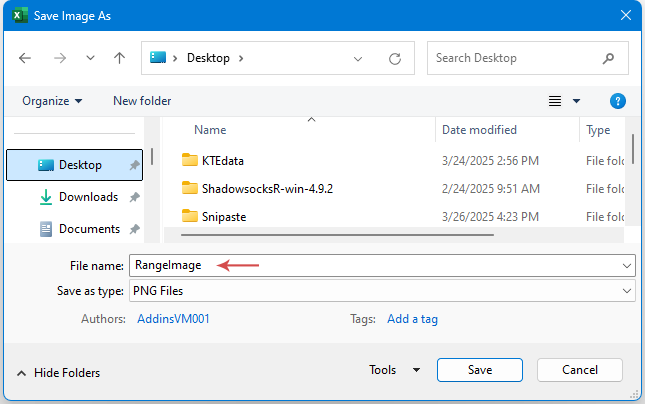
- Click OK to save your range as a .PNG graphic. You’ll receive a confirmation message with the file path.

Troubleshooting and suggestions: Ensure you select a valid cell range before running the macro; otherwise, you’ll get an error message. If your organization’s macro security settings restrict code execution, check with IT or enable macros in the Trust Center. For best-quality images, make sure unwanted rows or columns are hidden before running the script. Before running macros on important files, it’s recommended to save backups of your workbook to prevent accidental changes.
Alternative: Convert a range to an image using Excel via Microsoft PowerPoint Export
Another practical workaround, especially if you plan to use Excel data in presentations, is leveraging PowerPoint’s integration with Excel to facilitate easy export as an image. This method is ideal for users who regularly embed Excel data into slides or need additional post-processing flexibility, such as annotations or overlays. The drawback is it may require switching between applications.
- Select the desired cell range in Excel, then press Ctrl + C to copy.
- Open PowerPoint and navigate to the slide where you want the image. Select "Home" > “Paste” > “Paste Special…” and choose the "Picture (Enhanced Metafile)" or "Picture (PNG)" option. Then click OK. The Excel selection will be pasted as an image object.
- Right-click the pasted image in PowerPoint and select "Save as Picture…" to export it to your preferred format and location.
This approach is particularly valuable when you want to use Excel data as part of a broader non-Excel document or presentation. The image can then be re-inserted into any file type that supports pictures, providing an accessible alternative to Excel’s native features.
Conclusion
Converting Excel ranges to images can streamline data sharing, improve visual consistency, and protect sensitive or formatted content from being accidentally altered. Excel’s Copy as Picture feature is suitable for quick, one-time exports; Kutools for Excel offers a more efficient workflow for frequent or advanced use cases, supporting higher customization and file format variety; VBA offers automation and batch processing power for users comfortable with scripting. Meanwhile, leveraging PowerPoint, as described above, provides added flexibility for presentation scenarios. Whatever your purpose—be it reporting, documentation, or collaborative sharing—choose the most suitable method based on your requirements and familiarity with the tools. If you encounter issues such as missing formatting, partial captures, or export errors, double-check your range selection, verify cell visibility and formatting, and try alternative methods if needed. For additional Excel productivity tips and troubleshooting advice, visit our comprehensive collection of Excel guides and tutorials.
Best Office Productivity Tools
Supercharge Your Excel Skills with Kutools for Excel, and Experience Efficiency Like Never Before. Kutools for Excel Offers Over 300 Advanced Features to Boost Productivity and Save Time. Click Here to Get The Feature You Need The Most...
Office Tab Brings Tabbed interface to Office, and Make Your Work Much Easier
- Enable tabbed editing and reading in Word, Excel, PowerPoint, Publisher, Access, Visio and Project.
- Open and create multiple documents in new tabs of the same window, rather than in new windows.
- Increases your productivity by 50%, and reduces hundreds of mouse clicks for you every day!
All Kutools add-ins. One installer
Kutools for Office suite bundles add-ins for Excel, Word, Outlook & PowerPoint plus Office Tab Pro, which is ideal for teams working across Office apps.
- All-in-one suite — Excel, Word, Outlook & PowerPoint add-ins + Office Tab Pro
- One installer, one license — set up in minutes (MSI-ready)
- Works better together — streamlined productivity across Office apps
- 30-day full-featured trial — no registration, no credit card
- Best value — save vs buying individual add-in