How to Insert Pictures in Cells in Excel (Place in Cell & Batch Methods, 2025 Guide)
If you work with product catalogs, staff lists, dashboards, or any worksheet that needs pictures, you’ve probably hit the same problem: pictures float over cells. They don’t sort or filter with your data, they get misaligned when you resize rows or columns, and they’re painful to manage in bulk.
In the latest Excel versions, Microsoft has started to address this with the newer Place in Cell feature. At the same time, Kutools for Excel offers Import Pictures, which makes it possible to batch insert and control hundreds of images in just a few clicks. This guide explains how to put pictures inside cells in modern Excel and when to use Kutools to batch-insert and manage those pictures efficiently.
- Method 1 – Insert a picture directly into a cell from the ribbon
- Method 2 – Convert a floating picture into a cell picture
- Method 3 – Paste a copied picture into a cell
- Scenario A – Batch insert pictures with Import Pictures
- Scenario B – Match pictures to cell values with Match Import Pictures
What is the Place in Cell feature in Excel?
Place in Cell is a relatively new image option in Excel (Microsoft 365 / newer Excel versions and Excel for the web). Instead of placing a picture over the grid, Excel inserts the image as part of the cell itself.
When you use Insert > Pictures > Place in Cell, the picture:
- Sits inside the selected cell instead of floating above the grid.
- Moves and resizes together with that cell.
- Works nicely with sorting, filtering, and structured tables because the image belongs to the cell’s content.
This makes it much easier to build:
- Product lists with thumbnail images
- Attendance sheets with headshots
- Checklists with small icons (OK / Warning / Error)
You can still use the old behavior via Place over Cells, which keeps the image floating. Excel lets you switch between them.
Insert a picture in a cell with Place in Cell
Below are three practical methods to insert or convert pictures so they stay inside cells instead of floating over the grid.
Method 1 – Insert a picture directly into a cell from the ribbon
Use this method when you want to insert one or several pictures directly into cells from your device or online sources.
Step 1: Select the target cell
Click the cell where you want the first picture to appear.
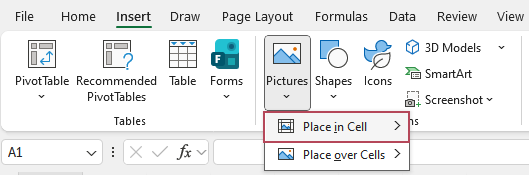
Step 2: Go to Insert > Pictures > Place in Cell
On the Insert tab, in the Illustrations group, choose Pictures, then click Place in Cell.
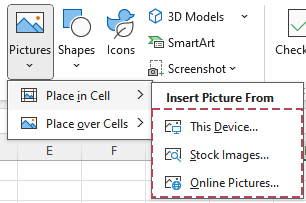
Step 3: Choose an image source
In the drop-down menu, select:
- This Device – to insert pictures from your computer.
- Stock Images – to use built-in images.
- Online Pictures – to search for images online.
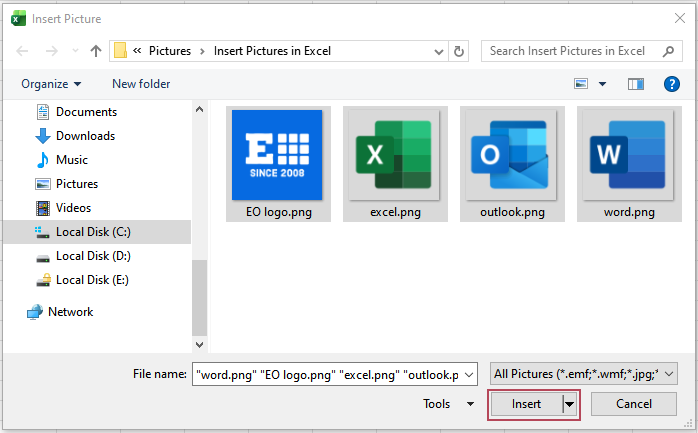
Step 4: Select one or multiple pictures and Insert
Pick a single picture to insert one image. Or select multiple files to insert all at once. Click Insert.
Result:
Each selected picture will be inserted into its own cell.
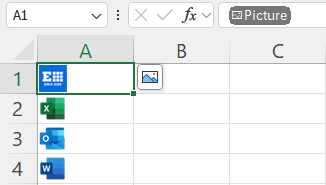
When inserting multiple pictures, Excel will fill cells down the column from the active cell. If those cells already contain values, the values will be replaced by pictures, so pick the range carefully.
Method 2 – Convert a floating picture into a cell picture
If your workbook already contains pictures that float over the grid, you can convert them to in-cell pictures:
1. Click the picture that currently sits on top of the cells.
2. When the picture is selected, either click the small Place in Cell button that appears next to the picture,
or go to the Picture Format tab (or right-click the image) and choose Place in Cell.
Result: Excel moves the image into the cell at its top-left corner. From then on, the picture will move, resize, and sort with that cell like any other in-cell image.

Method 3 – Paste a copied picture into a cell
When you already have a picture on your clipboard:
1. Right-click in the destination cell.
2. Under Paste Options, choose Paste Picture in Cell.

Result: This forces Excel to treat the pasted image as in-cell content instead of a floating object.
Where Place in Cell is great – and where it isn’t enough
Place in Cell is a big usability improvement, but it is still designed mainly for small or medium image sets and manual operations.
It’s ideal when:
- You insert a handful of pictures manually.
- You want pictures that sort/filter with table rows.
- You’re building visually rich but small tracking or reporting worksheets.
However, you quickly feel its limits when you:
- Need to insert dozens or hundreds of product images.
- Must ensure each picture matches a specific product code / SKU / name in cells.
- Have very strict size rules (for example, all images must be exactly
80×80px). - Manage picture lists regularly (updated catalogs, new items, price changes, etc.).
You also see confusion online: some users report that they can’t find Place in Cell even on Microsoft 365 due to version or rollout differences, or they see only the classic “over cells” behavior. For these heavier, more controlled scenarios, Kutools for Excel offers a much more powerful solution.
Insert multiple pictures into cells with Kutools for Excel
Below are three practical methods to insert or convert pictures so they stay inside cells instead of floating over the grid.
Scenario A – Batch insert pictures into cells with the Import Pictures feature
Use this method when you want to insert one or several pictures directly into cells from your device or online sources.
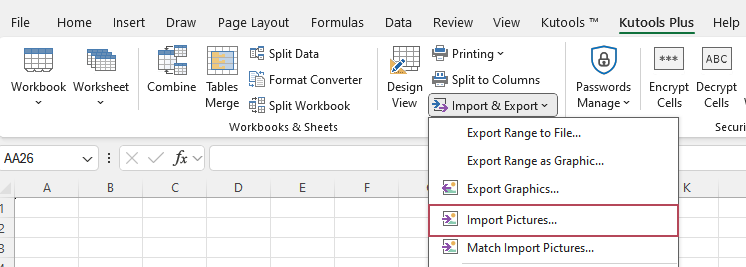
Step 1: Open Import Pictures
Click Kutools Plus > Import & Export > Import Pictures.
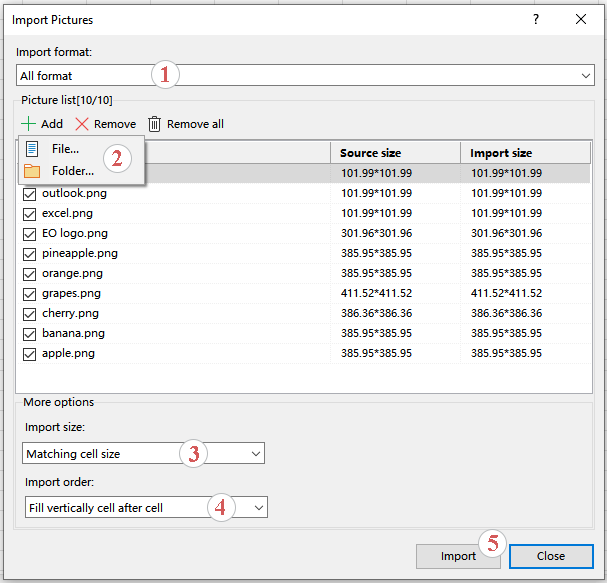
Step 2: Add pictures and Configure import order and size
In the Import Pictures dialog:
- If you have a specific format, choose the picture format you want to import.
- Click Add, choose File or Folder to select your images so that all files appear in the Picture list.
- From the Import size drop-down list:
- Choose Matching itself size to keep original image dimensions.
- Or Matching cell size to auto-fit cells.
- Or Specify size if you want exact dimensions (height and width).
- From the Import order drop-down list, choose Fill vertically cell after cell or Fill horizontally cell after cell depending on your layout.
- Click Import.
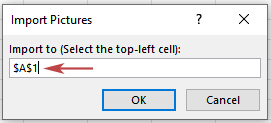
Step 3: Select destination range
When prompted, select the first cell of the destination range (for example, A1). Kutools will insert pictures into cells automatically, following the import order you set.
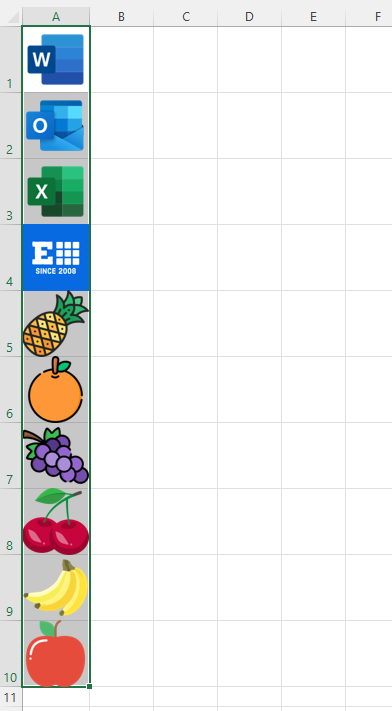
Result:
Within seconds, your column or grid of cells is filled with neatly aligned images.
Scenario B – Insert pictures based on cell values with the Match Import Pictures feature
Use this when you have codes or names in cells and want images to match them automatically.
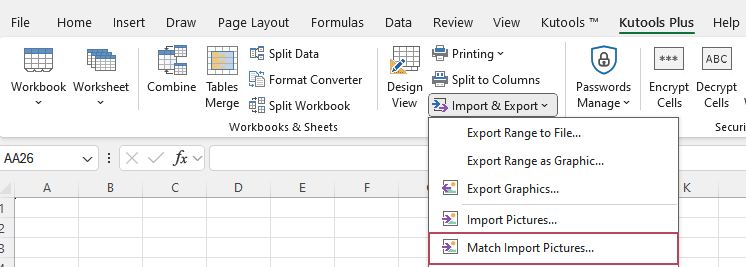
Step 1: Open Match Import Pictures
Click Kutools Plus > Import & Export > Match Import Pictures.
Step 2: Add pictures and set options
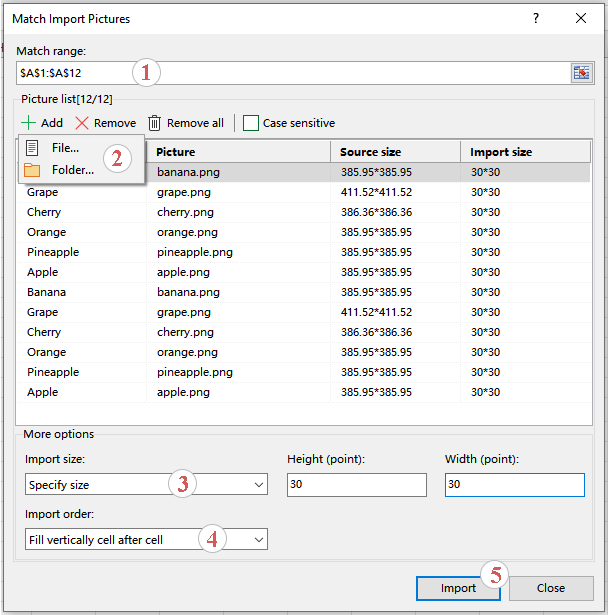
In the Match Import Pictures dialog:
- Select the value cells in Match range box.
- Click Add > File or Folder to load all the pictures. Kutools will automatically link picture names to the values in the match range.
- Configure Import size:
- Matching itself size
- Matching cell size
- Specify size (custom height and width)
- Configure Import order (vertical or horizontal).
- Click Import.
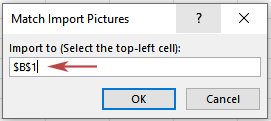
Step 3: Select destination range
Select the top-left cell of the range where pictures should appear (for example, B1).
Result:
Kutools inserts the images, matching each file name to the correct cell value.
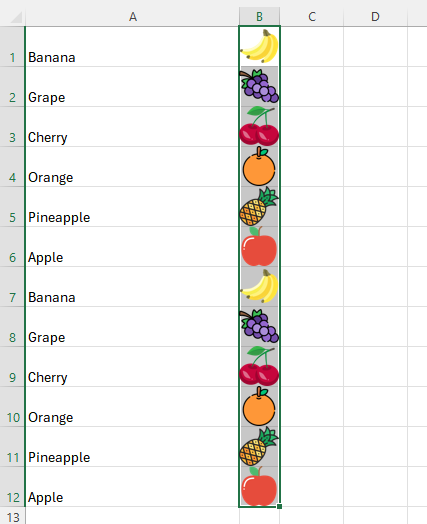
- If any cell value has no matching picture name, Kutools simply skips it, which keeps the operation safe and predictable.
- To use Match Import Pictures, please download and install Kutools for Excel first.
Frequently asked questions
Why don’t I see “Place in Cell” in my Excel?
There are a few possibilities:
- You may be using an older version of Excel that does not yet include this feature.
- Your Microsoft 365 channel or build might not have received it at the same time as others.
- In some environments, Place in Cell appears only in certain clients (for example, Excel for the web).
In many cases, updating to the latest build of Microsoft 365 and checking Insert > Pictures again will help. If you still cannot find it, Kutools Import Pictures is a reliable alternative for in-cell image handling.
What’s the difference between “Place in Cell” and “Place over Cells”?
- Place in Cell makes the image part of the cell so it moves and resizes with that cell and behaves well with sorting/filtering.
- Place over Cells keeps the image floating above the grid; it’s not tied to any specific cell.
For data-driven scenarios like catalogs, Place in Cell is almost always the better choice.
Can I insert pictures into cells based on cell values without VBA?
Yes. Native Excel does not have a straightforward way to do this without formulas or code, but Kutools for Excel provides the Match Import Pictures feature, which matches pictures to cell values based on their file names. This gives you the “insert picture based on cell value” behavior without writing any VBA.
How do I resize all pictures in cells at once?
- With Place in Cell images:
- Adjust the row heights and column widths of the target cells. Images will adapt to the cell size.
- With Kutools Import Pictures:
- Configure Import size in the dialog:
- Match cell size, keep original size, or specify an exact height/width for all imported images.
- Configure Import size in the dialog:
Summary: Insert pictures in Excel cells without pain
In 2025, the Place in Cell feature finally gives Excel users a built-in way to insert images into cells instead of just floating above them. It works well for smaller, manual jobs and makes sorting, filtering, and formatting much cleaner.
But when you need to go further – hundreds of images, strict size rules, automatic matching to cell values – native Excel is still limited. This is where Kutools for Excel’s Import Pictures and Match Import Pictures become extremely powerful:
- Batch insert pictures fast
- Match images to codes or names
- Keep layouts clean, consistent, and professional
If you are serious about image-heavy worksheets, combining Excel Place in Cell with Kutools Import Pictures gives you the best of both worlds: modern Excel features plus productivity tools designed for real-world workloads.
Best Office Productivity Tools
Supercharge Your Excel Skills with Kutools for Excel, and Experience Efficiency Like Never Before. Kutools for Excel Offers Over 300 Advanced Features to Boost Productivity and Save Time. Click Here to Get The Feature You Need The Most...
Office Tab Brings Tabbed interface to Office, and Make Your Work Much Easier
- Enable tabbed editing and reading in Word, Excel, PowerPoint, Publisher, Access, Visio and Project.
- Open and create multiple documents in new tabs of the same window, rather than in new windows.
- Increases your productivity by 50%, and reduces hundreds of mouse clicks for you every day!
All Kutools add-ins. One installer
Kutools for Office suite bundles add-ins for Excel, Word, Outlook & PowerPoint plus Office Tab Pro, which is ideal for teams working across Office apps.
- All-in-one suite — Excel, Word, Outlook & PowerPoint add-ins + Office Tab Pro
- One installer, one license — set up in minutes (MSI-ready)
- Works better together — streamlined productivity across Office apps
- 30-day full-featured trial — no registration, no credit card
- Best value — save vs buying individual add-in
Table of contents
- What is the Place in Cell feature in Excel?
- Insert a picture in a cell with Place in Cell
- Method 1 – Insert a picture directly into a cell from the ribbon
- Method 2 – Convert a floating picture into a cell picture
- Method 3 – Paste a copied picture into a cell
- Where Place in Cell is great – and where it isn’t enough
- Insert multiple pictures into cells with Kutools for Excel
- Scenario A – Batch insert pictures with Import Pictures
- Scenario B – Match pictures to cell values with Match Import Pictures
- Frequently asked questions
- Summary
- The Best Office Productivity Tools
Kutools for Excel
Boosts Excel With 300+
Powerful Features