Read emails
When emails arrive at Outlook, how do you read these emails? Here, this tutorial introduce three methods to read emails in Outlook.
- 1. Read an email in Reading Pane
- 2. Read an email in Message window
- 3. Quick read multiple emails in Message List
Note: This tutorial is introduced based on exchange account in Microsoft Outlook 2019 desktop program in Windows 10. And it may vary significantly or slightly depending on the types of email accounts (Exchange, IMAP or POP), the versions of Microsoft Outlook, and Windows environments.
1. Read emails in the Reading Pane
After adding email accounts in Outlook, emails sent to these email accounts will arrive automatically, and you can quickly read these emails in Outlook. This tutorial will introduce reading emails in the Reading Pane.
It’s very easy to read emails in the Reading Pane in Outlook.
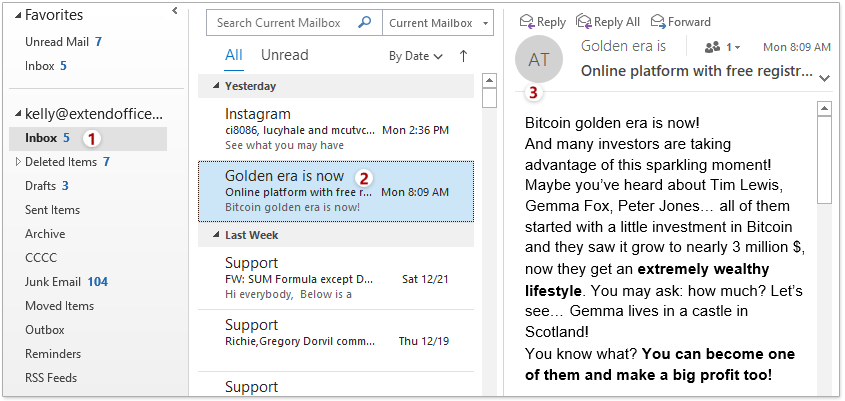
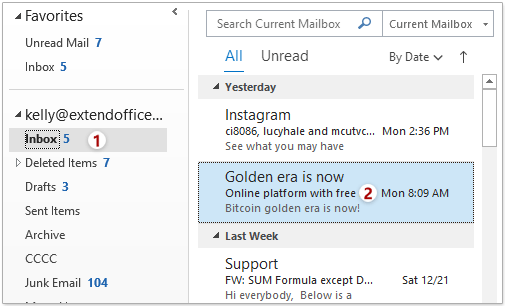
Firstly, click to open the specified mail folder on the Folder Pane, then click to open the specified email in the message list, and finally you can read the specified email in the Reading Pane.
Notes:
(1) Reading Pane
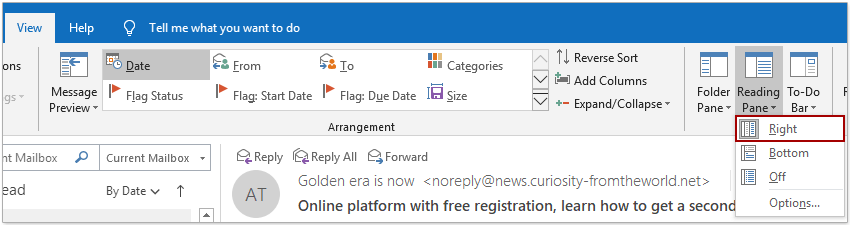
By default, the Reading Pane is turned on and displayed on the right hand. If the Reading Pane disappears or displays at the bottom, you can click View > Reading Pane > Right to show it on the right hand.
(2) Zoom level
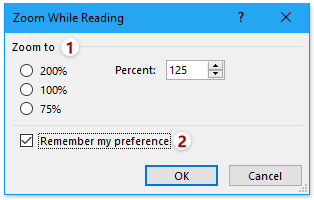
When reading emails in the Reading Pane, you can change the zoom level in the Reading Pane as follows: (1) click the percentage beside the Zoom Slider at the bottom-right corner of the Outlook main interface; (2) In the Zoom While Reading dialog, please specify the zoom level as you need in the Zoom to section, check the Remember my preference option, and click the OK button.
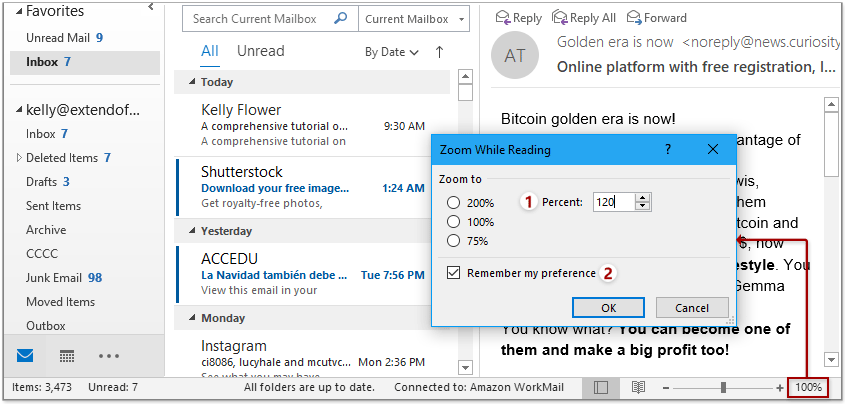
Above operation will lock the new zoom level in the Reading Pane and message windows. If you just need to change the zoom level temporarily, please clear the Remember my preference option. Alternatively, you can change the zoom level by the zoom slider.
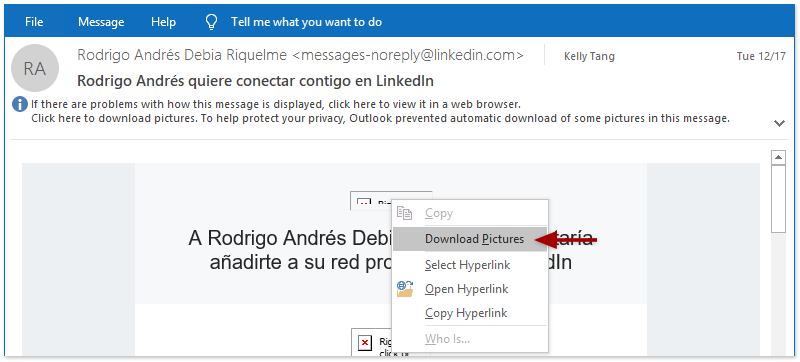
(3) Pictures display as placeholders in the Reading Pane
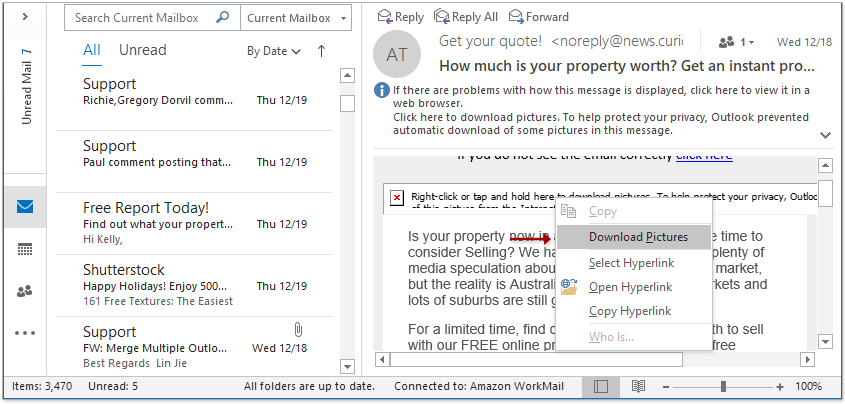
Sometimes, when reading emails in the Reading Pane, the embedded pictures display as placeholders. That’s because these embedded pictures are not downloaded.
You can quickly download all embedded pictures by clicking the warning information between the message header and body and selecting Download Pictures in the popping out context menu.
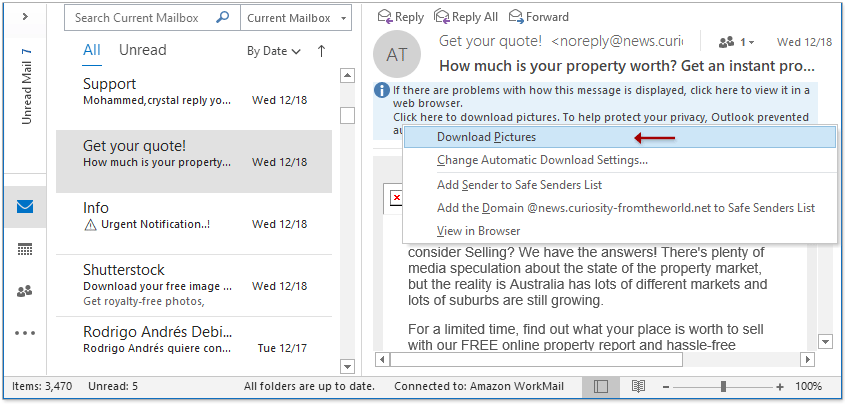
Alternatively, you can right click anyone of placeholders, and select Download Pictures from the context menu.
(4) Preview attachments
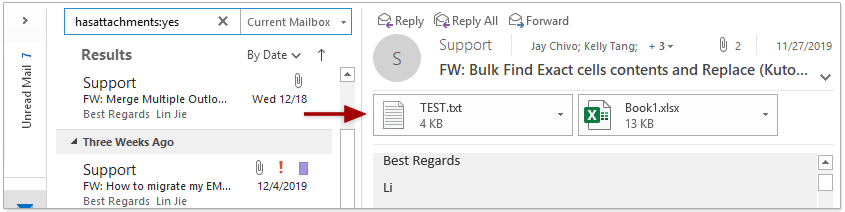
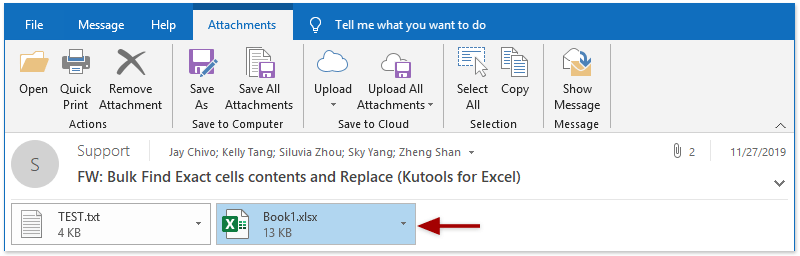
If there are attachments in the email, you can quickly preview the attachments in the Reading Pane too.
In the attachment bar above the message body, you just need to click the specified attachment to preview in the Reading Pane immediately.
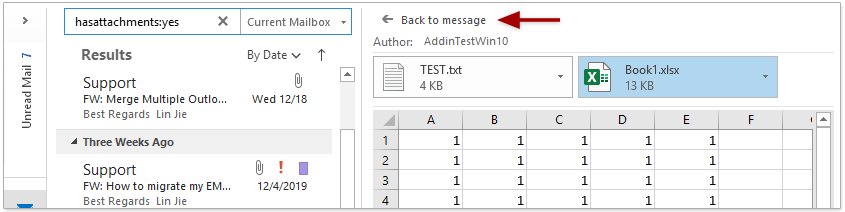
When previewing an attachment in the Reading Pane, you can quickly get back to the message by clicking Back to message at the upper-left corner of the Reading Pane.
(5) Read Aloud
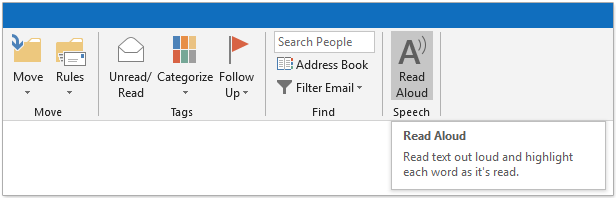
When reading an email in the Reading Pane, you can apply the Read Aloud feature (by clicking Home > Read Aloud) to speak out the message content.
2. Read emails in the Message Window
Some Outlook users prefer to read emails in the Message window. This tutorial will show you how to read emails in the message window.
You can quickly open and read an email in the message window as follows: In the mail view, click to open the specified mail folder on the Folder Pane, and then double click the specified email to open it in the message list.
Now the specified email is opened in a message window, and you can read it as you need.
Notes
(1) Pictures displays as placeholders
Sometimes, the pictures are not downloaded and display as placeholders when reading emails in the message window.
You can quickly download these pictures with clicking the warning information between the message header and message body, and selecting Download Pictures from the drop-down list.

Alternatively, you can download all pictures in the opening email by right clicking any placeholder and selecting Download Pictures from the context menu.
(2) Zoom level
If you want to adjust the zoom level for reading emails in the message window, you can do as follows:
(1) Click Message > Zoom.

(2) In the Zoom While Reading dialog, specify the zoom level in the Zoom to section as you need, tick the Remember my preference option, and click the OK button.
If you have enabled the Remember my preference option, the new zoom level will be automatically applied to all message windows and Reading Pane.
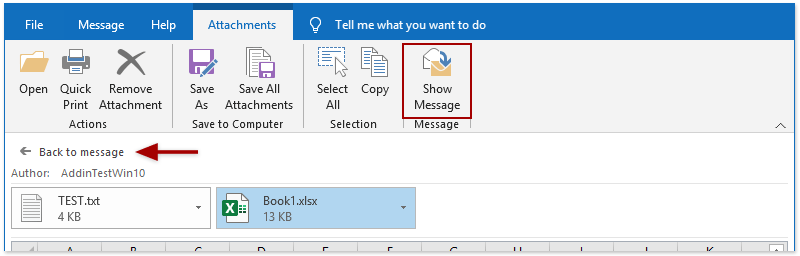
(3) Preview attachments
If the opening email contains attachments, you can easily preview the attachments by clicking them in the attachment bar.
When you preview an attachment in the message window, you can click Back to message above the attachment bar or click Attachments > Show Message to show the message content.
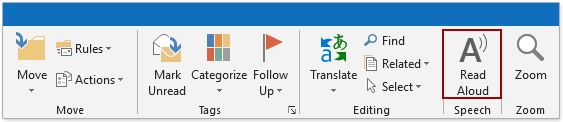
(4) Read Aloud
When reading an email in the message window, you can let the message content to be spoken out by clicking Message > Read Aloud.
(5) Previous Item and Next Item
When reading an email in the message window, you can easily skip to the previous or the next email by clicking ![]() or
or ![]() in the quick access toolbar.
in the quick access toolbar.
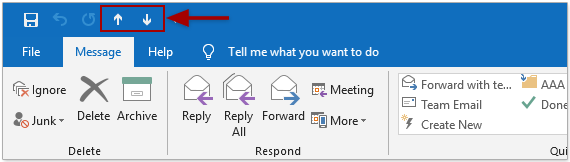
Alternatively, you can press Ctrl + < keys to open the previous email, and press Ctrl + > to open the next email.
3. Quick read multiple emails in Message List
If you receive multiple emails mixed with a bunch of junk emails every day, you can scan these emails in the message list directly, and then pick up useful emails and read them in the reading pane or message window. Now this tutorial will show you how to quick read multiple emails in the message list.
You can widen the message list, and then enable the Auto Preview with multiple lines to quick read emails in the message list directly.
1. Firstly, widen the message list as you need:
(1) Move cursor to the right edge of the message list;
(2) Drag the edge to right when the cursor change to ![]() ;
;
(3) Release the mouse when the width is enough.
2. Click View > Message Preview and select 1 Line, 2 Lines, or 3 Lines in the drop-down list to change the number of preview lines. (In my case, I select 3 Lines.)
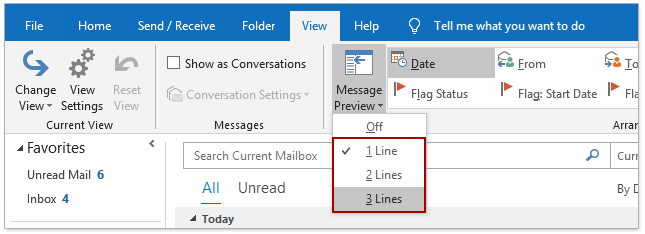
3. Now the Microsoft Outlook dialog comes out. Please click the This folder button or All mailboxes button as you need.
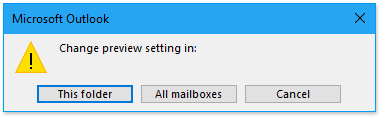
- This folder: If you want to change the number of preview lines in the current mail folder only, please click the This folder button;
- All mailboxes: If you want to change the number of preview lines in all folders of all mailboxes, please click the All mailboxes button.
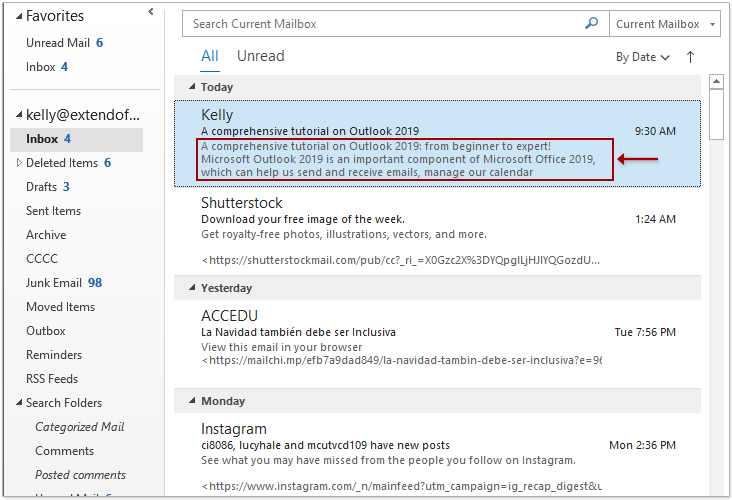
Now the message list is changed as below screenshot shown. In the message list, you can preview the message content of every email in 3 lines (or other specified number of lines).
More articles ...
Best Office Productivity Tools
Experience the all-new Kutools for Outlook with 100+ incredible features! Click to download now!
📧 Email Automation: Auto Reply (Available for POP and IMAP) / Schedule Send Emails / Auto CC/BCC by Rules When Sending Email / Auto Forward (Advanced Rules) / Auto Add Greeting / Automatically Split Multi-Recipient Emails into Individual Messages ...
📨 Email Management: Recall Emails / Block Scam Emails by Subjects and Others / Delete Duplicate Emails / Advanced Search / Consolidate Folders ...
📁 Attachments Pro: Batch Save / Batch Detach / Batch Compress / Auto Save / Auto Detach / Auto Compress ...
🌟 Interface Magic: 😊More Pretty and Cool Emojis / Remind you when important emails come / Minimize Outlook Instead of Closing ...
👍 One-click Wonders: Reply All with Attachments / Anti-Phishing Emails / 🕘Show Sender's Time Zone ...
👩🏼🤝👩🏻 Contacts & Calendar: Batch Add Contacts From Selected Emails / Split a Contact Group to Individual Groups / Remove Birthday Reminders ...
Use Kutools in your preferred language – supports English, Spanish, German, French, Chinese, and 40+ others!


🚀 One-Click Download — Get All Office Add-ins
Strongly Recommended: Kutools for Office (5-in-1)
One click to download five installers at once — Kutools for Excel, Outlook, Word, PowerPoint and Office Tab Pro. Click to download now!
- ✅ One-click convenience: Download all five setup packages in a single action.
- 🚀 Ready for any Office task: Install the add-ins you need, when you need them.
- 🧰 Included: Kutools for Excel / Kutools for Outlook / Kutools for Word / Office Tab Pro / Kutools for PowerPoint