Create, edit, filter and delete named ranges in Excel using Kutools' Name Manager
The Name Manager tool in Kutools for Excel provides an enhanced, easy-to-use panel that lets you view, create, edit, locate, filter, and manage all named ranges in your workbook more efficiently than Excel’s built-in interface. This guide walks you through each function so you can work with named ranges quickly and accurately.
Why use Kutools’ Name Manager?
Kutools’ Name Manager provides a faster, clearer, and more powerful way to manage named ranges in Excel. Instead of opening multiple dialog boxes or navigating through Excel’s built-in Name Manager, Kutools places all name-related tools into a single, easy-to-use panel on the left side of your workbook. With its enhanced navigation, editing, filtering, and management features, it greatly improves efficiency, especially when working with large workbooks or complex models.
- 🔍 View and locate names instantly - Jump to any named range with a single click and see the referenced cells highlighted in your worksheet.
- ⚡ Create names more efficiently - Define names manually or generate multiple names at once from labeled selections to save time and reduce errors.
- ✏️ Edit names with flexibility - Choose between editing through a dialog box or modifying details directly in the pane for quicker adjustments.
- 🎯 Filter names to focus on what matters - Display only error names, table names, sheet-scoped names, workbook-scoped names, or other specific groups to simplify management.
- 🗑️ Remove unwanted names easily - Delete one or many names at once using Ctrl, Shift, or mouse multi-selection, and clean up workbooks more efficiently.
- 👁️ Reveal hidden names - Display names created by Excel, add-ins, or imported content that normally remain hidden, giving you full transparency and control.
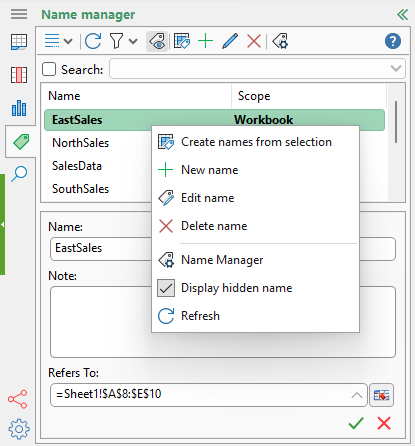
- 🖱️ Efficient right-click menu - Access essential tasks like editing, deleting, creating names from selection, showing hidden names, and refreshing—all from a convenient context menu.
- ⚙️ Customize the editing experience - Enable or disable the Name Editor pane using Navigation Options to match your preferred workflow.
- 🧭 Quick access to Excel’s native Name Manager - Open Excel’s built-in Name Manager directly from the panel whenever needed.
Kutools vs. Excel: Name Manager Comparison
| Feature | Kutools Name Manager | Excel Built-in Name Manager |
|---|---|---|
| Access & Interface | Always visible panel for quick access | Opens as a separate dialog |
| View named ranges | Shows all names clearly in a panel | Shows all names in a dialog list |
| Create named ranges | ✅ Create manually or batch from labeled selections | ⚠️ Only one at a time |
| Edit named ranges | ✅ Edit directly in panel or via dialog | ⚠️ Edit only through dialog |
| Filter | ✅ Names scoped to workbook/worksheet ✅ Names scoped to specific worksheets ✅ Names with/without errors ✅ Defined names / Table names ✅ Filter by name (search box) ✅ Hidden names | ✅ Names scoped to workbook/worksheet ❌ Cannot filter by specific worksheet ✅ Names with/without errors ✅ Defined names / Table names ❌ No filter by name ❌ Cannot filter hidden names |
| Locate named ranges | ✅ One-click navigation and highlight | ❌ Does not navigate; only outlines cells |
Overall, Kutools’ Name Manager consolidates everything you need for working with named ranges into one intuitive panel, making complex workbook management simpler, faster, and more efficient.
Open the Name Manager panel
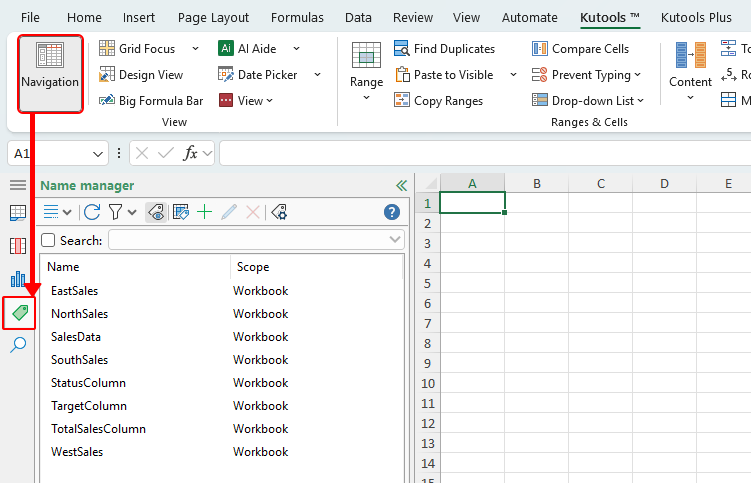
On the Kutools tab, click the Navigation button to open the navigation pane on the left side of your workbook, and then switch to the Name Manager tab.
What can the Name Manager do
The Name Manager in Kutools for Excel offers a set of tools that help you view, navigate, organize, and manage all named ranges in your workbook more efficiently. The following features show how you can work with names quickly and accurately.
Create a named range
The Name Manager panel provides two ways to create named ranges: manually defining a name or generating several names from a labeled selection.
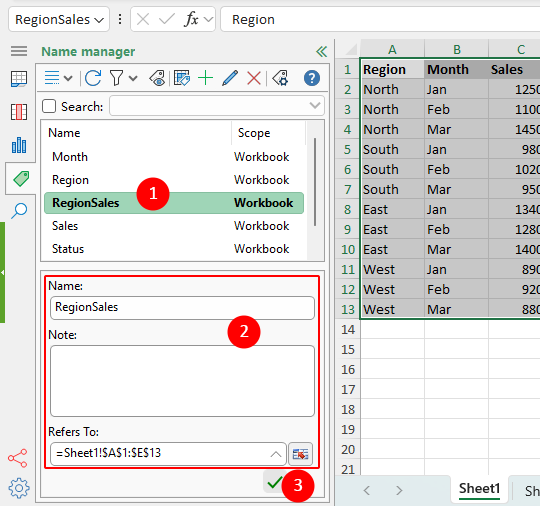
Create a named range manually
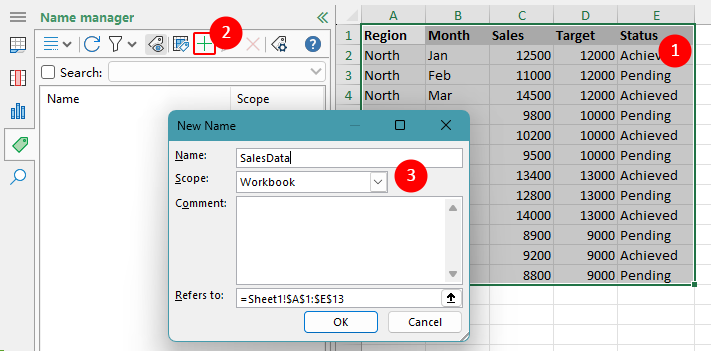
You can quickly define and save a name for any selected range in your workbook using the New Name (+) button on the toolbar in the Name Manager panel.
- Select the cell range in the worksheet that you want to name.
- Click the Add (+) button on the toolbar to create a new named range.
- In the "New Name" dialog box that appears:
- Enter the name you want to assign to the selected range.
- Specify the scope (workbook or a specific worksheet) to define where the named range can be used..
- Click OK to save the named range.

Result
After you click OK, the new named range is created and appears in the Name Manager panel. You can now select it in the list to jump directly to its location in the worksheet, view its referenced cells, or edit it.
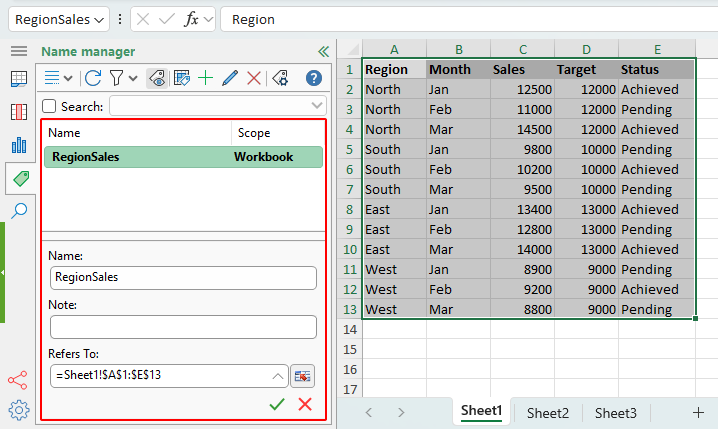
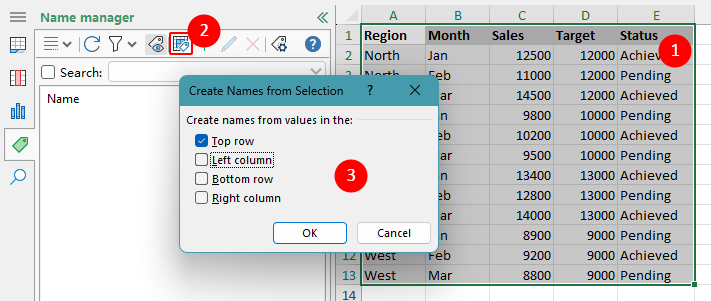
Create names from a labeled selection
If your worksheet already contains clear headers (such as labels in the top row or left column), you can quickly create multiple named ranges at once by using the Create Names from Selection option in the Name Manager panel.
- Select the entire range that contains your labels and the related data you want to turn into named ranges.
- In the Name Manager panel, click the Create Names from Selection button.
- In the "Create Names from Selection" dialog box that appears, choose where the labels are located, and click OK.
- Top row - uses the header row at the top of the selection to create names.
- Left column - uses the labels in the first column to create names.
- Bottom row - creates names from labels in the last row of the selection.
- Right column - uses the labels in the rightmost column.

Result
After clicking OK, Kutools automatically creates named ranges based on the labels you selected. Each label becomes a name, and each corresponding row or column of data becomes its referenced range. You can now view, edit, or jump to these names directly from the Name Manager panel.
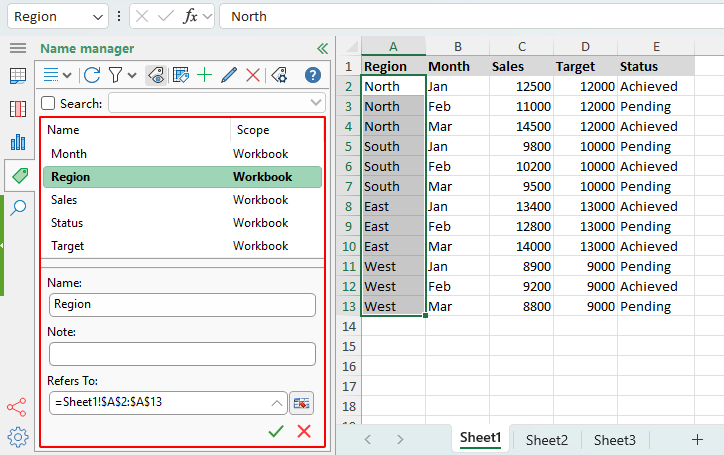
Note: This feature is ideal when your dataset already contains clear titles or labels, allowing Kutools to convert them into named ranges instantly.
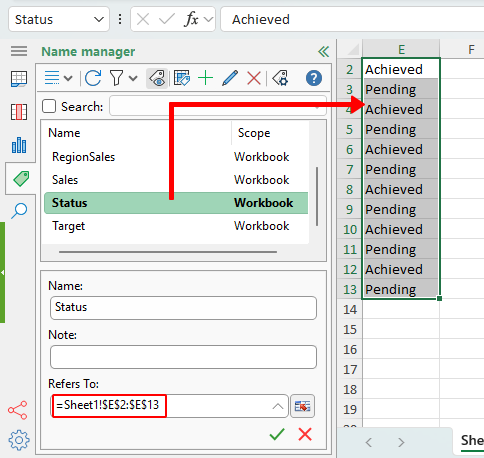
Locate a named range
To locate a named range, simply click its name from the list of the Name Manager panel. Excel will automatically jump to the referenced cell or range, and the first cell of that range will be positioned at the top-left corner of the visible worksheet area.
Modify an existing name in Excel
The Name Manager panel allows you to modify an existing named range in two different ways, depending on which editing method you prefer.
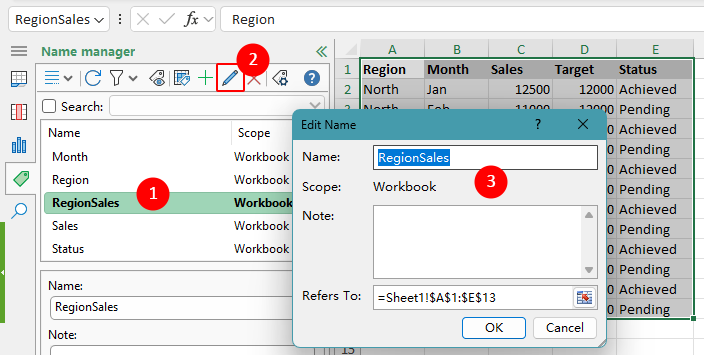
- Use the Edit button on the toolbar
Select a name in the list, then click the Edit button on the toolbar to open the Edit Name dialog box. Here, you can change the name and note, or update the referenced range.
- Edit directly in the editor pane
Select a name in the list, and the editor pane below will display its information. You can modify the name, notes, or edit the “Refers to” range directly, then click OK () to save the changes.
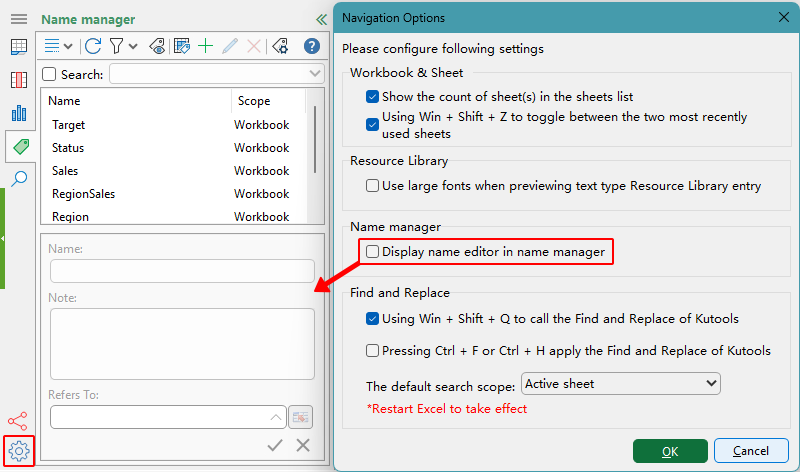
Note: If you don’t want to use the editor pane for editing, click the Navigation Options () button in the lower-left corner of the Name Manager panel, and uncheck the “Display name editor in Name Manager” option.


Result
After modifying the name or its reference using either method, the changes are applied immediately and reflected in the Name Manager panel.
Filter names in Excel
The Name Manager panel provides several filtering options that let you quickly display only the types of named ranges you want to work with. This is especially useful in large workbooks that contain many names.
Click the filter icon on the Name Manager toolbar to open the filtering menu.
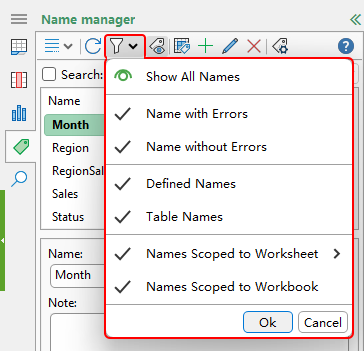
- Choose one of the available filter options:
- Show All Names - displays every named range in the workbook.
- Name with Errors - shows only names with errors.
- Name without Errors - displays only valid, error-free named ranges.
- Defined Names - filters to show only traditional (non-table) named ranges.
- Table Names - shows names associated with Excel Tables.
- Names Scoped to Worksheet - displays names that are limited to a specific worksheet.
- Names Scoped to Workbook - shows names that can be used throughout the workbook.
- Click OK to apply the selected filter.

Once a filter is applied, the Name Manager panel updates immediately to show only the matching named ranges, making it easier to locate and manage them.
Remove a named range in Excel
You can delete one or multiple named ranges directly from the Name Manager panel.
- Select the name you want to remove.
Tips: You can select multiple names by:
- Holding Ctrl and clicking each name.
- Holding Shift to select a continuous range of names.
- Dragging with the mouse to highlight multiple names.
- Click the Delete () button on the toolbar to remove the selected name(s).
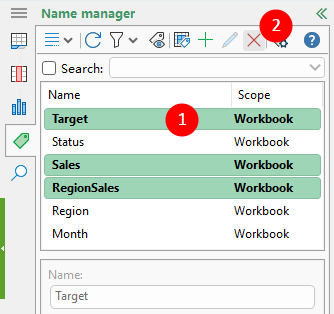

The selected named ranges are deleted immediately from the Name Manager panel, and they will no longer be available in formulas or navigation.
Note: To delete all names with errors, apply the filter described above to display only those names, then select them all and click the Delete () button.
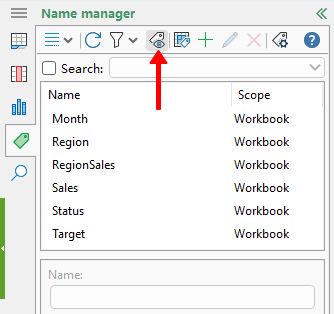
Display hidden names in Excel
Some workbooks contain hidden names, usually created by Excel, add-ins, or imported data. These names do not appear in the list by default. The Name Manager panel includes a button that allows you to reveal or hide these hidden names, giving you control to toggle their visibility as needed.
Tips for using the Name Manager panel
Refresh the list
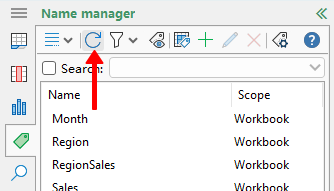
If you create or modify a named range using Excel’s built-in tools - such as typing a name directly into the Name Box - the new name may not appear immediately in the Name Manager panel. Click the Refresh button to update the list.
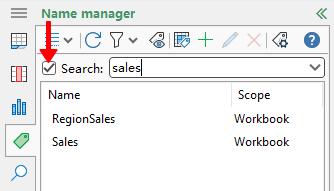
Search for a named range
You can quickly locate a specific named range by enabling the search box and typing part of the name you want to find.
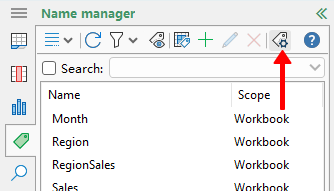
Open Excel’s built-in Name Manager
Click the Name Manager button on the toolbar to open Excel’s built-in Name Manager dialog box if you need to manage names using Excel’s original interface.
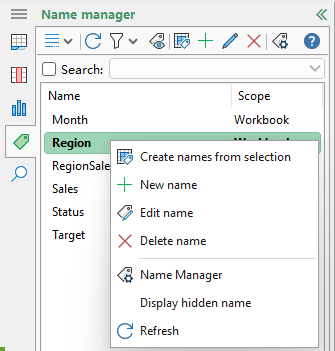
Use the right-click menu
Right-click a named range to open a shortcut menu with options such as creating names from selection, adding a new name, editing or deleting the selected name, displaying hidden names, opening Excel’s Name Manager, or refreshing the list.
Disable the editor pane
If you prefer not to edit names in the editor pane and want to disable it, click the Navigation Options () button in the lower-left corner of the panel, and uncheck the “Display name editor in Name Manager” option.
Best Office Productivity Tools
Supercharge Your Excel Skills with Kutools for Excel, and Experience Efficiency Like Never Before. Kutools for Excel Offers Over 300 Advanced Features to Boost Productivity and Save Time. Click Here to Get The Feature You Need The Most...
Office Tab Brings Tabbed interface to Office, and Make Your Work Much Easier
- Enable tabbed editing and reading in Word, Excel, PowerPoint, Publisher, Access, Visio and Project.
- Open and create multiple documents in new tabs of the same window, rather than in new windows.
- Increases your productivity by 50%, and reduces hundreds of mouse clicks for you every day!
All Kutools add-ins. One installer
Kutools for Office suite bundles add-ins for Excel, Word, Outlook & PowerPoint plus Office Tab Pro, which is ideal for teams working across Office apps.
- All-in-one suite — Excel, Word, Outlook & PowerPoint add-ins + Office Tab Pro
- One installer, one license — set up in minutes (MSI-ready)
- Works better together — streamlined productivity across Office apps
- 30-day full-featured trial — no registration, no credit card
- Best value — save vs buying individual add-in
Table of Contents
- Why use Kutools’ Name Manager
- Open the Name Manager panel
- What can Name Manager do
- Create a named range
- Locate a named range
- Modify an existing name
- Filter names
- Remove a name
- Display hidden names
- Tips for using Name Manager
Kutools for Excel
Brings 300+ advanced features to Excel
- 🧩 Overview
- 📥 Free Download
- 🎁 30-Day Free Trial available