3 methods to create barcode in Excel – a step-by-step guide
Creating barcodes in Excel can streamline your inventory management, shipping processes, or even retail operations by providing a quick and easy way to generate trackable information. This guide will walk you through three effective ways to create barcodes in Excel, ensuring you can choose the method that best fits your needs and system capabilities.
Create barcode in Excel
In this section, we will explore three practical methods to create barcodes directly in Excel. Let's dive into these methods to see how each can be utilized to create barcodes seamlessly within your Excel environment.
By using a barcode font
Barcode fonts are an accessible and straightforward way to generate barcodes in Excel. These fonts work by converting standard text into symbols that barcode scanners can read. One reliable barcode font that you can use is "Code 39," which supports a wide range of characters and is ideal for general barcode applications.
Step 1: Download the font
- Visit a reputable font download site such as idautomation.
- Find the Download button and click to download the font.
Step 2: Install the font
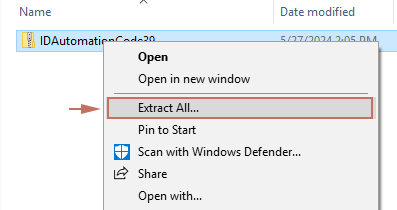
- After downloading, right click on the zip file and select Extract All from the right-clicking menu.
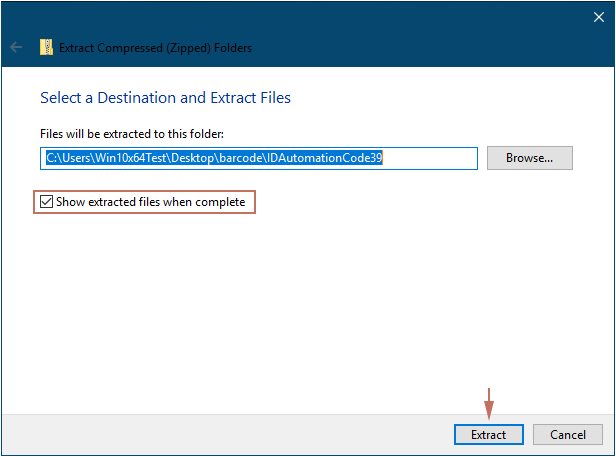
- In the Extract Compressed (Zipped) Folders window:
- Choose a folder to save the extracted file. (I choose to keep the default folder that the system suggested).
- Ensure the Show extracted files when complete checkbox is checked.
- Click the Extract button.
- A folder will then open displaying the extracted files. Open the Free Code 39 Font folder.
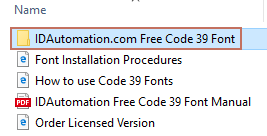
- Right click on the font file and select Install to add it to your system fonts.


Step 3: Create barcode with the font in Excel
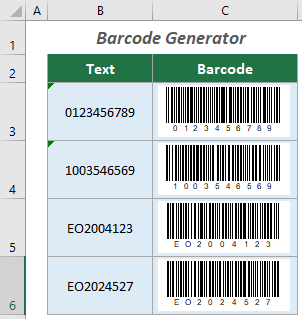
As shown in the screenshot below, to create a barcode based on numbers or text in the range B3:B8, you can apply the installed fonts as follows.

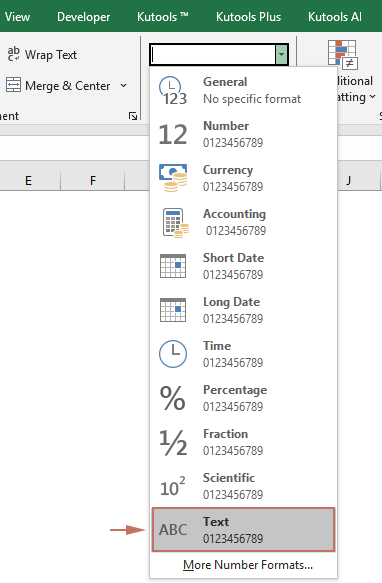
- Select the cells you wish to generate barcodes based on. Here I select B3:B8.
- Under the Home tab, click to expand the Number Format drop down menu, and then choose the Text format from the list.

- Select a cell where you want to show the barcode, such as C3 in this case.
- Enter the following formula and press Enter. Select the first formula cell and drag its Fill Handle down to get the rest of the results.
="("&B3&")"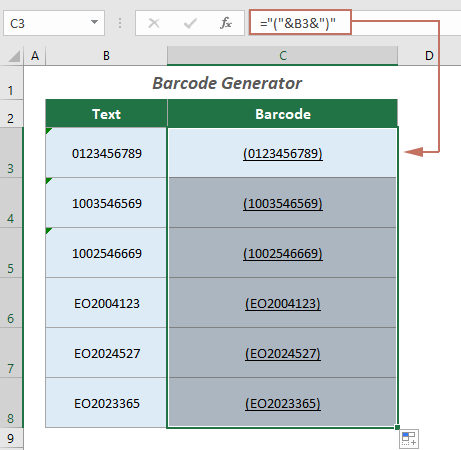

- Select all the result cells, click the Font drop-down menu under the Home tab, and then find and select the barcode font you have installed.


Result
Now you have a list of barcodes generated from the given data, as shown in the screenshot below.

By using a handy add-in
Kutools for Excel's Insert Barcode feature enables quick, batch generation of various barcode types directly in your spreadsheets. This feature is designed to facilitate seamless integration of barcode technology into your data management processes, allowing you to create multiple barcodes simultaneously from provided data with just a few clicks.
After installing Kutools for Excel, go to select Kutools > Insert > Insert Barcode to open the Insert Barcode pane, then you can generate barcodes in bulk as follows:
- Choose a barcode type you need from the Barcode type drop-down list.
- In the Data Range field, select the range of cells containing the data you want to generate barcodes based on.
- In the Insert Range field, select a range of cells to place the corresponding barcodes.
- Specify the options such as Width and Height according to your needs.
- Check the Show barcode number checkbox if you need to display the original data in the barcode.
- Click the Generate button to generate barcodes.
- Before using this feature, ensure that Kutools for Excel is installed. Download a 30-day free trial with full features of Kutools for Excel now!
- Click to know more about this feature.
By using Microsoft Barcode Control
Microsoft Barcode Control was a common feature in older versions of Excel, such as Office 2003 and 2007. While it is generally not included in most modern installations of Office, there have been instances where it appears in Office 365, possibly due to specific legacy support or certain enterprise configurations. However, its presence in Office 365 is not guaranteed and may vary depending on factors such as your version, subscription level, or system updates. In this section, if you have access to this feature, I will show you how to use the Microsoft Barcode Control to generate barcodes in Excel.
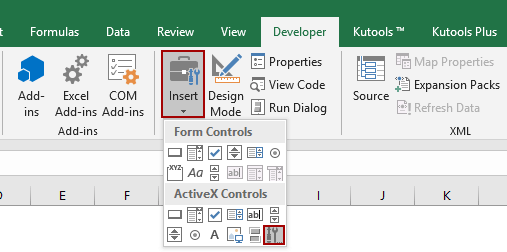
- Click Developer > Insert > More Controls.
 Note: If the Develper tab is not displayed in your Excel ribbon, check out this tutorial on how to show developer tab in Excel Ribbon.
 - In the More Controls window, find and select the Microsoft Barcode Control option and click the OK button.

- Now draw a barcode on your worksheet. Then right click on it and select Microsoft Barcode Control Object > Properties.

- In the Microsoft Barcode Control Properties window, specify the options as you need, and then click the OK button.

- Right click the barcode again and select Properties from the context menu. In the Properties window, enter the corresponding value into the Value box that you want to show in the barcode, and then close the window.


Now a barcode is generated.

Whether you choose to use a simple barcode font, a more robust add-in, or the Microsoft Barcode Control, Excel offers versatile options for generating barcodes tailored to your specific requirements. Each method has its advantages, so consider your technical environment and what you need from your barcodes before deciding on the approach. With the steps outlined above, you'll be well on your way to integrating efficient barcode generation into your Excel tasks.
Best Office Productivity Tools
Supercharge Your Excel Skills with Kutools for Excel, and Experience Efficiency Like Never Before. Kutools for Excel Offers Over 300 Advanced Features to Boost Productivity and Save Time. Click Here to Get The Feature You Need The Most...
Office Tab Brings Tabbed interface to Office, and Make Your Work Much Easier
- Enable tabbed editing and reading in Word, Excel, PowerPoint, Publisher, Access, Visio and Project.
- Open and create multiple documents in new tabs of the same window, rather than in new windows.
- Increases your productivity by 50%, and reduces hundreds of mouse clicks for you every day!
All Kutools add-ins. One installer
Kutools for Office suite bundles add-ins for Excel, Word, Outlook & PowerPoint plus Office Tab Pro, which is ideal for teams working across Office apps.
- All-in-one suite — Excel, Word, Outlook & PowerPoint add-ins + Office Tab Pro
- One installer, one license — set up in minutes (MSI-ready)
- Works better together — streamlined productivity across Office apps
- 30-day full-featured trial — no registration, no credit card
- Best value — save vs buying individual add-in