Delete multiple specific pages in a Word (Complete Step-by-Step Guide)
Deleting a single page in Microsoft Word is straightforward, but removing multiple, non-consecutive pages or specific ranges can be tricky. Whether you're finalizing a report, cleaning up a manuscript, or preparing a document for print, this guide provides step-by-step methods to efficiently delete specific pages.

- Delete a range of pages (5-10) with Go To feature
- Delete multiple specific pages (1,3,5,8) with VBA code
- Delete a range of pages or specific pages (2,5-10,15) with Kutools
Delete specific pages in Word
Word doesn’t provide a single built-in command to remove selected pages, so whether you need to delete a continuous page range or remove multiple non-adjacent pages, the following sections walk you through several reliable solutions to help you safely and efficiently remove exactly the pages you don’t need.
Delete a range of pages (5-10) with Go To feature
If you need to remove a large chunk of consecutive content, the Go To feature is the most precise method. It ensures you select every character from the start of the first page to the very end of the last.
- Press Ctrl + G to open the Find and Replace dialog. In the Enter page number box, type the number of the first page you want to delete (e.g., 5) and hit Enter.
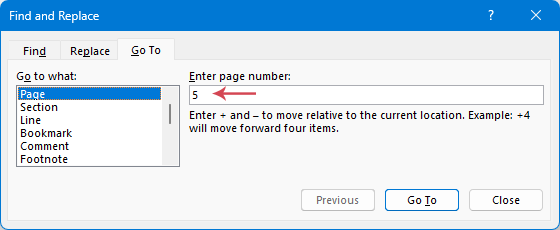
- Close the dialog. Your cursor is now at the start of page 5.
- Press F8 to turn on Extend Mode. This pins your cursor, telling Word that everything from this point forward should be selected.
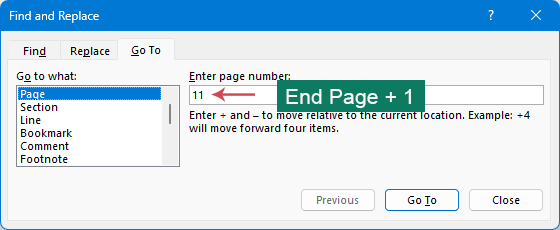
- Press Ctrl + G again. To ensure you capture the entire last page, type the page number immediately following your range (e.g., if you want through page 10, type 11). Hit Enter, Word will instantly highlight every character, image, and table between those two points.
- Close the dialog box. Then, press Delete to remove the selected pages at once.


When using the Go To feature, keep in mind that if the ending page is the last page of the document, Word may not select it correctly. In this case, you may need to manually drag the mouse to complete the selection.
- Built into Word—no extra tools required
- Easy to use for continuous page ranges
- Suitable for beginners and quick edits
- Cannot delete non-adjacent pages
- Requires careful page counting
- Easy to delete extra content if the selection is inaccurate
Delete multiple specific pages (1,3,5,8) with VBA code
Word doesn't have a Select Pages tool for non-consecutive pages. To do this quickly without manual scrolling, you can use a simple VBA Macro.
- Hold down Alt + F11 to open the Microsoft Visual Basic for Applications window.
- Click Insert > Module, and paste the following VBA code into the Module window:
Sub DeletePagesInDoc() Dim xRange As Range Dim xPage As String Dim xDoc As Document Dim xArr Dim I, xSplitCount As Long Application.ScreenUpdating = False Set xDoc = ActiveDocument xPage = InputBox("Enter the page numbers of pages to be deleted: " & vbNewLine & _ "use comma to separate numbers", "KuTools for Word", "") xArr = Split(xPage, ",") xPageCount = UBound(xArr) For I = xPageCount To 0 Step -1 Selection.GoTo wdGoToPage, wdGoToAbsolute, xArr(I) xDoc.Bookmarks("\Page").Range.Delete Next Application.ScreenUpdating = True End Sub - Press F5 to run the code. A prompt box will appear asking you to enter the page numbers you want to delete. Separate the page numbers with commas. See screenshot:
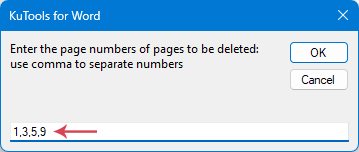
- Click the OK button, and all the specified pages will be deleted instantly.

- Can delete non-consecutive pages
- Highly flexible and customizable
- Useful for repetitive or automated tasks
- Requires VBA knowledge
- Macros must be enabled (security concerns)
- Risky for casual users—incorrect code may delete wrong content
Delete a range of pages or specific pages (2,5-10,15) with Kutools
When you need to delete multiple pages in different positions, built-in Word tools can be slow and error-prone. Kutools for Word offers a simple page-removal feature that lets you specify page numbers such as 2, 5–10, 15 in one dialog—no manual selection or VBA required. With just a few clicks, you can safely and efficiently remove exactly the pages you don’t need.
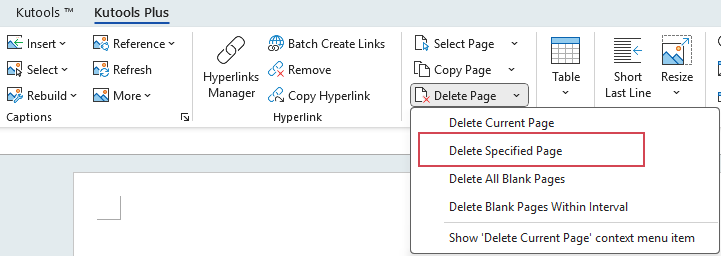
- Click Kutools Plus > Delete Page > Delete Specified Page, see screenshot:
- In the dialog box, enter the page numbers or page ranges you want to delete, using commas to separate them.
- Specific Pages: Type numbers separated by commas (2, 15).
- Range of Pages: Enter the start and end (5-10).
- Combination: Enter both into the selection field (2, 5-10, 15).
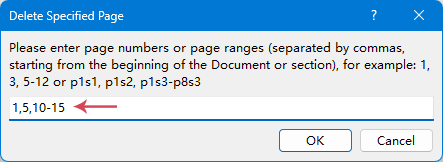
- Then, click OK, the specified page will be deleted immediately. A dialog box will then appear confirming the deletion.


- Supports any combination of pages (single pages + ranges)
- No manual selection or VBA needed
- Fast, accurate, and user-friendly
- Ideal for long or complex documents
Delete blank pages in Word
Blank pages often appear unexpectedly in Word documents—at the end of a file or between sections—and are usually caused by hidden formatting marks like extra paragraph marks or page breaks. Depending on your document, you can remove blank pages manually or delete all of them at once using a faster method. The following sections show you practical ways to clean up blank pages and keep your document neat and professional.
Delete blank pages one by one
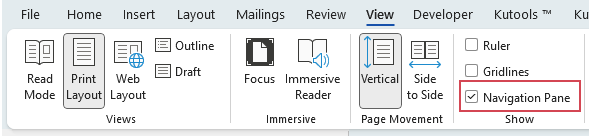
- First, you need a visual map of your document to find exactly where those empty pages are hiding. Go to the View tab on the Ribbon and check the Navigation Pane box in the Show group.
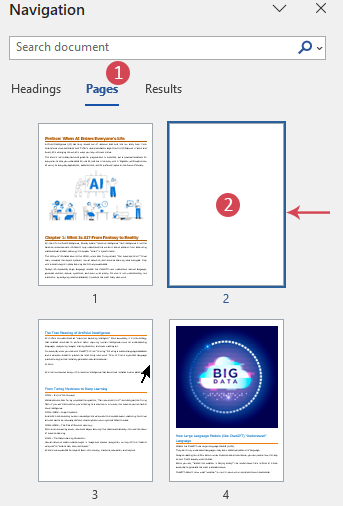
- Click the Pages tab within the Navigation pane. You will see a list of all pages; click on the blank page you wish to remove to jump directly to it.


Once your cursor is resting on the blank page, use this specialized command to highlight every invisible character on that specific page.
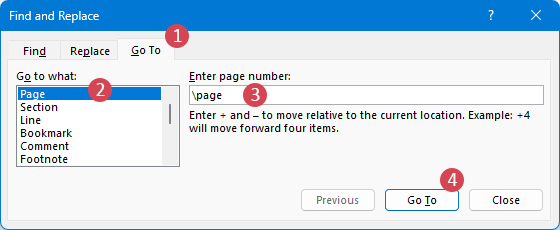
- Press Ctrl + G on your keyboard to open the Find and Replace dialog box. In the Go To tab, ensure Page is selected in the Go to what list. In the Enter page number text box, type: \page. At last, click the Go To button. See screenshot:
- You will notice the entire blank page (including all hidden paragraph marks) is now highlighted. Close the dialog box.

With the content still highlighted in your document, simply press the Backspace or Delete key.
The blank page will vanish immediately, and the subsequent content will shift up to fill the gap. You can repeat this process for any other specific blank pages identified in your Navigation Pane.
- No additional tools required
- Good for removing one or two blank pages
- Helps you understand what causes blank pages
- Time-consuming for long documents
- Easy to miss hidden formatting marks
- Not efficient for multiple blank pages
Delete all blank pages at once with Kutools
When a document contains multiple blank pages, removing them one by one can be tedious and easy to get wrong. Kutools for Word offers a one-click solution that automatically finds and deletes all blank pages in your document—no need to inspect formatting marks or hunt for hidden breaks. With Kutools, the process is faster, safer, and more reliable, making it especially useful for long or complex documents where manual cleanup would take far too much time.
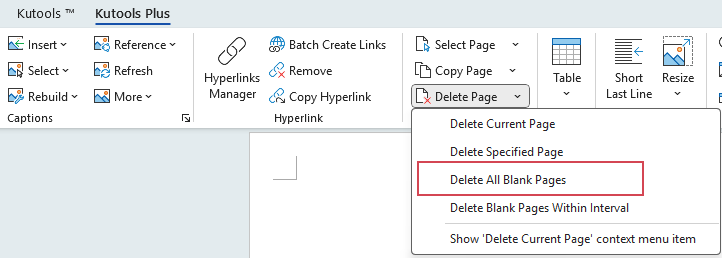
- After installing Kutools for Word, click Kutools Plus > Delete Page > Delete All Blank Pages, see screenshot:
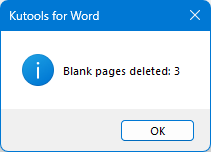
- A prompt box will appear, showing how many blank pages have been deleted.


- One-click removal of all blank pages
- Fast, accurate, and safe
- Perfect for large or messy documents
Best Practice Tips (To Avoid Accidental Deletion)
Conclusion
Deleting multiple specific pages in Word doesn't have to be a tedious, page-by-page chore.
- For consecutive ranges, the native Go To (Ctrl+G) method is quick and effective.
- For complex, scattered page deletion, a VBA macro provides a powerful automated solution.
- If you frequently manage large documents, investing in a tool like Kutools for Word can save significant time and effort.
Whichever method you choose, following the best practice tips—especially saving a backup and showing formatting marks—will ensure you delete exactly what you intend to, keeping your document clean and error-free.
Best Office Productivity Tools
Kutools for Word - Elevate Your Word Experience with Over 100 Remarkable Features!
🤖 Kutools AI Features: AI Assistant / Real-Time Assistant / Super Polish (Preserve Format) / Super Translate (Preserve Format) / AI Redaction / AI Proofread...
📘 Document Mastery: Split Pages / Merge Documents / Export Selection in Various Formats (PDF/TXT/DOC/HTML...) / Batch Convert to PDF...
✏ Contents Editing: Batch Find and Replace across Multiple Files / Resize All Pictures / Transpose Table Rows and Columns / Convert Table to Text...
🧹 Effortless Clean: Sweap away Extra Spaces / Section Breaks / Text Boxes / Hyperlinks / For more removing tools, head to the Remove group...
➕ Creative Inserts: Insert Thousand Separators / Check Boxes / Radio Buttons / QR Code / Barcode / Multiple Pictures / Discover more in the Insert group...
🔍 Precision Selections: Pinpoint Specific Pages / Tables / Shapes / Heading Paragraphs / Enhance navigation with more Select features...
⭐ Star Enhancements: Navigate to Any Location / Auto-Insert Repetitive Text / Toggle Between Document Windows / 11 Conversion Tools...
🌍 Supports 40+ Languages: Use Kutools in your preferred language – supports English, Spanish, German, French, Chinese, and 40+ others!

Office Tab - Brings Tabbed interface to Office, Make Your Work Much Easier
- Enable tabbed editing and reading in Word, Excel, PowerPoint, Publisher, Access, Visio and Project.
- Open and create multiple documents in new tabs of the same window, rather than in new windows.
- Increases your productivity by 50%, and reduces hundreds of mouse clicks for you every day!
✨ Kutools for Office – One Installation, Five Powerful Tools!
Includes Office Tab Pro · Kutools for Excel · Kutools for Outlook · Kutools for Word · Kutools for PowerPoint
📦 Get all 5 tools in one suite | 🔗 Seamless integration with Microsoft Office | ⚡ Save time and boost productivity instantly
Best Office Productivity Tools
Kutools for Word - 100+ Tools for Word
- 🤖 Kutools AI Features: AI Assistant / Real-Time Assistant / Super Polish / Super Translate / AI Redaction / AI Proofread
- 📘 Document Mastery: Split Pages / Merge Documents / Batch Convert to PDF
- ✏ Contents Editing: Batch Find and Replace / Resize All Pictures
- 🧹 Effortless Clean: Remove Extra Spaces / Remove Section Breaks
- ➕ Creative Inserts: Insert Thousand Separators / Insert Check Boxes / Create QR Codes
- 🌍 Supports 40+ Languages: Kutools speaks your language – 40+ languages supported!
Table of contents
- Delete specific pages in Word
- Delete a range of pages
- Delete multiple specific pages
- Delete a range of pages or specific pages
- Delete blank pages in Word
- Delete blank pages one by one
- Delete all blank pages at once
- Best Practice Tips
- Conclusion
- The Best Office Productivity Tools
Kutools for Word
Brings 100+ advanced features to Word
- ⬇️ Free Download
- 🛒 Purchase Now
- 📘 Feature Tutorials
- 🎁 60-Day Free Trial