This tutorial will guide you to add reflection for the selected text in the message body when you are composing, replying, or forwarding an email in Outlook.
Note: Methods introduced on this page apply to Microsoft Outlook 2019 desktop program in Windows 10. And the instructions may vary significantly or slightly depending on the version of Microsoft Outlook and the Windows environments.
Add reflection for selected text in message body
In the message editing window in Outlook, you can add reflection for the selected text in the message body as follows:
1. In the message body, select the text you will add reflection for.
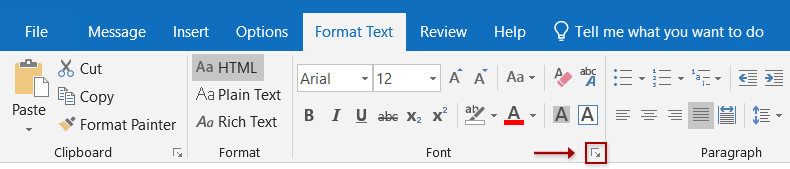
2. Go to the "Font" group on the "Format Text" tab, and click the anchor at the bottom-right corner to open the Font dialog. Tips: You can also press "Ctrl" + "D" keys to open the Font dialog.
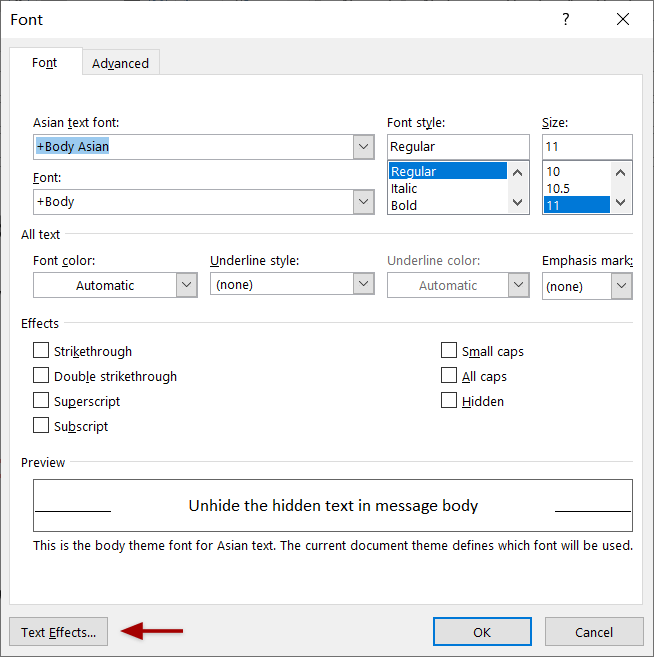
3. In the Font dialog, click the "Text Effects" button at the bottom-left corner.
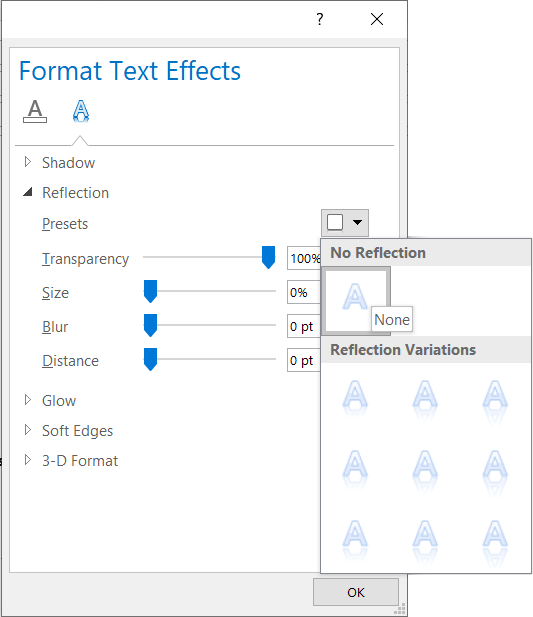
4. In the Format Text Effects dialog, enable the "Text Effects" tab, and click the arrow before "Reflection" to expand this section.
5. Configure the reflection parameters as you need:
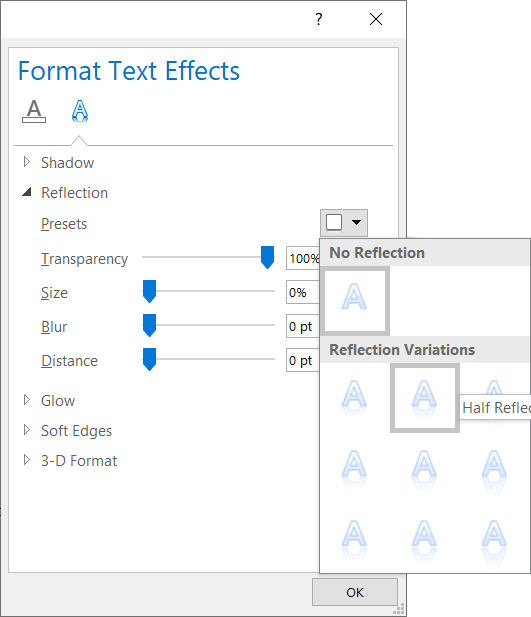
Presets: Select one style of reflections from the "Presets" drop-down list. Tips: If the chosen preset reflection meets your needs, you can finish configuring here. Otherwise, set other parameters.
Transparency: Drag the slider or enter a percentage to set the transparency.
Size: Drag the slider or enter a percentage to set the reflection size.
Blur: Drag the slider or enter a number of points to adjust the blurriness.
Distance: Drag the slider or enter a number of points to set the distance between the text and its reflection.
6. Click the "OK" buttons to save the settings and close both dialogs.
So far, the reflection has been added for the selected text in the message body.
Note
If you need to remove the reflection from text in the message body, you can do as follows:
1. In the message body, select the text whose reflection you will remove.
2. Press "Ctrl" + "D" keys to open the Font dialog, and then click the "Text Effects" button.
3. In the Format Text Effects tab, enable the "Text Effects" tab, select "None" from the "Presets" drop-down list in the "Reflection" section, and click the "OK" buttons to close both dialogs.
More articles ...
Format Text Effects – Text Fill This tutorial will show you how to add text fill effects for the selected text in the message body, when you are composing, replying, or forwarding an email in Outlook.
Format Text Effects – Text Outline When you are composing, replying, or forwarding an email in Outlook, you can add text outline effects for the selected text in the message body. And this tutorial will show you how to get it done.
Format Text Effects – Text Shadow You may be familiar to add shadows for shapes or images in some image processing tools, says Photoshops, etc. Actually, we can also add shadows for text. And Outlook email supports this amazing text effects too.
Format Text Effects – Text Glow When composing, replying, or forwarding an email in Outlook, you can add glow effects for the selected text in the message body with different colors. And this tutorial will show you the detailed steps.
Best Office Productivity Tools
Experience the all-new Kutools for Outlook with 100+ incredible features! Click to download now!