Precisely change cell size to inches, cm, or other units in Excel
When working in Excel, adjusting cell size to match physical dimensions—such as inches or centimeters—is essential for preparing printed reports, forms, or labels. However, Excel's default behavior can be confusing, as it does not clearly indicate the measurement unit being used. This guide walks you through various methods to control cell size precisely using familiar measurement units.
- Why Cell Size Settings Are Confusing
- Change Excel’s Default Measurement Units
- Visually Resize Cells Using the Page Layout View
- Input Specific Unit Values for Cell Size
- Instantly Resize Cells by Units with Kutools for Excel
Why Cell Size Settings Are Confusing
Most Excel users adjust cell size by going to the "Home" tab > "Format" > "Row Height" or "Column Width" but encounter the following problems:
- The input boxes only accept numbers—without any visible unit, making it unclear what "15" or "20" actually represents.
- If you try to enter a number with a unit (e.g., 4cm, 2in), Excel throws an error message, as it expects plain numeric values.


This makes it difficult to precisely control the real-world size of a cell.
To solve this, first change Excel's default ruler units, then switch to Page Layout view, where you can use more intuitive, unit-based methods to adjust cell sizes.
Change Excel's Default Measurement Units
Changing the default unit helps you understand how Excel interprets size inputs and improves control during manual resizing or input.
- Go to "File" (or Office button) > "Options".
- In the "Excel Options" window, click "Advanced" from the left pane.
- Scroll down to the Display section.
- In the "Ruler Units" dropdown, select "Inches", "Centimeters" or "Millimeters" as desired.
- Finally click "OK" to save the changes. See screenshot.


Visually Resize Cells Using the Page Layout View
Once you've set your preferred unit, you can visually resize cells using the mouse in a more intuitive way:
- In the worksheet you want to resize the cells, enable the Page Layout view.
- Select "View" >"Page Layout".
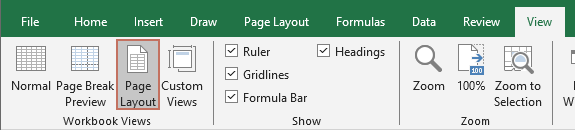
- Or click the "Page Layout" button in the right side of the "Status Bar".

- Select "View" >"Page Layout".
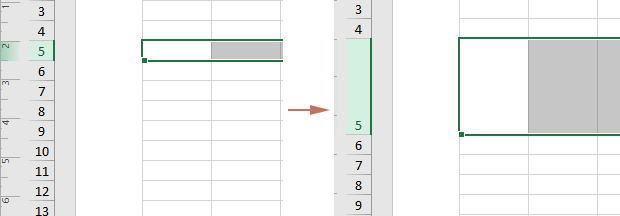
- Hover your mouse over the bottom edge of a row header (for example, the bottom edge of the number box for row 7). When the cursor changes to a horizontal line with up and down arrows (resize icon)
 , click and drag to adjust the row height.
  Notes:
- Similarly, to change the width of a column, hover your mouse over the right edge of a column letter (e.g., the right edge of column C) until the cursor changes to the resize icon, then drag to adjust.
- You’ll see a live tooltip (e.g., 2.00 Centimeters) showing the current size in your selected unit.
- Release when you reach your desired size.


This method is ideal for users who prefer visual feedback and precise control based on familiar physical measurements.
Input Specific Unit Values for Cell Size
Excel also allows you to enter precise dimensions (like 4cm, 2 in) to adjust row height and column width, but only in Page Layout view.
To resize a column:
- Switch to "Page Layout" view.
- Select "View" >"Page Layout".
- Or click the "Page Layout" button in the right side of the "Status Bar".
- Right-click the header of the column you want to adjust (e.g., column B), and then choose "Column Width" from the context menu.

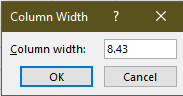
- In the "Column Width" dialog box, you'll see a value with the unit you previously set. To resize the column, simply type a new value followed by a supported unit, such as 4cm, 2in, or 50mm, and then click "OK".


The column width now resized to precise dimensions.
To resize a row:
- Right-click the row number (e.g., row 5) and choose "Row Height".

- Enter a value like 1in or 2cm and click "OK".
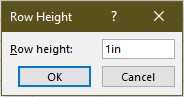


The row height now resized to precise dimensions.
To resize all cells:
- Press "Ctrl" + "A" to select all.
- Right-click any row number or column letter, choose "Row Height" or "Column Width" from the context menu.
- In the dialog box, enter your desired value with a unit (e.g., 5cm, 2in), and click "OK".
This method only works in Page Layout view. If used outside this view, entering a unit like 3cm will produce an error.
Instantly Resize Cells by Units with Kutools for Excel
If you often need to resize cells with specific units, Excel requires switching views and adjusting row height and column width separately. "Kutools for Excel" offers a more efficient and user-friendly alternative: it lets you easily choose from various units and adjust both row height and column width simultaneously, all in one place without changing views.
- After installing Kutools, go to select "Kutools" > "Format" > "Adjust Cell Size".

- In the opening "Adjust Cell Size" dialog box, you need to:
- Select the range with cells you want to resize.
- Choose an "Unit Type" (Pound, Inch, cm, or pixel).
- Check "Row Height" and/or "Column Width".
- Input the desired values.
- Click "OK".


All selected cells are resized immediately.
Kutools for Excel - Supercharge Excel with over 300 essential tools, making your work faster and easier, and take advantage of AI features for smarter data processing and productivity. Get It Now
Conclusion
Adjusting cell size in Excel to exact dimensions like centimetres or inches is possible—but not straightforward using Excel’s default methods. You’ll need to switch to Page Layout view and change the Ruler Unit setting for better control. For quick, bulk adjustments across various units and without view restrictions, Kutools for Excel offers the most efficient and flexible solution.
Whether you're printing forms, designing invoices, or aligning data visually, these techniques help ensure that your layout looks just right on paper and screen.
Demo: Ajust cell size by cm/pounds/pixels/inches using Kutools for Excel
Related articles:
- How to maximize all columns in Excel?
- How to quickly convert cells between hectares and acres in Excel?
- How to remove plus sign or minus sign of data in Excel?
Best Office Productivity Tools
Supercharge Your Excel Skills with Kutools for Excel, and Experience Efficiency Like Never Before. Kutools for Excel Offers Over 300 Advanced Features to Boost Productivity and Save Time. Click Here to Get The Feature You Need The Most...
Office Tab Brings Tabbed interface to Office, and Make Your Work Much Easier
- Enable tabbed editing and reading in Word, Excel, PowerPoint, Publisher, Access, Visio and Project.
- Open and create multiple documents in new tabs of the same window, rather than in new windows.
- Increases your productivity by 50%, and reduces hundreds of mouse clicks for you every day!
All Kutools add-ins. One installer
Kutools for Office suite bundles add-ins for Excel, Word, Outlook & PowerPoint plus Office Tab Pro, which is ideal for teams working across Office apps.
- All-in-one suite — Excel, Word, Outlook & PowerPoint add-ins + Office Tab Pro
- One installer, one license — set up in minutes (MSI-ready)
- Works better together — streamlined productivity across Office apps
- 30-day full-featured trial — no registration, no credit card
- Best value — save vs buying individual add-in