Change text case in Excel – 6 super practical ways
Maintaining consistent text casing in Excel, such as capitalizing the first letter of each word or using uniform uppercase/lowercase, significantly enhances data readability and professionalism. Unlike Microsoft Word, Excel does not provide a Change Case button for changing the text case in worksheets, which complicates the work of many Excel users. This article offers six practical methods to help you change the text case in Excel as needed. Let's work together to bring uniformity to your text data!
- Change the case of text in Excel
- With built-in functions (for upper, lower and proper cases)
- With a few clicks using a handy tool (for upper, lower, proper and sentence cases)
- With Flash Fill (for upper, lower, proper and sentence cases)
- With Microsoft Word (for upper, lower, proper and sentence cases)
- With Power Query (for upper, lower and proper cases)
- With VBA codes (for upper, lower, proper and sentence cases)
Change the case of text in Excel
This section demonstrates different methods to help you convert the text values in cells to uppercase, lowercase, proper case, as well as sentence case.
Change the case of text with built-in functions
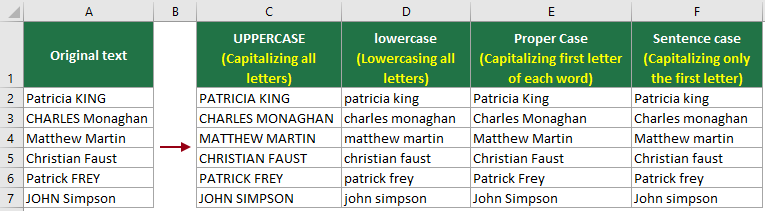
Suppose you have a list of names in the range A2:A7 as shown in the screenshot below, and now you want to change the case of the text to uppercase, lowercase, or proper case, Microsoft Excel has the following built-in functions that can help you easily accomplish the task.

- UPPER Function – Converts text to uppercase, such as the total PRICE > THE TOTAL PRICE
- LOWER Function – Converts text to lowercase, such as the total PRICE > the total price
- PROPER Function – Capitalize the first letter of each word in a text string, such as the total PRICE > The Total Price
Change the case of text to uppercase with the UPPER function
To change the case of text in the range A2:A7 to uppercase, the UPPER function can help. Please do as follows.
Step 1: Apply the UPPER function
Here I select the cell C2, enter the following formula and press the Enter key to get the first result.
=UPPER(A2)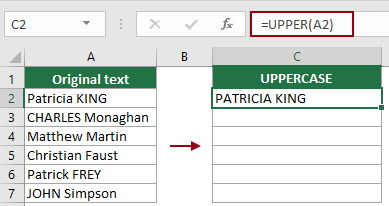
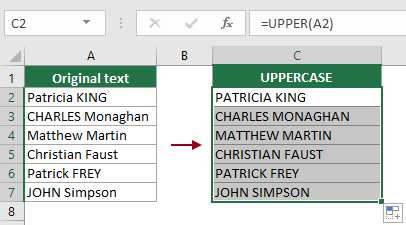
Step 2: Get all results
Select the first result cell, drag its Fill Handle down to get all the results. You can see the referenced text is converted to uppercase as shown in the screenshot below.
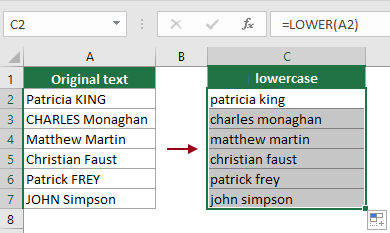
Change the case of text to lowercase with the LOWER function
To change the case of text in the range A2:A7 to lowercase, you can apply the LOWER function as follows.
Step 1: Apply the LOWER function
Here I select the cell C2, enter the following formula and press the Enter key to get the first result.
=LOWER(A2)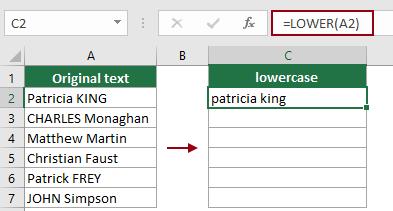
Step 2: Get all results
Select the first result cell, drag its Fill Handle down to get all the results. You can see the referenced text is converted to lowercase as shown in the screenshot below.
Change the case of text to Proper (title) case with the PROPER function
To change the case of text in the range A2:A7 to proper case (capitalizing the first letter of each word), the PROPER function can do you a favor. Please do as follows.
Step 1: Select a cell to output the result and apply the PROPER function
Here I select the cell C2, enter the following formula and press the Enter key to get the first result.
=PROPER(A2)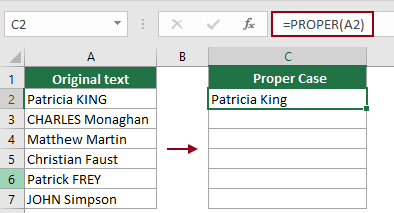
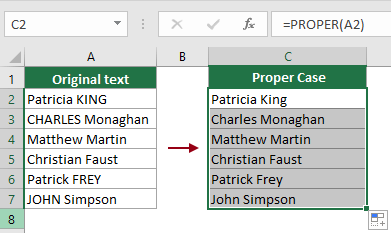
Step 2: Get all results
Select the first result cell, drag its Fill Handle down to get all the results. You can see the referenced text is converted to proper case (the first letter of each word is capitalized) as shown in the screenshot below.
Change the case of text with a few clicks using a handy tool
While the aforementioned functions allow you to change the text's case, they require a helper column to store the altered text. This can be inconvenient, especially if you need the changed text for further operations. However, Kutools for Excel's Change Case feature lets you effortlessly adjust the text case in a selected range to upper, lower, proper, or even sentence case, directly within the range. Please try the feature as follows.
After installing Kutools for Excel, go to select Kutools > Text > Change Case, and then do as follows:
- Select the range containing the text whose case you want to change.
- In the Change Case dialog box, choose the text case option you need.
- Click OK.


Result
In this case, I choose the UPPER CASE option, after clicking the OK button, all texts in the selected range will be changed to uppercase. See the screenshot below.
- To use this feature, you should install Kutools for Excel first, please click to download and have a 30-day free trial now.
- You can apply this Change Case feature to change the case of text in multiple ranges at the same time.
Change the case of text with Flash Fill
Now let’s move on to the third method, known as Flash Fill. Introduced in Excel 2013, Flash Fill is designed to automatically fill your data when it senses a pattern. Using the Flash Fill feature to change the text case in a range in Excel is relatively straightforward. Here's the step-by-step guide:
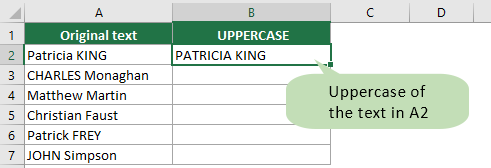
Step 1: Type the first entry in the desired case into the adjacent cell
In the cell immediately adjacent to your first data entry, manually type the first entry as you want it to appear.
For example, if I want to change the text case in the range A2:A7 to uppercase, I would go to the cell B2 which is directly adjacent to the first name and manually type the text in uppercase.
Step 2: Apply the Flash Fill to automatically fill all uppercase
Move to the cell below B2, and type the second name from A3 in uppercase, then Excel will detect the pattern from your previous input and a Flash Fill suggestion will appear to automatically fill the remaining cells with uppercase text. Then you need to press Enter to accept the preview.
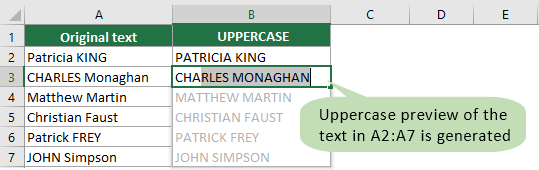
Result
After pressing the Enter key to accept the preview, you will get a list of uppercase text as shown in the screenshot below.

- This feature is only available in Excel 2013 and later versions.
- You can follow the same steps to apply Flash Fill to change the case of text to lowercase, proper case as well as sentence case as needed.
- If Excel doesn't automatically offer a Flash Fill suggestion, you can force it to take effect using one of the following methods.
- By shortcutAfter typing the first uppercase text in cell B2, select the range B2:B7, press Ctrl + E keys to automatically fill the rest of the uppercase texts.

- By ribbon optionAfter typing the first uppercase text in cell B2, select the range B2:B7, go to click Fill > Flash Fill under the Home tab.

- By shortcut


Change the case of text with Microsoft Word
Using Microsoft Word to help change the text case of a range in Excel involves a bit of a workaround. However, this can be beneficial if you're more comfortable with Word's case-changing capabilities. Here are the steps:
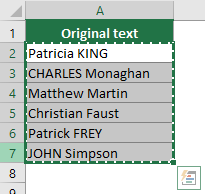
Step 1: Copy the range of cells containing the text whose case you want to change
In this case, I select the range A2:A7 in an Excel worksheet and press Ctrl + C to copy it.
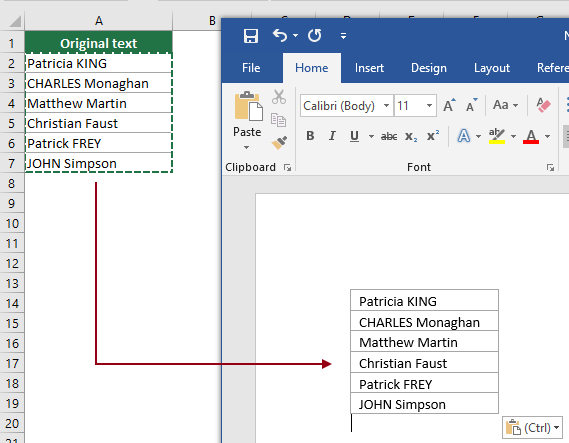
Step 2: Paste the selected range into a Word document
You then need to press Ctrl + V to paste the copied content into a new or existing Word document.
Step 3: Change the selected text to uppercase, lowercase or other common cases
- Select the copied text in word.
- Under the Home tab, click to expand the Change Case drop down menu.
- Choose one of the case options as you need. Here I choose lowercase from the drop down menu.


Step 4: Copy the changed texts from word and paste back into Excel
Once the text is changed to the case you specified (here the case of text is changed to lowercase), you need to do as follows:
- Select and copy the changed texts in Word.
- Go back to your Excel worksheet.
- Select the first cell of the range where you want to place the texts, and then press Ctrl + V to paste the content back into Excel.


Change the case of text with Power Query
You also can apply the Power Query feature to change the case of text in Excel. The downside to this method is that it takes multiple steps to complete just like the Microsoft Word method. Let's dive in to see how it works.
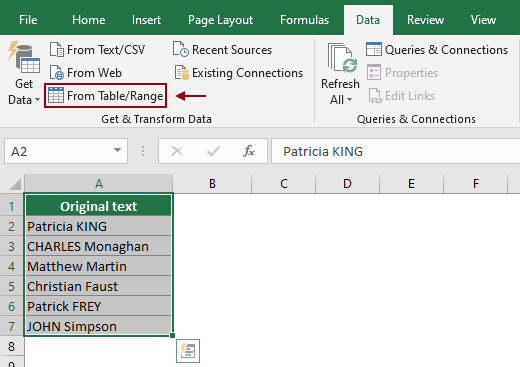
Step 1: Select the data range, enable the From Table/Range feature
Select the cells (including header) where you want to change the text case, here I select the range A1:A7. Then select Data > From Table/Range.
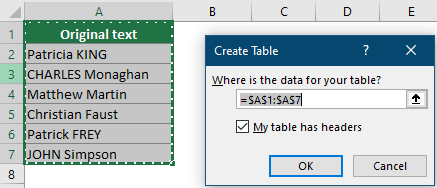
Step 2: Convert the selected cells to table format
If the selected cells are not Excel table format, a Create Table dialog box will pop up. In this dialog box, you just need to verify if Excel has picked your selected cell range correctly, mark if your table has header, and then click the OK button.
If the selected cells are Excel table, jump to Step 3.
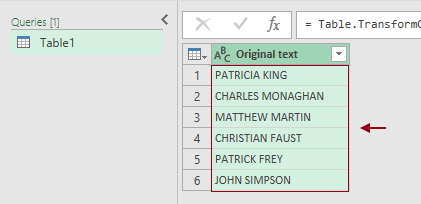
Step 3: Convert the texts to any case as you need
In the opening Power Query window, you need to:
- Go to the Transform tab.
- Click on Format.
- Choose one of the case options (lowercase, UPPERCASE, Capitalize Each Word) as you need. Here I choose UPPERCASE from the drop down menu.


The transformation is now done. As you can see in the screenshot below, all text has been changed to uppercase in the Power Query window in this example.
Step 4: Save and load the text back into Excel
- In this case, as I need to specify a custom destination for my data, I click Close & Load > Close & Load To under the Home tab.
 Tip: To load the text in a new worksheet, choose the Close & Load option.
 - In the Import Data dialog box, choose the Existing worksheet option, select a cell to place the converted text, and then click OK.


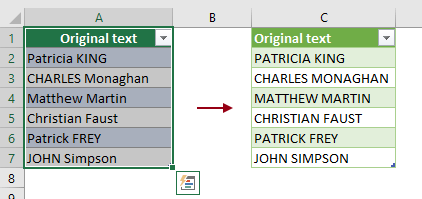
Result
The text that changed to the text case you specified in step 3 is now back in your worksheet.
- To use Power Query, you need Excel 2016 or newer.
- If you are using Excel 2010/2013, download the Microsoft Power Query add-in to get started.
Change the case of text with VBA code
This method provides four VBA codes that help you change the case of text in a specified range to uppercase, lowercase, proper case and sentence case. Please do as follows and pick the code you need.
Step 1: Open the Microsoft Visual Basic for Applications window
Press the Alt + F11 keys to open this window.
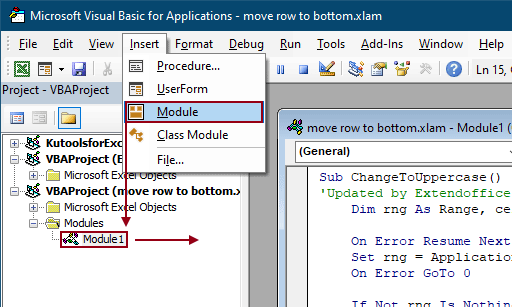
Step 2: Insert a module and enter VBA code
Click Insert > Module, and then copy and paste one of the following VBA codes into the Module (Code) window.
In this case, I want to change the case of text in a range to uppercase, so I will copy and paste the below VBA code 1.
VBA code 1: Change the text case in a range to uppercase
Sub ChangeToUppercase()
'Updated by Extendoffice 20230913
    Dim rng As Range, cell As Range

    On Error Resume Next
    Set rng = Application.InputBox("Please select a range", "KuTools For Excel", Type:= 8)
    On Error GoTo 0

    If Not rng Is Nothing Then
        For Each cell In rng.Cells
            cell.Value = UCase(cell.Value)
        Next cell
    End If
End Sub
VBA code 2: Change the text case in a range to lowercase
Sub ChangeToLowercase()
'Updated by Extendoffice 20230913
    Dim rng As Range, cell As Range

    On Error Resume Next
    Set rng = Application.InputBox("Please select a range", "KuTools For Excel", Type:= 8)
    On Error GoTo 0

    If Not rng Is Nothing Then
        For Each cell In rng.Cells
            cell.Value = LCase(cell.Value)
        Next cell
    End If
End Sub
VBA code 3: Change the text case in a range to proper case
Sub ChangeToPropercase()
'Updated by Extendoffice 20230913
    Dim rng As Range, cell As Range
    Dim vText As Variant, i As Long

    On Error Resume Next
    Set rng = Application.InputBox("Please select a range", "KuTools For Excel", Type:= 8)
    On Error GoTo 0

    If Not rng Is Nothing Then
        For Each cell In rng.Cells
            vText = Split(cell.Value, " ")
            For i = LBound(vText) To UBound(vText)
                vText(i) = Application.WorksheetFunction.Proper(vText(i))
            Next i
            cell.Value = Join(vText, " ")
        Next cell
    End If
End Sub
VBA code 4: Change the text case in a range to sentence case
Sub ChangeToSentenceCase()
'Updated by Extendoffice 20230913
Dim rng As Range, cell As Range
Dim content As String
On Error Resume Next
Set rng = Application.InputBox("Please select a range", "KuTools For Excel", Type:= 8)
On Error GoTo 0
If Not rng Is Nothing Then
For Each cell In rng.Cells
content = LCase(cell.Value)
cell.Value = UCase(Left(content, 1)) & Mid(content, 2)
Next cell
End If
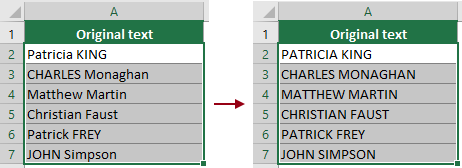
End SubStep 3: Run the VBA code
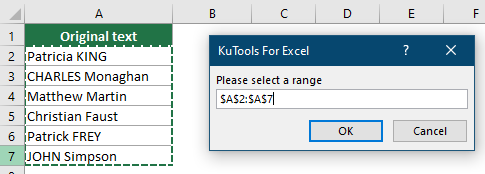
Press the F5 key to run the code. Then a dialog box will appear prompting you to select the cells with the text you want to change the text case (here I select the range A2:A7). After making your selection, click OK.
Result
The text in the selected cells then changed to uppercase or the case you specified.
Comparison of these methods
The following table lists a comparison of the methods mentioned in this article. Each method has its pros and cons. The choice of which to use depends on your needs.
| Method | Consideration | Supported Case Types |
| Built-in functions |
|
|
| Kutools for Excel |
|
|
| Flash Fill |
|
|
| Microsoft Word |
|
|
| Power Query |
|
|
| VBA Codes |
|
|
In conclusion, there are many ways to change text case in Excel, each catering to different preferences and levels of expertise. Whether you're looking for a quick fix or a comprehensive solution, it's necessary to explore and understand the various techniques to find the method that best suits your needs. For those eager to delve deeper into Excel's capabilities, our website boasts a wealth of tutorials. Discover more Excel tips and tricks here.
Best Office Productivity Tools
Supercharge Your Excel Skills with Kutools for Excel, and Experience Efficiency Like Never Before. Kutools for Excel Offers Over 300 Advanced Features to Boost Productivity and Save Time. Click Here to Get The Feature You Need The Most...
Office Tab Brings Tabbed interface to Office, and Make Your Work Much Easier
- Enable tabbed editing and reading in Word, Excel, PowerPoint, Publisher, Access, Visio and Project.
- Open and create multiple documents in new tabs of the same window, rather than in new windows.
- Increases your productivity by 50%, and reduces hundreds of mouse clicks for you every day!
All Kutools add-ins. One installer
Kutools for Office suite bundles add-ins for Excel, Word, Outlook & PowerPoint plus Office Tab Pro, which is ideal for teams working across Office apps.
- All-in-one suite — Excel, Word, Outlook & PowerPoint add-ins + Office Tab Pro
- One installer, one license — set up in minutes (MSI-ready)
- Works better together — streamlined productivity across Office apps
- 30-day full-featured trial — no registration, no credit card
- Best value — save vs buying individual add-in