How to exclude certain cell or area from printing in Excel?
While printing a worksheet, you may need to exclude values of certain cells or area from printing for some purpose. Methods in this article are going to show you how to exclude certain cell or area from printing in details.
Exclude certain cell or area from printing by customizing the cell format
Exclude certain cell or area from printing by VBA code
Exclude certain cell or area from printing by customizing the cell format
As below screenshot shown, you need to exclude the number 5 and 9 rows while printing the worksheet. Before printing, you can customize the format of certain cell or area to hide the cell content to achieve it. Please do as follows.

1. Select the cell or area you will exclude from printing (here I select multiple ranges A6:C6 and A10:C10), then press Ctrl + 1 keys simultaneously to open the Format Cells dialog box.
2. In the Format Cells dialog box, click Custom in the Category box under the Number tab, then enter three semicolon ;;; into the Type box, and finally click the OK button. See screenshot:

Now all contents in selected ranges are hidden immediately as below screenshot shown. You can start printing the worksheet now.

Note: After printing, you can remove the semicolons you have entered in step 2 from the Format Cells dialog box to display the cell contents.

Unlock Excel Magic with Kutools AI
- Smart Execution: Perform cell operations, analyze data, and create charts—all driven by simple commands.
- Custom Formulas: Generate tailored formulas to streamline your workflows.
- VBA Coding: Write and implement VBA code effortlessly.
- Formula Interpretation: Understand complex formulas with ease.
- Text Translation: Break language barriers within your spreadsheets.
Exclude certain cell or area from printing by VBA code
Besides the above method, you can apply the following VBA code to automatically hide contents of specified cells or area while printing worksheet.
1. Press Alt + F11 keys simultaneously to open the Microsoft Visual Basic for Applications window.
2. In the Microsoft Visual Basic for Applications window, double click ThisWorkbook in the Project pane, and then copy and paste the below VBA code into the ThisWorkbook(Code) window.
VBA code: exclude certain cell or area from printing in Excel
Private Sub Workbook_BeforePrint(Cancel As Boolean)
    Dim xIndex As Long
    If ActiveSheet.Name = "Sheet1" Then
        Cancel = True
        Application.EnableEvents = False
        Application.ScreenUpdating = False
        With ActiveSheet
            xIndex = .Range("A6:C6,A10:C10").Font.ColorIndex
            .Range("A6:C6,A10:C10").Font.Color = vbWhite
            .PrintOut
            .Range("A6:C6,A10:C10").Font.ColorIndex = xIndex
        End With
        Application.EnableEvents = True
        Application.ScreenUpdating = True
    End If
    MsgBox "Print completed!", vbInformation, "Kutools for Excel"
End Sub
Note: In the code, Sheet1 is the active sheet name you need to print, and A6:C6, A10:C10 are the ranges you will exclude from the printing. Please change them based on your needs.
3. Press Alt + Q keys simultaneously to close the Microsoft Visual Basic for Applications window.
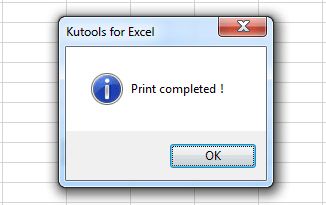
Now you can start printing your worksheet. After finishing printing, you will get a Kutools for Excel dialog box as below screenshot shown. And you can see the specified ranges are blanks in the printout.
Related articles:
- How to exclude values in one list from another in Excel?
- How to exclude cells in a column from sum in Excel?
- How to find minimum value in a range excluding zero value in Excel?
Best Office Productivity Tools
Supercharge Your Excel Skills with Kutools for Excel, and Experience Efficiency Like Never Before. Kutools for Excel Offers Over 300 Advanced Features to Boost Productivity and Save Time. Click Here to Get The Feature You Need The Most...
Office Tab Brings Tabbed interface to Office, and Make Your Work Much Easier
- Enable tabbed editing and reading in Word, Excel, PowerPoint, Publisher, Access, Visio and Project.
- Open and create multiple documents in new tabs of the same window, rather than in new windows.
- Increases your productivity by 50%, and reduces hundreds of mouse clicks for you every day!
All Kutools add-ins. One installer
Kutools for Office suite bundles add-ins for Excel, Word, Outlook & PowerPoint plus Office Tab Pro, which is ideal for teams working across Office apps.
- All-in-one suite — Excel, Word, Outlook & PowerPoint add-ins + Office Tab Pro
- One installer, one license — set up in minutes (MSI-ready)
- Works better together — streamlined productivity across Office apps
- 30-day full-featured trial — no registration, no credit card
- Best value — save vs buying individual add-in