How to change bullet style and color in Outlook?
Formatting bullet lists in Outlook is important for presenting your emails clearly and making your content more visually appealing. Whether you want to match a company's branding, highlight particular sections, or simply make your lists easier to read, customizing bullet styles and colors can help you achieve a more professional look. Fortunately, Microsoft Outlook offers several options for modifying both the style and color of bullets when composing messages. This guide details how to perform these customizations, highlights scenarios where you might use each method, and includes troubleshooting and tips for smooth usage.
Change the bullet style in Outlook
Change the bullet color in Outlook
- Enhance your email productivity with AI technology, enabling you to quickly reply to emails, draft new ones, translate messages, and more efficiently.
- Automate emailing with Auto CC/BCC, Auto Forward by rules; send Auto Reply (Out of Office) without requiring an exchange server...
- Get reminders like BCC Warning when replying to all while you're in the BCC list, and Remind When Missing Attachments for forgotten attachments...
- Improve email efficiency with Reply (All) With Attachments, Auto Add Greeting or Date & Time into Signature or Subject, Reply Multiple Emails...
- Streamline emailing with Recall Emails, Attachment Tools (Compress All, Auto Save All...), Remove Duplicates, and Quick Report...
Change the bullet style in Outlook
Altering the bullet style in your message is useful when you want to differentiate types of content, enhance readability, or align with specific document formatting requirements. Different bullet styles can convey different levels of hierarchy or highlight key points in your correspondence. To customize the bullet style of a list in Outlook, follow these steps:
1. In the message editing window, locate the bulleted list you wish to modify. Click directly on any bullet within the list. After clicking, you’ll notice that all bullets in that list become selected, indicating they are ready to be formatted together.
Note: Selecting one bullet in a list automatically highlights every bullet in that same list, ensuring that style changes will apply to the entire group at once.
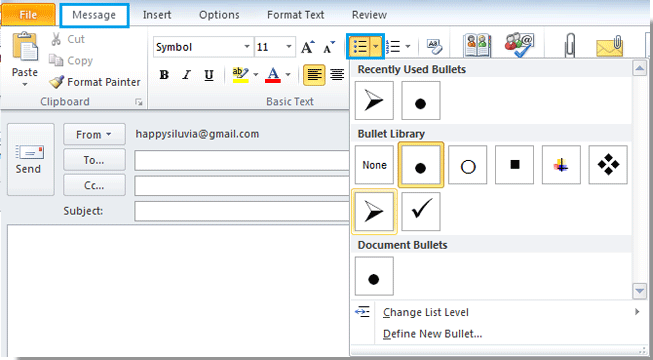
2. At the top of the Outlook window, go to the Message tab. Locate the Bullets button in the toolbar, and click the small arrow next to it to open the dropdown menu. In the Bullet Library section, choose your preferred bullet style by clicking on one of the available designs (such as hollow circles, squares, or others depending on your Outlook version).
Outlook offers a limited set of bullet styles by default. If none of the presented bullet designs meet your requirements, you can explore Define New Bullet at the bottom of the dropdown for even more customization, like using symbols or pictures.
Tip: Hover your mouse over each style to preview how it will look in your list before clicking to apply.
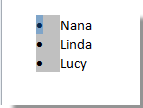
3. Once you select a new style, your bullet points will immediately update in the message window. This allows you to quickly review the result and make further changes if needed. The following screenshots demonstrate the before and after effects of switching bullet styles in Outlook:
|  |  |
Useful to know: Customizing bullet style is mostly cosmetic and does not affect the structure of your text or how recipients view your message in supported email clients. However, be aware that unusual or highly customized bullets may appear differently (or even default) in older or non-Outlook email platforms.
Common issue: If you do not see the desired bullet style, it may be due to Outlook’s formatting limitations or profile customization. If formatting options are unavailable (e.g., “Bullet Library” is not responsive), ensure you are editing in HTML format (not Plain Text or Rich Text). Go to Format Text and select HTML before trying again.
When to use: Adapting the bullet style is suitable when creating meeting agendas, summarizing action items, preparing client-facing emails, or distinguishing between different types of listed information within a single message.
Change the bullet color in Outlook
Customizing the color of bullets allows you to match your email styling with organizational branding, emphasize particular list items, or simply improve readability, especially in longer emails or newsletters. Adjusting bullet color can help important points stand out without altering the overall structure of your message.
1. With your message open and the bulleted list visible, click directly on any bullet in the list. This selects all bullets, ensuring any color change applies uniformly throughout the list.
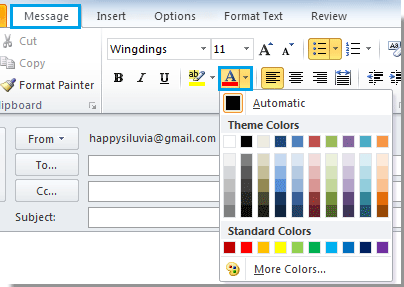
2. Once your bullets are selected, ensure you are on the Message tab at the top of the Outlook interface. Click the arrow next to Font Color (this icon typically appears as a letter 'A' with a color bar beneath it). A color palette will display. Simply click on the color you want to apply to your bullets. As soon as you select a color, the bullets in your list will update to that color.
3. After selecting a color, you can see the bullets in the email instantly change to your chosen shade.
| |  |
If you wish to use a custom color that is not shown in the palette, you can choose More Colors at the bottom of the color dropdown. This opens additional customization options.
Important reminder: The color of bullets will be consistent for all selected items, but the text color of your list items will only change if you specifically select and format the text along with the bullets. To avoid unintentionally changing text color, make sure only the bullets are highlighted before applying the color change.
Potential issue: If the selected bullet color does not appear as expected after sending the message, the recipient's email client or viewing software may not fully support all formatting options. For best results, standard colors are usually rendered faithfully across platforms, while custom or very bright colors may look different in some environments.
When to use: Changing bullet color is especially helpful in emails containing action items, status updates, or lists spanning multiple categories, as the use of color helps visually separate sections without adding additional formatting.
Best Office Productivity Tools
Experience the all-new Kutools for Outlook with 100+ incredible features! Click to download now!
📧 Email Automation: Auto Reply (Available for POP and IMAP) / Schedule Send Emails / Auto CC/BCC by Rules When Sending Email / Auto Forward (Advanced Rules) / Auto Add Greeting / Automatically Split Multi-Recipient Emails into Individual Messages ...
📨 Email Management: Recall Emails / Block Scam Emails by Subjects and Others / Delete Duplicate Emails / Advanced Search / Consolidate Folders ...
📁 Attachments Pro: Batch Save / Batch Detach / Batch Compress / Auto Save / Auto Detach / Auto Compress ...
🌟 Interface Magic: 😊More Pretty and Cool Emojis / Remind you when important emails come / Minimize Outlook Instead of Closing ...
👍 One-click Wonders: Reply All with Attachments / Anti-Phishing Emails / 🕘Show Sender's Time Zone ...
👩🏼🤝👩🏻 Contacts & Calendar: Batch Add Contacts From Selected Emails / Split a Contact Group to Individual Groups / Remove Birthday Reminders ...
Use Kutools in your preferred language – supports English, Spanish, German, French, Chinese, and 40+ others!


🚀 One-Click Download — Get All Office Add-ins
Strongly Recommended: Kutools for Office (5-in-1)
One click to download five installers at once — Kutools for Excel, Outlook, Word, PowerPoint and Office Tab Pro. Click to download now!
- ✅ One-click convenience: Download all five setup packages in a single action.
- 🚀 Ready for any Office task: Install the add-ins you need, when you need them.
- 🧰 Included: Kutools for Excel / Kutools for Outlook / Kutools for Word / Office Tab Pro / Kutools for PowerPoint