How to Show and Use the Ruler in Word (Full Guide)
Microsoft Word is a powerful word processing tool that offers a plethora of features to enhance your document formatting. One such feature is the ruler, a handy tool that allows you to adjust margins, create indents, and set tab stops with precision. In this comprehensive guide, we'll walk you through everything you need to know about showing and using the ruler in Word.
Show the ruler in Word
Before we delve into the intricacies of using the ruler, let's first ensure it's visible on your Word interface.
Step 1: Open Microsoft Word
Launch Microsoft Word and open the document where you want to use the ruler.
Step 2: Enable the ruler
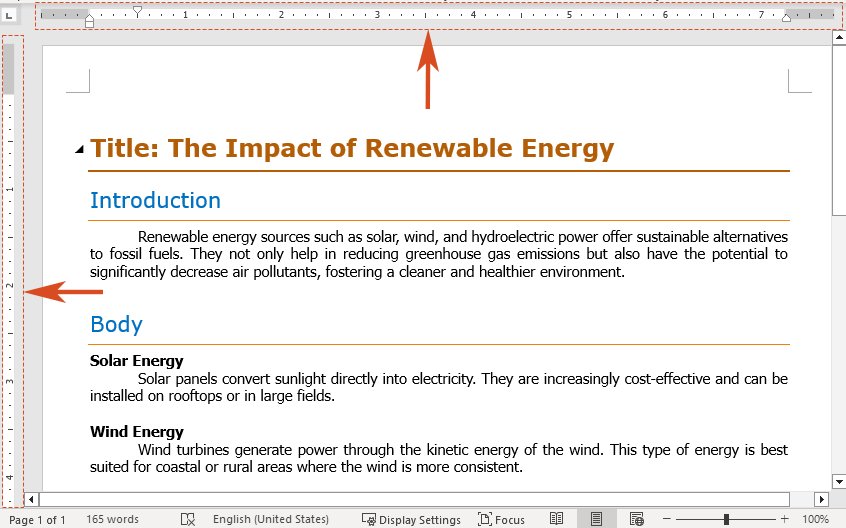
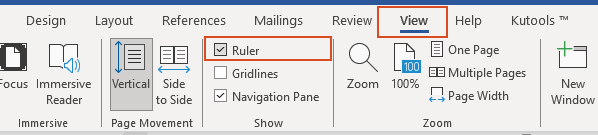
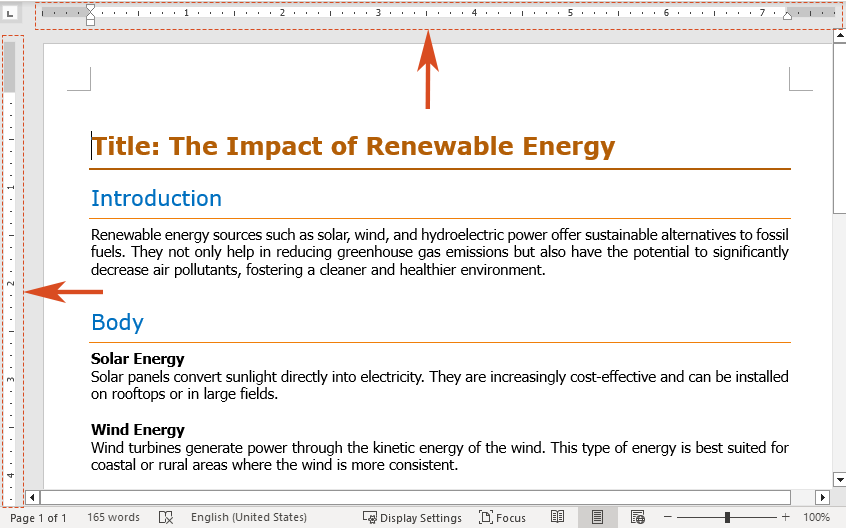
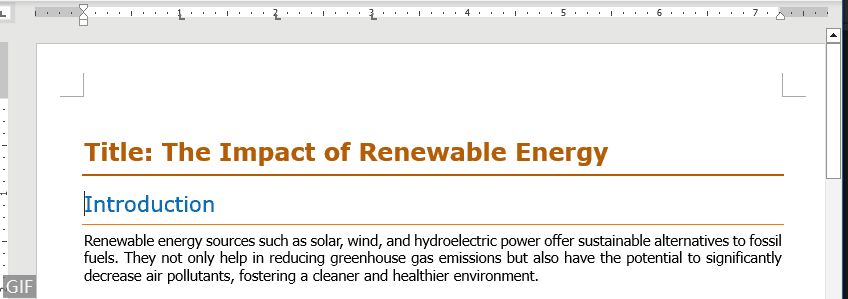
Navigate to the "View" tab. In the "Show" group, check the box of "Ruler".
Result
Voila! You should immediately see the horizontal ruler above your document and the vertical ruler to its left.
🌟 AI Assistant for Word: Rewrite, Compose, and Summarize 🌟
Save time and effort with Kutools for Word's AI Assistant feature! 🚀


📊 Kutools for Word: Chosen by over 18,000 users. Enjoy a full-featured FREE trial with no credit card required! 🚀
Display the Vertical Ruler in Word
The vertical ruler appears on the left side of the Word document. If only the horizontal ruler is displayed and your vertical ruler is missing, you can show vertical ruler by following the steps below.
Note: Make sure you are in the "Print Layout" view mode, because the vertical ruler does not display in other viewing modes.
Step 1: Open Word Options dialog
Navigate to the "File" tab. At the bottom of the left-hand menu, click on "Options".
Step 2: Enable the vertical ruler
In the "Word Options" dialog box, please do as follows:
- Go to the "Advanced" tab.
- Scroll down until you find the "Display" section. Check the box next to "Show vertical ruler in Print Layout view".
- Click "OK" to apply the changes.


Result
Now you'll have both horizontal and vertical rulers visible, allowing for precise alignment and formatting adjustments.
Use the ruler to change margins in Word
The rulers can be used to manually adjust the margins of your document.
Step 1: Select the ruler
Hover your cursor over the left or right edge of the horizontal ruler (the gray area) until it changes to a double arrow. You may also see a tooltip that says "Left margin" or "Right margin".

Note: You can also hover your cursor over the top or bottom edge of the vertical ruler (the gray area) until it changes to a double arrow. A tooltip may appear, showing "Top margin" or "Bottom margin".
Step 2: Drag to adjust
Drag the double arrow on the horizontal ruler left or right to your desired position. Release the mouse button to set the new left or right margin.
Note: You can also drag the double arrow on the vertical ruler up or down to change the top or bottom margin.
- As you drag the margin markers, a dotted line will appear to show the new margin position.
- To view exact measurements while dragging, hold the Alt key on your keyboard.
Use the ruler to create indents in Word
The ruler can also be used to set various types of indents in Word. Indents help in creating structured and organized documents, especially useful for formatting paragraphs and lists.
Left Indent: set the position of the left side of a paragraph
The "Left Indent" controls the position of the paragraph's left edge. It appears as a square marker on the lower left side of the horizontal ruler. Moving the left indent will also adjust the first line indent or hanging indent accordingly.

- Select the text where you want to apply the left indent.
- On the horizontal ruler, find the square marker on the lower left and drag it to your preferred position for the paragraph's left edge.


Right Indent: set the position of the right side of a paragraph
The "Right Indent" marker determines the position of the paragraph’s right edge and is represented by a triangular marker on the lower right side of the horizontal ruler.

- Select the text where the right indent needs adjustment.
- On the horizontal ruler, drag the triangular marker located on the lower right side to set the right edge of the paragraph where desired.


First Line Indent: indent the first line of a paragraph
A "First Line Indent" causes only the first line of a paragraph to be indented, while the remaining lines stay aligned with the left margin. This is controlled by a triangular marker located on the top left side of the horizontal ruler.

- Highlight the text where you want to apply a first line indent.
- On the horizontal ruler, drag the top left triangular marker to the point where you want the first line to begin.


Hanging Indent: create a hanging indent of a paragraph
A "hanging indent" indents the second and subsequent lines of a paragraph more than the first. This indent is controlled by the triangular marker on the lower left side of the horizontal ruler.

- Select the text to which you want to apply a hanging indent.
- On the horizontal ruler, drag the triangular marker located on the lower left side to the place you want the indentation to start.
 Tip: You can press and hold the Alt key on your keyboard as you drag the indent marker on the ruler to see precise measurements.

Use the Ruler to Create a Tab Stop in Word
In Word, the Tab key on your keyboard moves your cursor to a specific location called a tab stop. Tab stops are used to align text at specific positions within a document. Word offers various types of tab stops, such as left-align, center-align, right-align, and decimal. Here we will introduce the five types of tab stops.
 "Left Tab Stop": The most commonly used, this tab stop sets the starting point for left-aligned text, placing the text to the right of the tab stop.

 "Center Tab Stop": This tab stop centers the text around a specific position on the line, allowing the text to expand equally on both sides as you type.

 "Right Tab Stop": It sets the endpoint for a text line. Text aligned to this tab stop will line up its right edge to the left of the tab stop.

 "Decimal Tab Stop": This aligns numbers by their decimal point, ensuring that the decimal point is consistently positioned, regardless of the number of digits to its left or right.

 "Bar Tab Stop": Unlike other tabs that position text, this tab stop inserts a vertical bar at the tab's location on the ruler. The bar appears in the document immediately upon placement and will be printed unless removed before printing.

Let's see how to use the ruler to create a tab stop in Word.
Select the text of your document to which you want to apply the tab.
Note: If you don’t select your document before creating your new tab stop, it will only apply to the paragraph your cursor is currently in or newly created content.
- Click the tab selector button until it changes to the tab stop you want. Here I select the "Left Tab".

- Click the location on the ruler where you want to place the tab stop. The tab symbol will then appear on the ruler. You can place multiple tab stops on the ruler.


Result
Each time you press the Tab key, your cursor will move to the next stop.
The ruler in Microsoft Word is a versatile tool that allows for precise formatting and alignment of text. By following this guide, you should now be equipped with the knowledge to effectively show and use the ruler to adjust margins, create indents, and set tab stops in your documents. With practice, you'll become a proficient Word user, capable of producing professional-looking documents with ease. For more Word tips and tricks, please click here to access our extensive collection of hundreds of tutorials.
Related articles
How to add a footnote and endnote in Word? (Full guide)
This guide covers everything you need to know about inserting, formatting, and removing footnotes and endnotes in Word, along with answers to common questions.
How to Add Page Numbers in Word: A Step-by-Step Guide
This guide will walk you through the process of adding, formatting, and removing page numbers in Microsoft Word.
How to Add Fonts to Word (Windows & Mac)
Whether you're using Windows or Mac, the process of adding fonts to Word is relatively straightforward. In this guide, we'll walk you through the steps for both operating systems.
Best Office Productivity Tools
Kutools for Word - Elevate Your Word Experience
🤖 Kutools AI Features: AI Assistant / Real-Time Assistant / Super Polish (Preserve Format) / Super Translate (Preserve Format) / AI Redaction / AI Proofread...
📘 Document Mastery: Split Pages / Merge Documents / Export Selection in Various Formats (PDF/TXT/DOC/HTML...) / Batch Convert to PDF...
✏ Contents Editing: Batch Find and Replace across Multiple Files / Resize All Pictures / Transpose Table Rows and Columns / Convert Table to Text...
🧹 Effortless Clean: Sweap away Extra Spaces / Section Breaks / Text Boxes / Hyperlinks / For more removing tools, head to the Remove group...
➕ Creative Inserts: Insert Thousand Separators / Check Boxes / Radio Buttons / QR Code / Barcode / Multiple Pictures / Discover more in the Insert group...
🔍 Precision Selections: Pinpoint Specific Pages / Tables / Shapes / Heading Paragraphs / Enhance navigation with more Select features...
⭐ Star Enhancements: Navigate to Any Location / Auto-Insert Repetitive Text / Toggle Between Document Windows / 11 Conversion Tools...
🌍 Supports 40+ Languages: Use Kutools in your preferred language – supports English, Spanish, German, French, Chinese, and 40+ others!

Office Tab - Tabs for Office, Power for You
- Enable tabbed editing and reading in Word, Excel, PowerPoint, Publisher, Access, Visio and Project.
- Open and create multiple documents in new tabs of the same window, rather than in new windows.
- Increases your productivity by 50%, and reduces hundreds of mouse clicks for you every day!

✨ Kutools for Office – One Installation, Five Powerful Tools!
Includes Office Tab Pro · Kutools for Excel · Kutools for Outlook · Kutools for Word · Kutools for PowerPoint
📦 Get all 5 tools in one suite | 🔗 Seamless integration with Microsoft Office | ⚡ Save time and boost productivity instantly
Best Office Productivity Tools
Kutools for Word - 100+ Tools for Word
- 🤖 Kutools AI Features: AI Assistant / Real-Time Assistant / Super Polish / Super Translate / AI Redaction / AI Proofread
- 📘 Document Mastery: Split Pages / Merge Documents / Batch Convert to PDF
- ✏ Contents Editing: Batch Find and Replace / Resize All Pictures
- 🧹 Effortless Clean: Remove Extra Spaces / Remove Section Breaks
- ➕ Creative Inserts: Insert Thousand Separators / Insert Check Boxes / Create QR Codes
- 🌍 Supports 40+ Languages: Kutools speaks your language – 40+ languages supported!
Table of contents
- Show the ruler in Word
- Display the vertical ruler in Word
- Use the ruler to change margins in Word
- Use the ruler to create indents in Word
- Left Indent: set the position of the left side of a paragraph
- Right Indent: set the position of the right side of a paragraph
- First Line Indent: indent the first line of a paragraph
- Hanging Indent: create a hanging indent of a paragraph
- Use the Ruler to create a tab stop in Word
- Related articles
- The Best Office Productivity Tools
- Comments